Sinks are a simple yet underappreciated feature in bathroom design. There’s no need to leave them up-and-down. Consider getting creative with your own DIY sink projects for the perfect sink solution that will really set apart from others around town.
With the help of a little creativity, you can give your bathroom that personalized touch it needs. With these DIY sink projects for any occasion or style preference from modern to traditional. You’ll be able make anything go from boring into beautiful in no time.
Table of Contents
1. Turn an Old Dresser Into a Double Sink Vanity
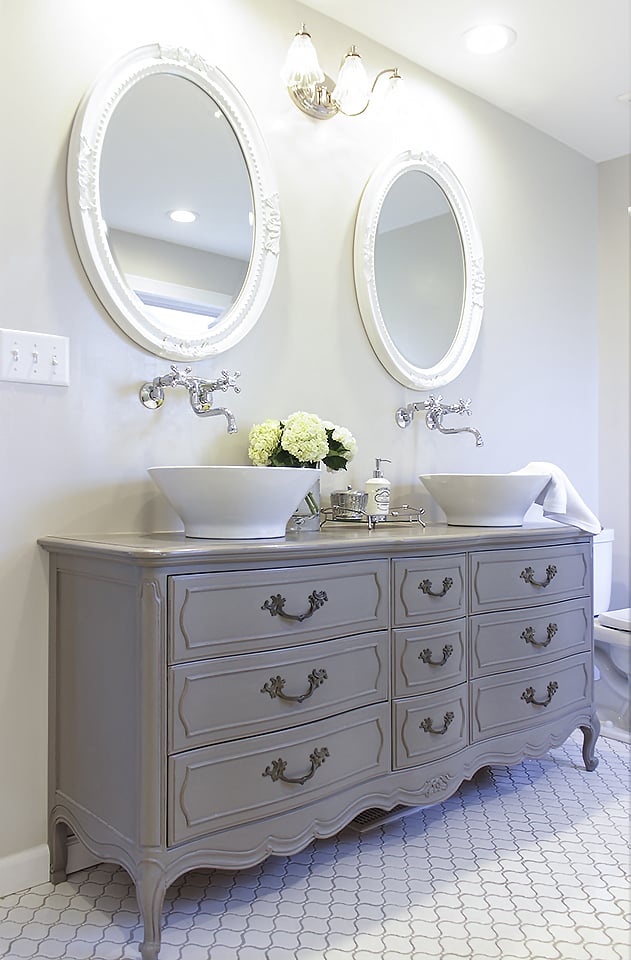
It’s a great way to save money and have a one-of-a-kind piece in your home. Plus, it’s not as difficult as you might think. All you need is a little elbow grease and some basic carpentry skills. First, remove all the drawers from the dresser and gut the inside so that it’s just a shell. Then, measure and cut two holes for the sinks.
You can use any type of sink that you like, but vessel sinks will give your vanity a more luxurious look. Once the sinks are in place, add some plumbing and hook everything up to your water supply. Finally, finish off the project by adding some faucets and handles.
2. Transform an Antique Buffet Into a Single Sink Vanity
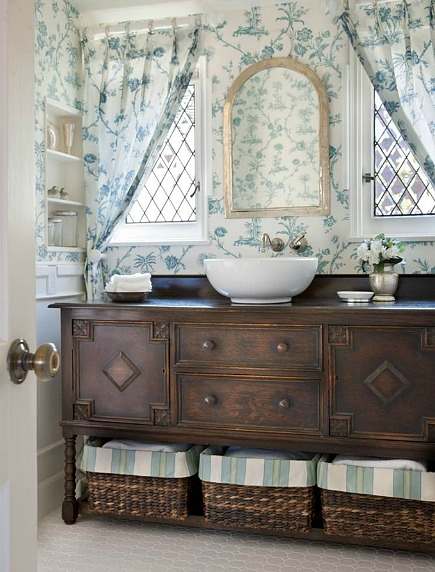
With some basic carpentry skills and a few simple tools, you can create a stylish and functional bathroom addition that will be the talk of your next dinner party.
Here’s what you need to get started:
- An old buffet or sideboard
- A saw (circular or jigsaw)
- A drill
- A screwdriver
- A hammer
- Nails or screws
- A hand saw (optional)
- Paint or stain (optional)
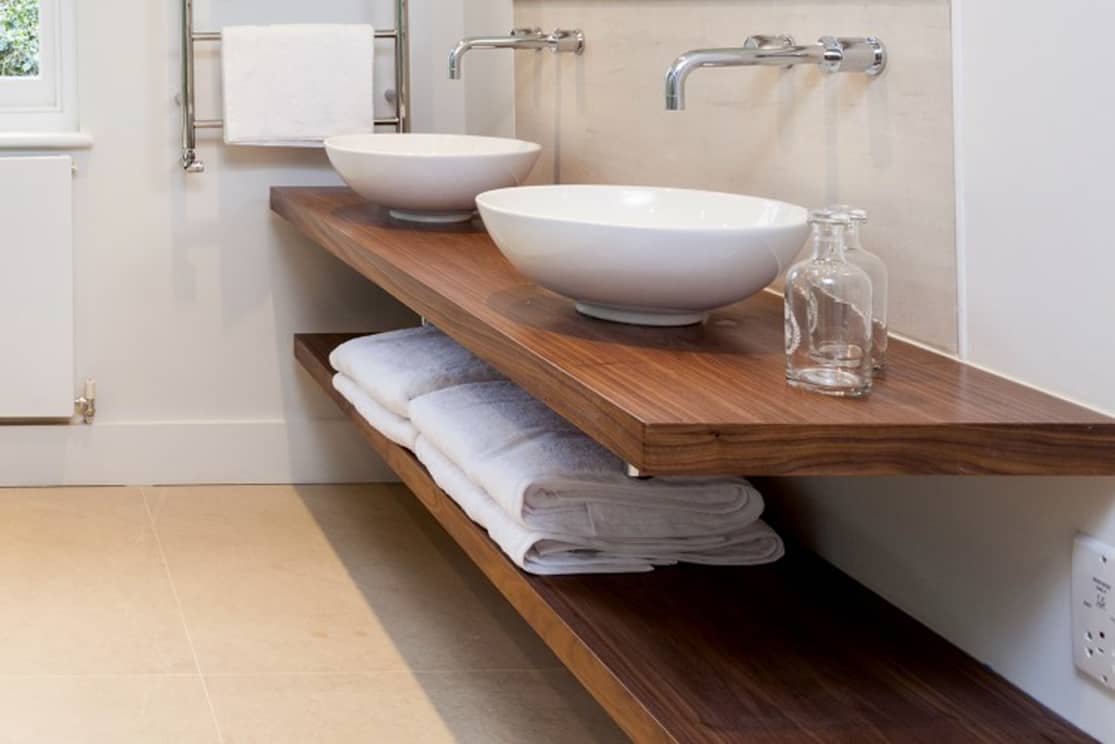
3. Create a Floating Sink Using Reclaimed Wood
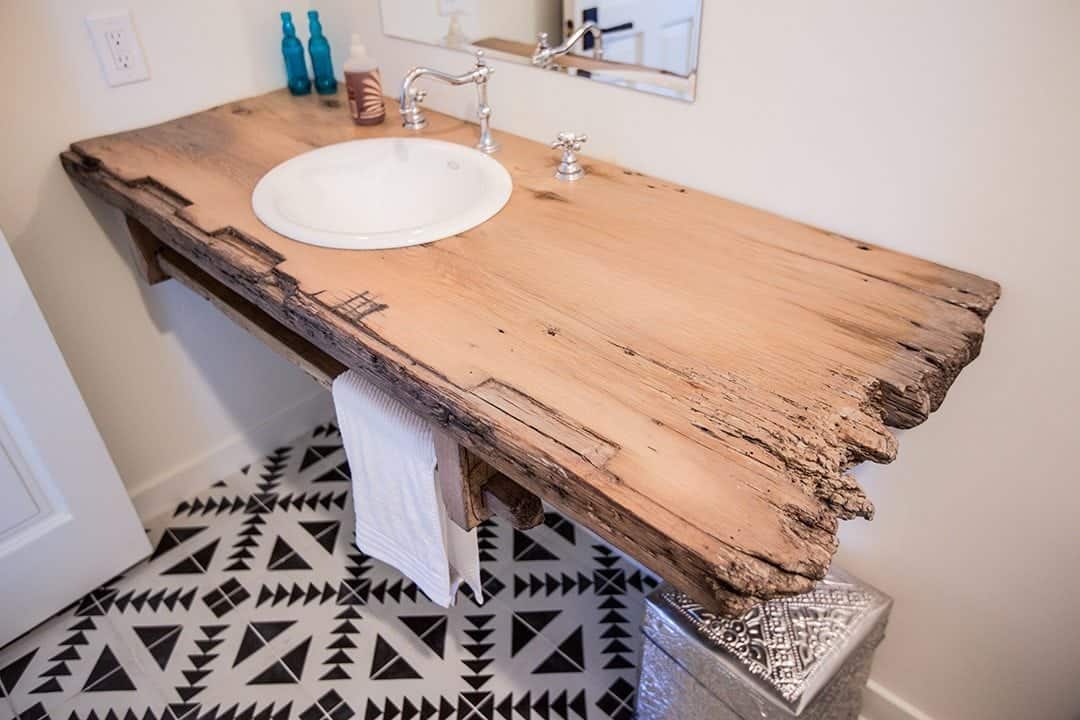
This type of sink is not only stylish, but it’s also easy to make yourself using reclaimed wood.
To start, simply measure the space where you want the sink to go and cut a piece of wood to fit. Next, attach the wood to the wall using brackets or screws. Then, install your faucet and drain in the desired location. Finally, add a coat of sealant to protect the wood and you’re finished.
4. Make Your Own Waterfall Faucet for a Modern Touch
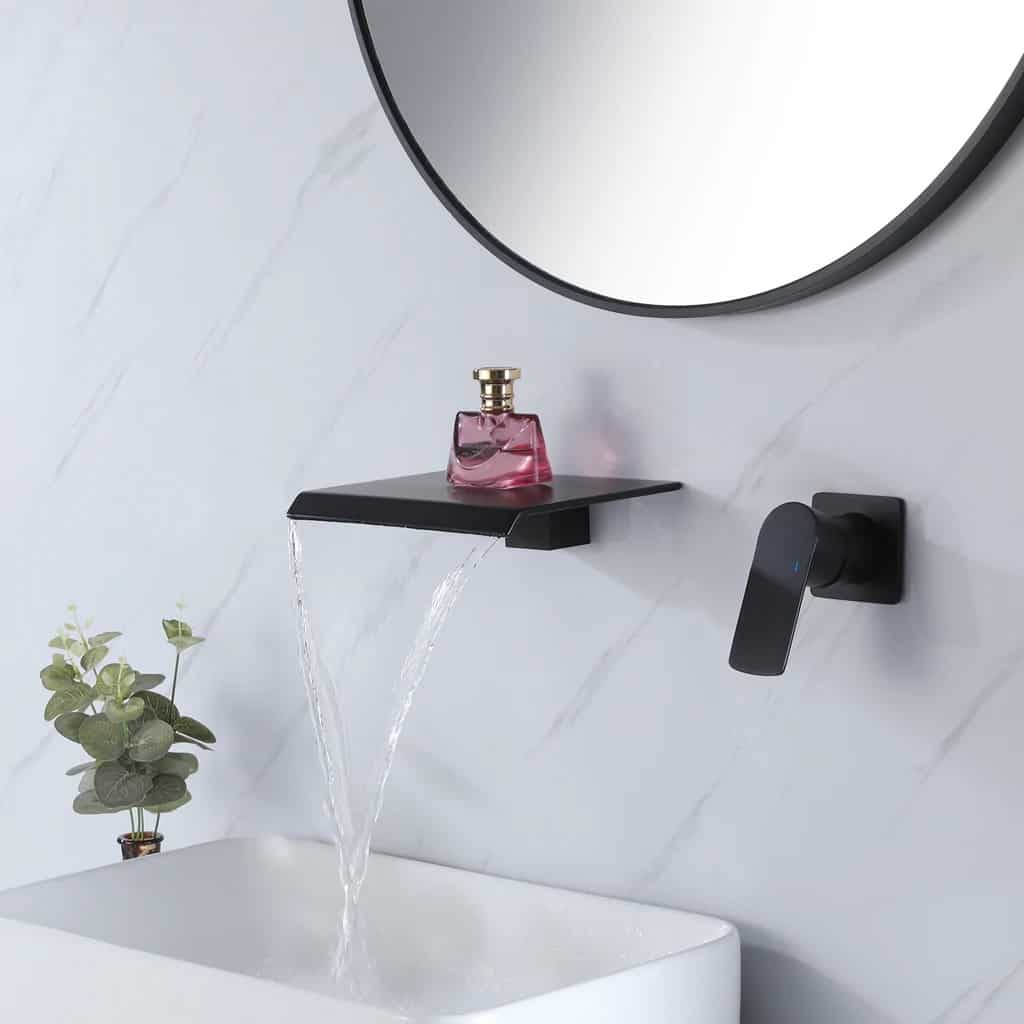
Bring in the modern touch with a waterfall faucet!
Making your own will add an interesting visual to the décor of your bathroom. This project requires some basic plumbing tools, like a wrench and adjustable pliers. You’ll also need a drill and other items like fittings, hoses, and mounting hardware depending on the type of faucet you are using.
5. Build a Concrete Sink for a Modern Look
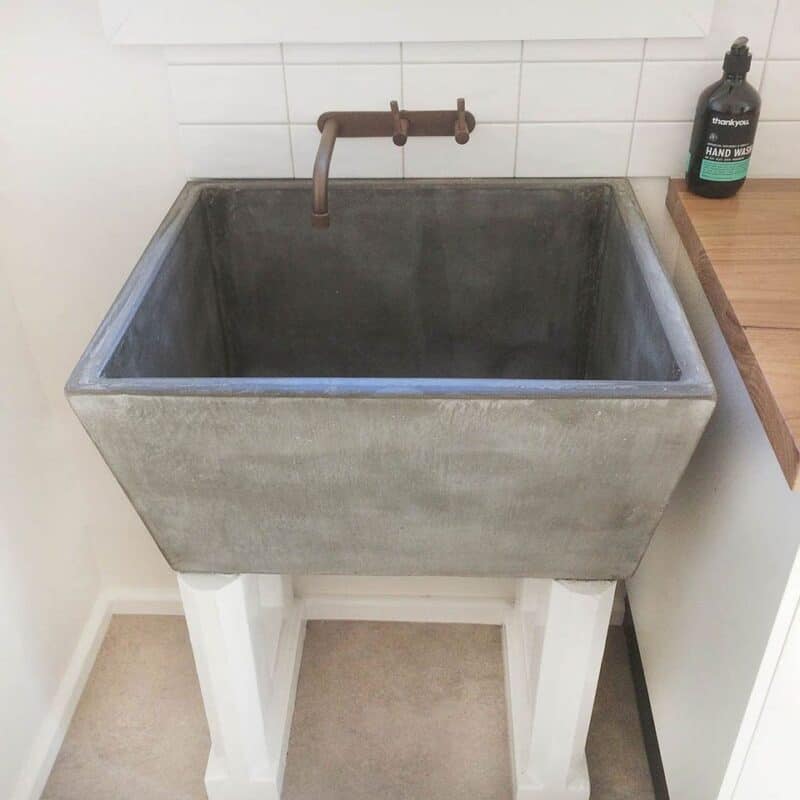
A concrete sink is a great way to add a modern touch to your home while can be the best option to upgrade and challenge your skills in one.
Here’s what you’ll need to get started:
- Concrete mix
- Bucket
- Trowel
- Tube form
- Rubber gloves
- Eye protection
Start by mixing the concrete in the bucket according to the manufacturer’s directions. Once it’s mixed, pour it into the tube form. Be sure to wear gloves and eye protection when working with concrete.
Use the trowel to smooth out the surface of the concrete, then let it curing for at least 24 hours before removing the form. Once the form is removed, your new concrete sink is ready to use.
6. Use an Old Chest of Drawers to Make a Unique Vessel Sink Vanity

It’s a fairly straightforward project that can be completed in a weekend, and it’ll add a touch of rustic charm to any bathroom.
Here’s what you’ll need:
- An old chest of drawers
- A vessel sink
- A drill
- 1″ hole saw
- Plywood
- Rubber sealant
- Silicone caulk
Start by removing the drawer fronts from the chest of drawers. Then, use the drill and hole saw to create an opening in the top of the chest for your vessel sink. Next, cut a piece of plywood to fit inside the chest, and attach it to the bottom with rubber sealant.
Finally, silicone caulk around the edges of the sink to create a watertight seal.
7. Repurpose an Old Door Into a Rustic Farmhouse Sink Cabinet
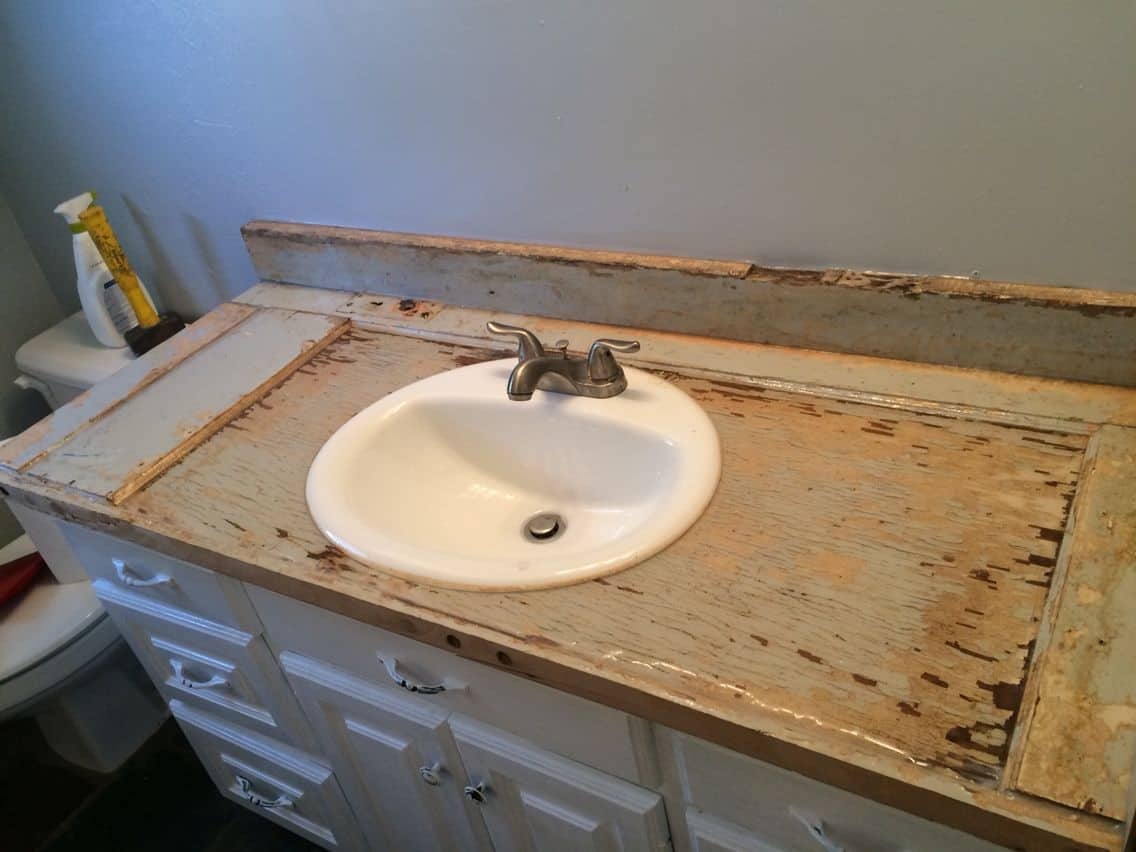
This project is relatively simple and can be completed in a few hours. All you need to do is remove the door from its frame and then cut a hole in the door for the sink. You will also need to add some supports to the door so that it can hold the weight of the sink.
Once you have done this, you can then paint or stain the door to match your desired look. You can also add some decorative handles or knobs to give it a more finished look.
8. Make a Floating Shelf to Hold Your Bathroom Essentials
Floating shelves are easy to install and can be customized to fit any space. Plus, they provide a great opportunity to add some personal style to your bathroom. To get started, simply measure the space above your sink and cut a piece of wood to size. Then, use screws or brackets to secure the shelf in place. Finally, add whatever decorations you like.
9. Create Storage Under Your Sink with Mason Jars
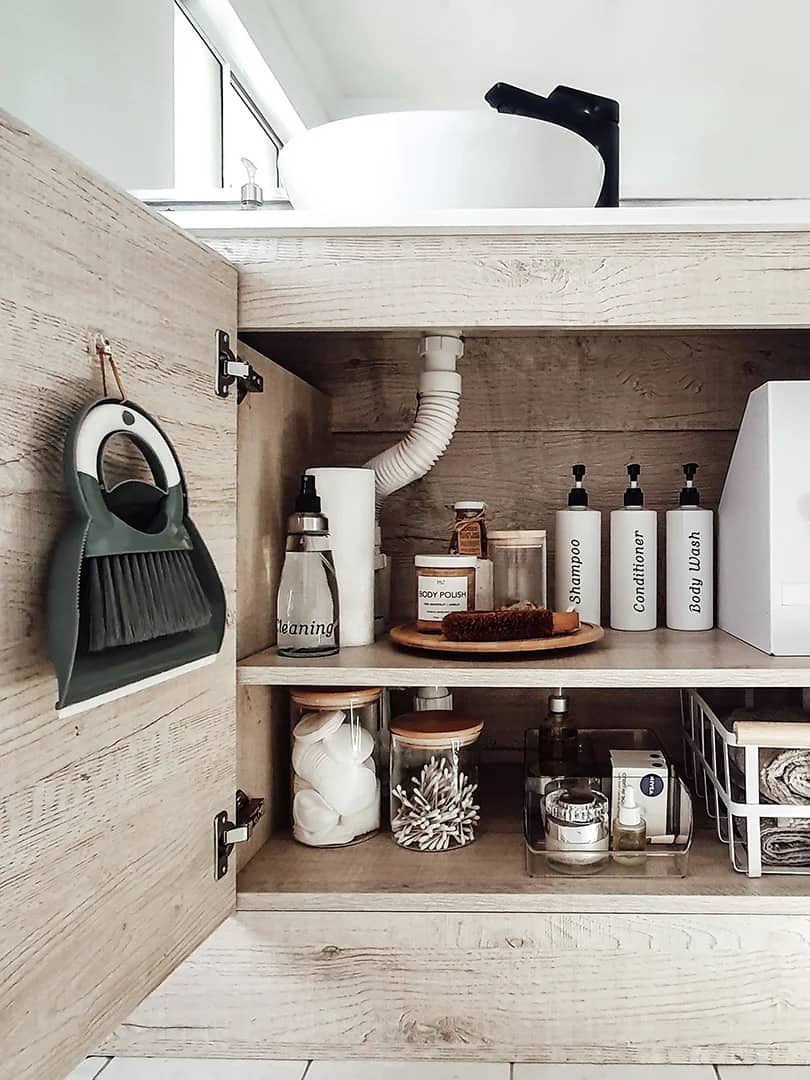
One easy way to organize under your sink is to use mason jars. By using mason jars, you can create easily accessible storage for all of your cleaning supplies. Just screw the lids onto the underside of your sink and then fill the jars with everything from dish soap to bleach.
Not only will this organization hack make it easier to find what you need, but it will also give your bathroom a bit of rustic charm.
10. Keep Your Towels Close at Hand with This Easy Towel Rack
Adding a towel rack to your sink is a great way to add extra storage without taking up too much space. Plus, it’s a simple project that even the most novice DIY-er can handle. All you need is a few supplies and some basic tools, and you’ll be ready to go!
Here’s what you’ll need for this project:
- Towel rack
- Drill
- Screws
- Anchors (if needed)
- Level
First, take measurements of your sink to determine where you want to place the towel rack. Once you have an idea of where you want it, mark the spot with a pencil. Then, using a drill, create pilot holes for the screws. Next, screw in the towel rack, making sure it is level. If necessary, use anchors to help secure it in place.
11. Add a Unique Touch to Your Bathroom with a Mosaic Tile Sink Basin
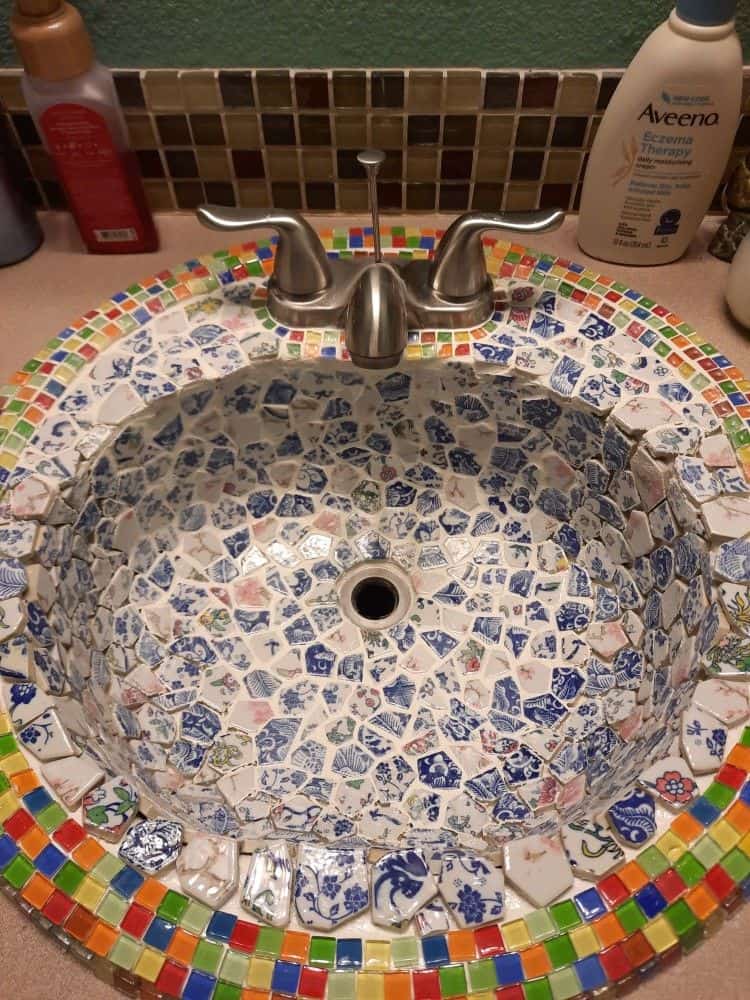
Mosaic tile is a beautiful and unique way to add a personal touch to your bathroom. While it may seem daunting, creating a mosaic tile sink basin is actually a fairly simple DIY project. First, choose the design of your basin.
You can either create a pattern yourself or use a pre-made template. Next, cut the tiles to fit the basin. Once the tiles are in place, grout the joints and allow the grout to dry. Finally, apply a sealant to protect the tiles and ensure that your new sink lasts for years to come.
12. Make an Industrial-Style Pipe Sink Faucet
This simple trick is perfect for anyone who wants to add a touch of industrial chic to their bathroom or kitchen. To get started, you will need to gather a few supplies, including: a length of black pipe, two elbow joints, a tee fitting, a flange, a faucet, and a detachable sprayer head.
Once you have all of your supplies, simply follow the instructions below to assemble your sink faucet.
- Begin by attaching the flange to the underside of your sink using screws or bolts.
- Next, take the black pipe and thread it through the center of the flange.
- Screw one of the elbow joints onto each end of the black pipe.
- Screw the tee fitting onto the middle of the black pipe.
- Finally, screw your faucet onto the tee fitting and attach the sprayer head to the end of the black pipe opposite the faucet.
13. Transform a Rustic Kitchen Table Into a Vanity and Sink Combo
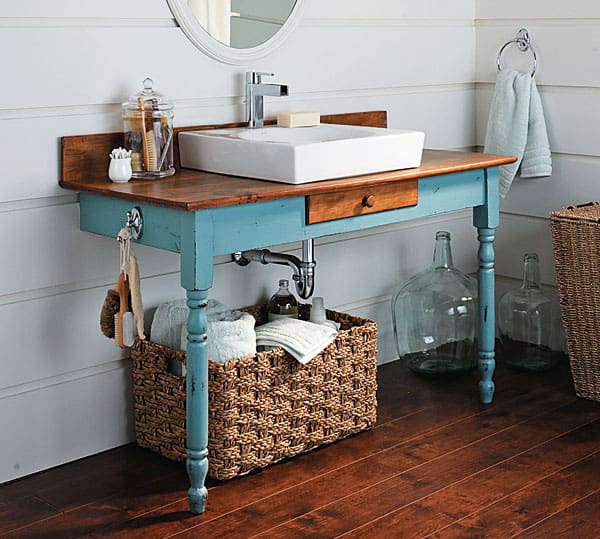
Add a touch of rustic style to your bathroom with the transformation of an old table into a stunning vanity and sink combo. To get started, sand down the tabletop and legs to create a smooth surface. Then, paint or stain the table to your desired finish. Once the table is dry, measure and cut a hole for the sink.
Be sure to seal around the edges to prevent water damage. Finally, attach the faucet and plumbing according to your design.
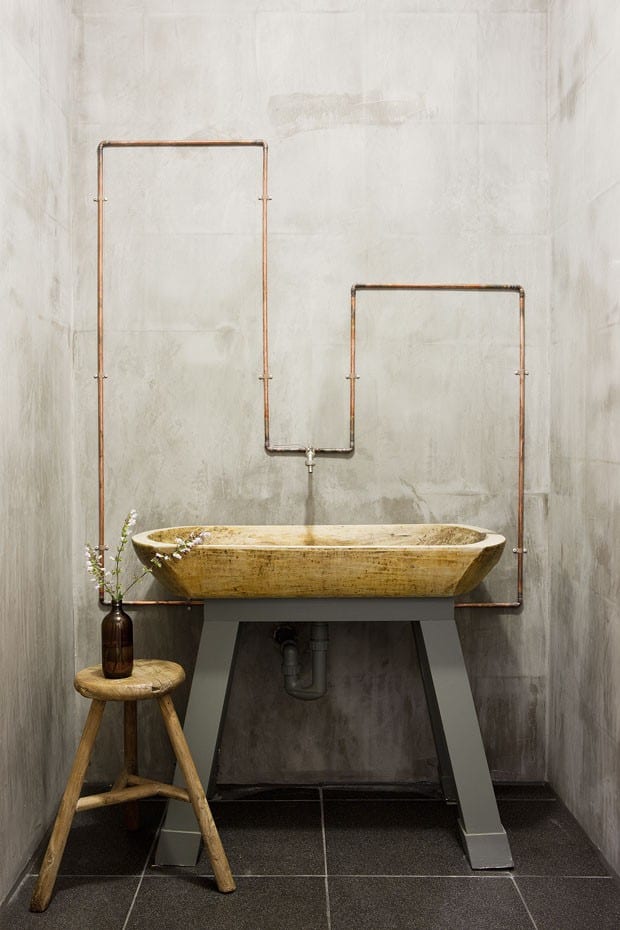
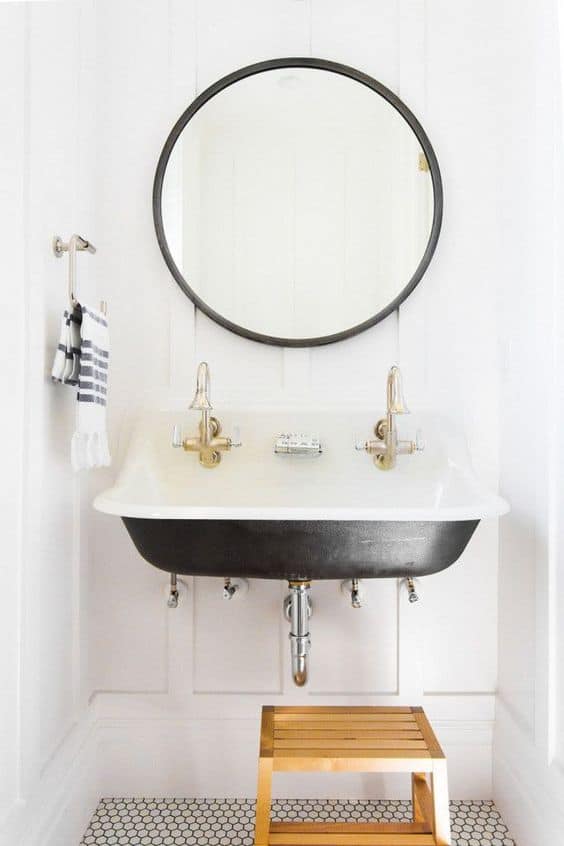
14. Create a Modern Look with This DIY Trough Sink
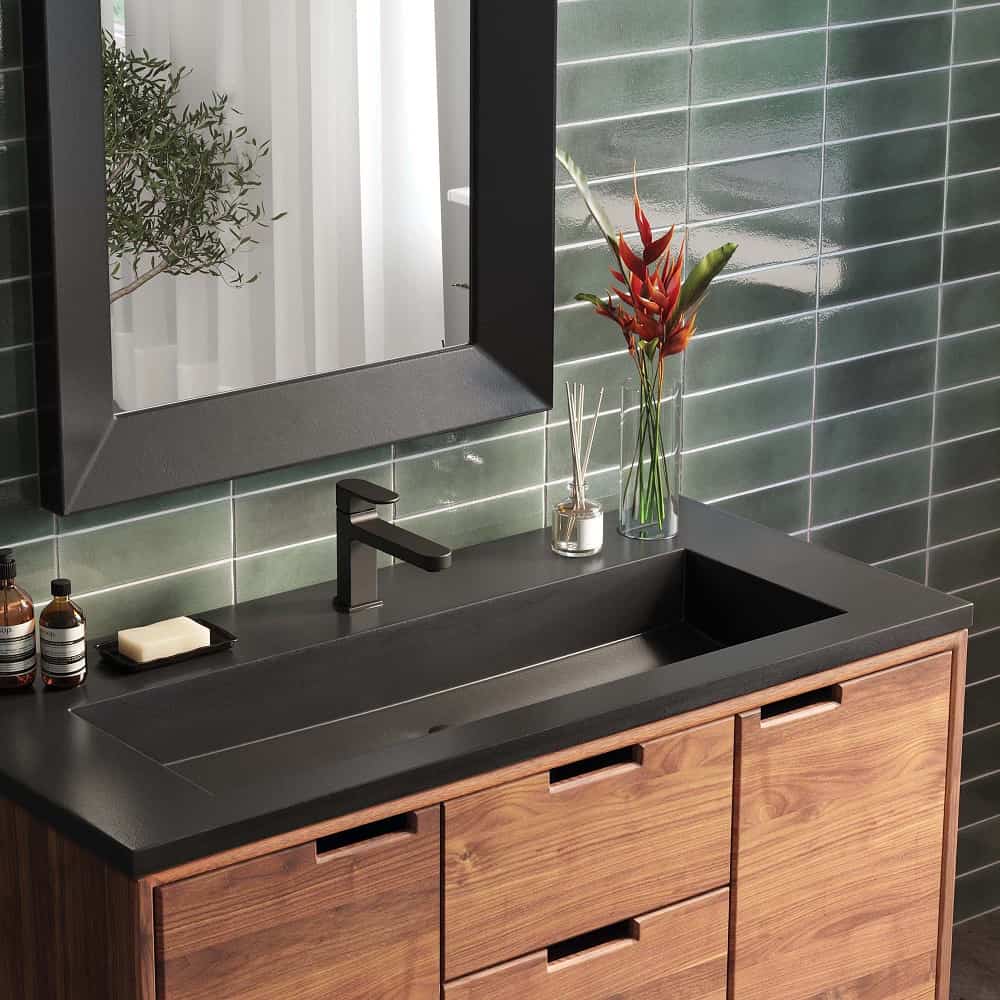
Trough sinks are long and narrow, and they often have two or more faucets. They’re a great option if you’re short on space, and they can also be used as a shared sink in a guest bathroom.
The trough design is sleek and understated, and the concrete material adds a touch of industrial flair. This amazing project requires some basic carpentry skills, but the finished product is definitely worth the effort. Simply cut a piece of plywood to fit the desired size of your sink, and then use a jigsaw to cut out a semi-circle from one end. Next, apply a layer of concrete mix to the plywood and smooth it out with a trowel.
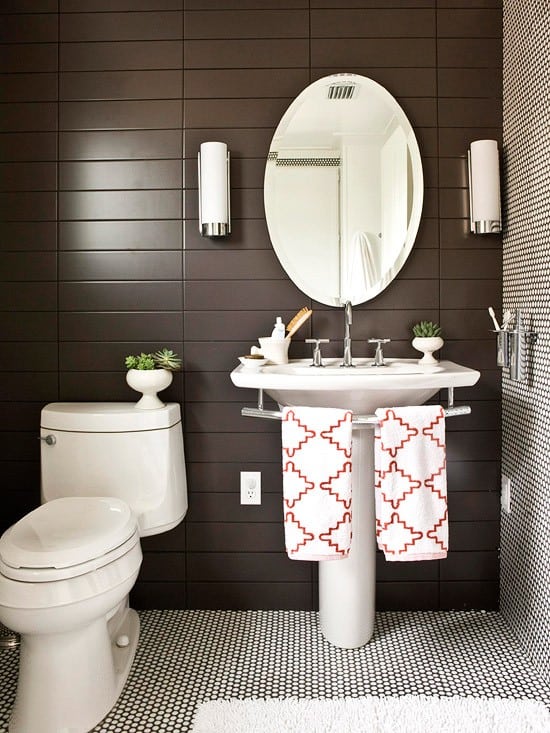
15. Keep Your Countertop Clutter-Free with a Wall-Mounted Sink
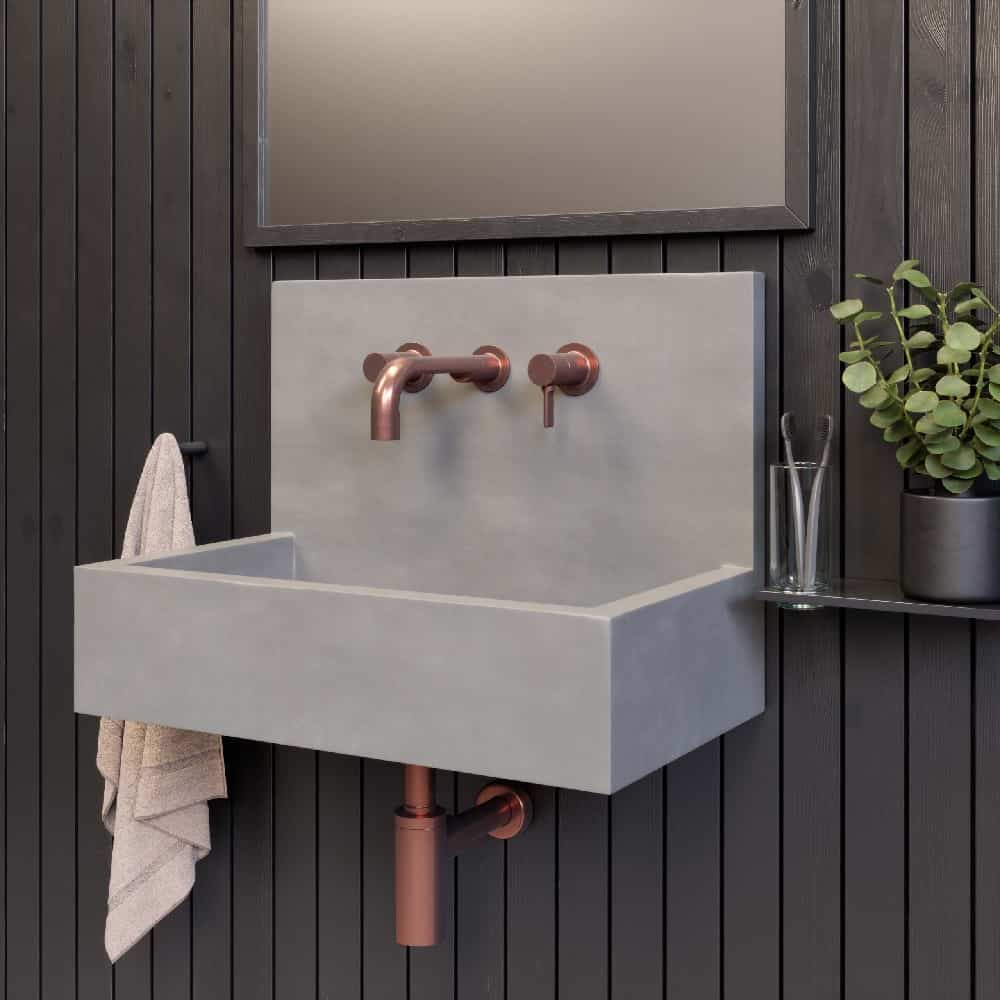
That’s why a wall-mounted sink is a great option for small bathrooms or any space where you want to keep your countertop clear. Wall-mounted sinks are easy to install and come in a variety of styles, so you can find one that fits your space and your aesthetic. Plus, they offer more storage options than traditional pedestal sinks, so you can declutter your countertop and keep your bathroom tidy.
16. Install a Wooden Sink Bowl as a Vessel Sink for a Rustic Look
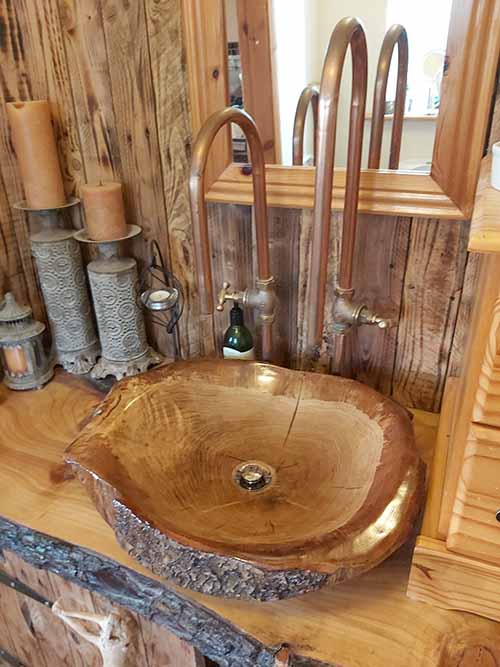
It’s a simple project that anyone can do, and it can really add some character to your space.
Here’s what you’ll need:
- A wooden bowl
- A drill with a spade bit
- A jigsaw
- A router
- Sandpaper
- A sealer or polyurethane
- A vessel sink faucet
- Plumbing supplies
Start by drilling a hole in the bottom of the bowl for the drain. If you’re using a router, now is the time to rout the edges of the bowl. Next, sand down any rough spots and apply a sealer or polyurethane.
Once that’s dry, it’s time to install the bowl on your vanity. Just attach it to the countertop with screws and then connect your plumbing. Add the faucet of your choice, and you’re all set
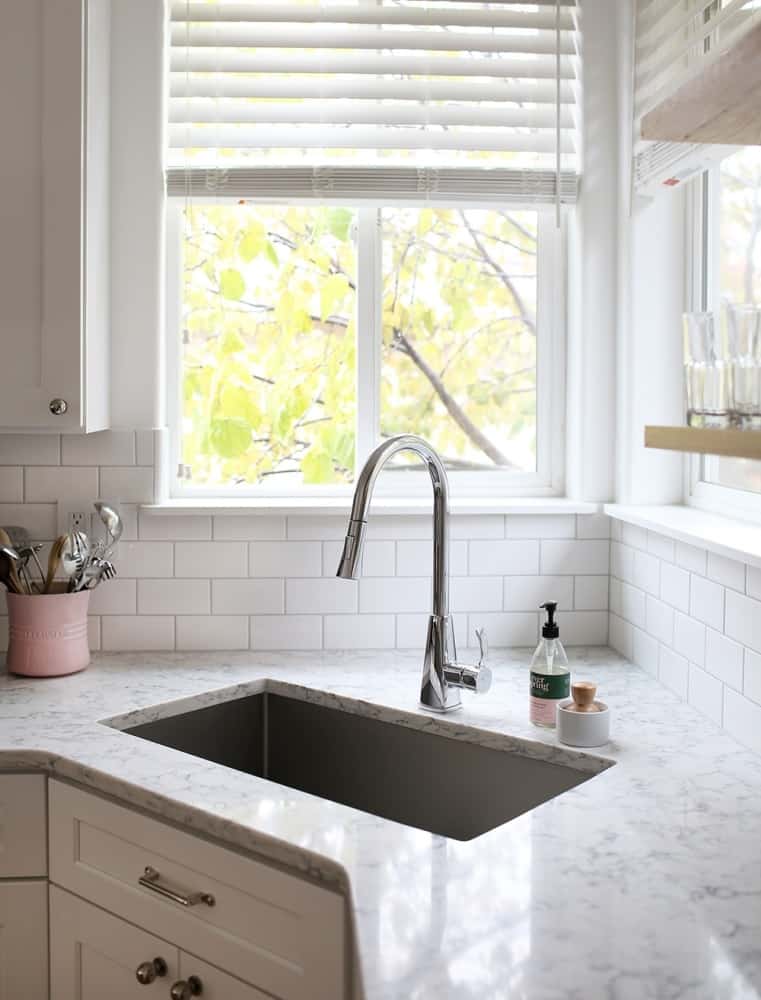
17. Add Some Drama with a Black Marble Countertop and Sink Combo
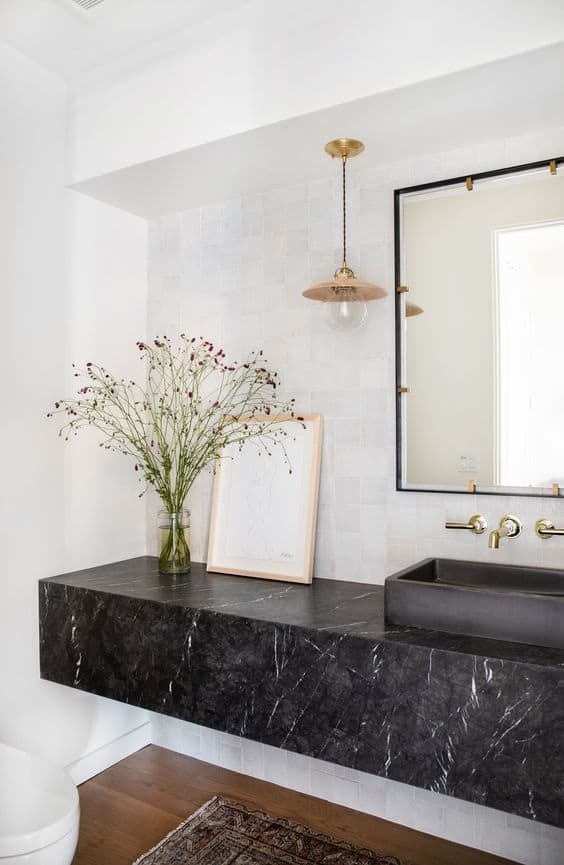
This elegant look is sure to turn heads, and it’s surprisingly easy to achieve. All you need is a black marble countertop, a white undermount sink, and some black caulk. First, install the countertop according to the manufacturer’s instructions. Then, attach the sink using silicone caulk and screws.
Be sure to use plenty of caulk around the edges to ensure a watertight seal. Once the sink is in place, use a putty knife to smooth out the caulk and give it a professional finish.
18. Create a Spa-Like Atmosphere with an Outdoor Copper Sink Basin
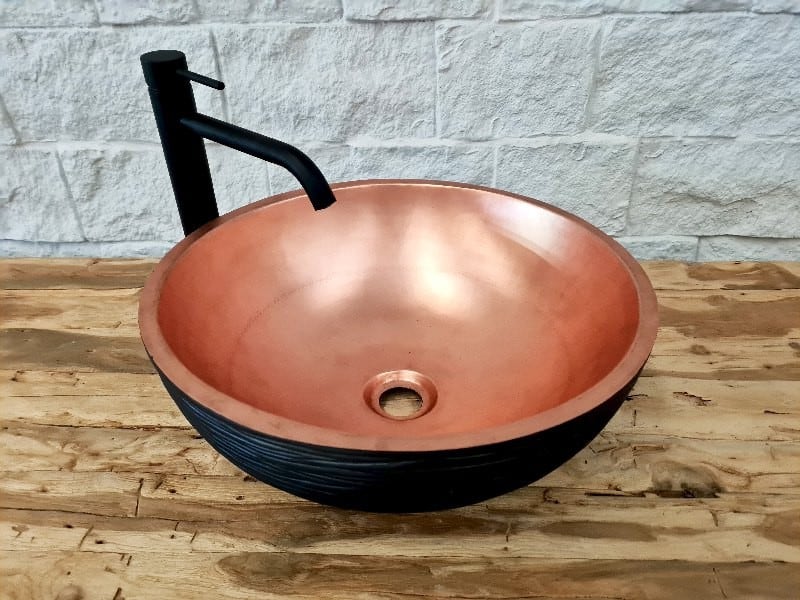
To get the look, you’ll need to purchase a copper basin and some fittings from your local hardware store.
Once you have all of your supplies, the next step is to measure and mark the spot where you want your sink to go. Then, using a drill and saw, cut two holes in the base of the basin for the drain and supply lines. After that, it’s simply a matter of connecting the fittings and securing everything in place. Once you’ve finished the installation, fill the basin with water and enjoy your new spa-like retreat.
19. Repurpose an Old Kitchen Cabinet Into a Rustic Sink Vanity
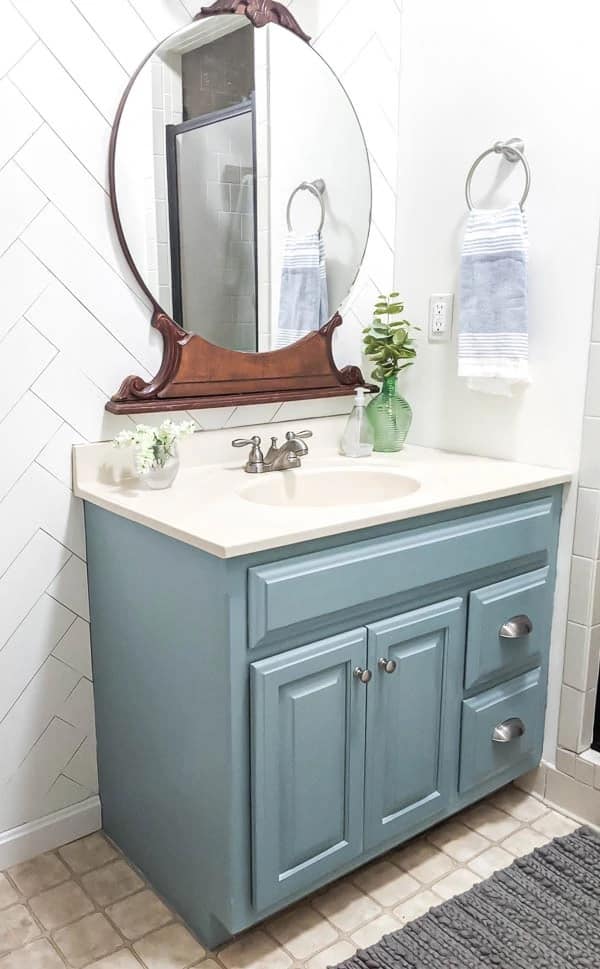
Breathe new life into an old kitchen cabinet and turn it into a rustic sink vanity. This is a great way to repurpose an old piece of furniture and give your bathroom a unique, country-chic look. Start by removing the doors from the cabinet and sanding down the surface to create a smooth finish. Then, cut a hole in the top of the cabinet to accommodate your sink.
You may need to use a jigsaw for this step. Once the sink is in place, add some decorative touches, like knobs or handles, to give the piece a personal touch. Finally, seal the wood with a clear sealer to protect it from moisture.
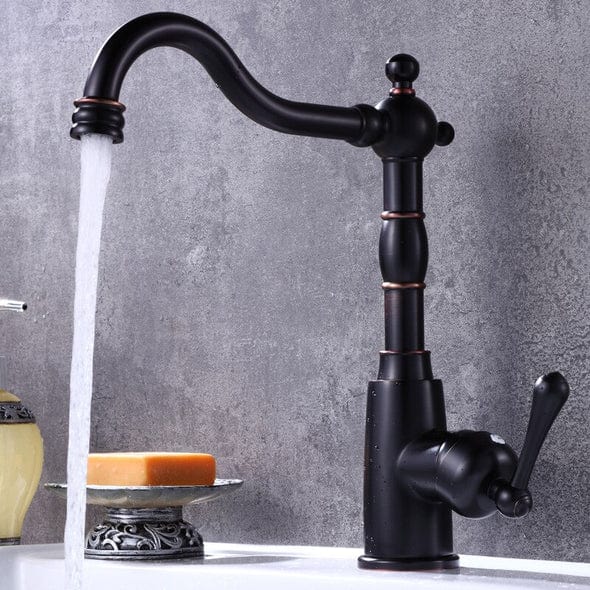
20. Make a Luxurious Bathroom Sink Out of Marble and Antique Brass Fixtures
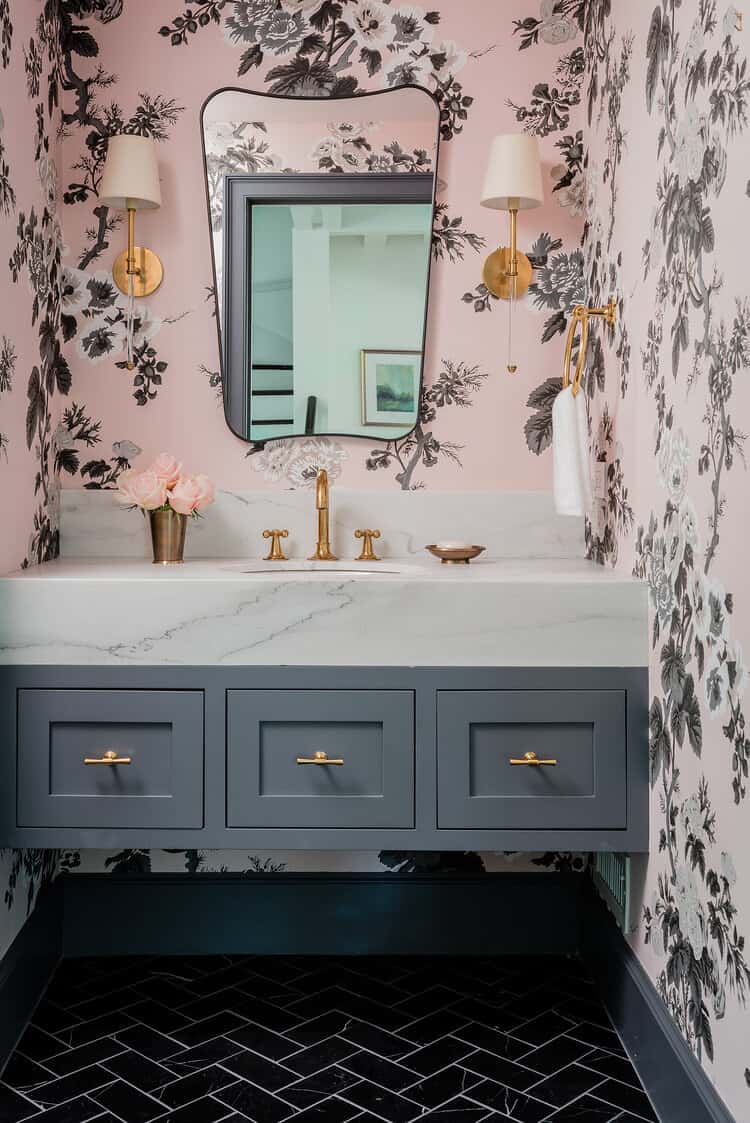
By pairing a luxurious marble countertop with antique brass fixtures, you can create a sink that is both stylish and functional. All you need is a marble countertop, an antique brass faucet, and a pop-up drain. Start by installing the pop-up drain in your countertop. Then, add the faucet of your choice.
If you’re using an antique brass faucet, be sure to use Teflon tape on the threads to prevent leaks. Finally, add the marble countertop.
21. Bring an Old Library Card Catalog Back to Life as a Unique Sink Cabinet
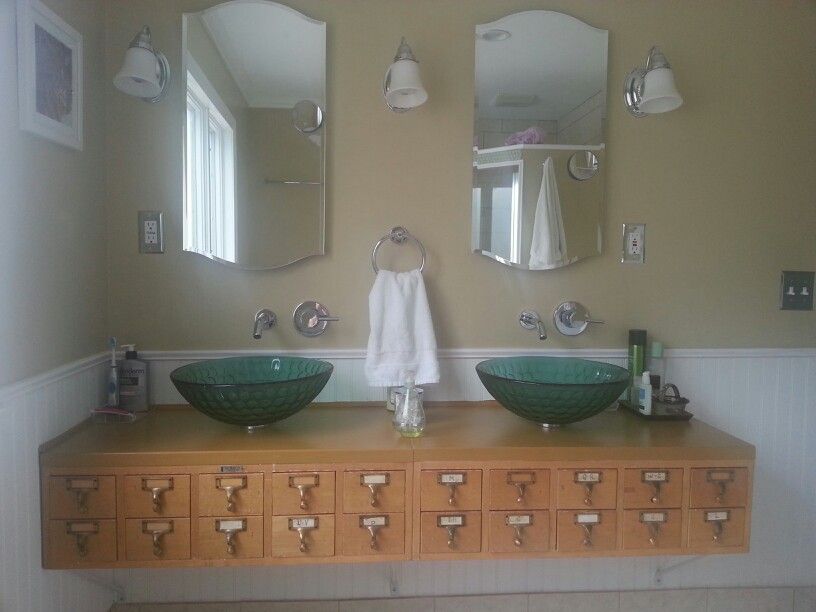
With a little creativity, an old library card catalog can be upcycled into a unique sink cabinet. First, remove the drawers from the catalog and sand down any rough edges. Next, cut a hole in the top of the cabinet for the sink. Then, use a drill to create holes for the faucet and plumbing.
Once everything is in place, add a coat of paint or sealant to protect the wood. Finally, attach the drawers to the cabinet and enjoy your new upcycled sink.
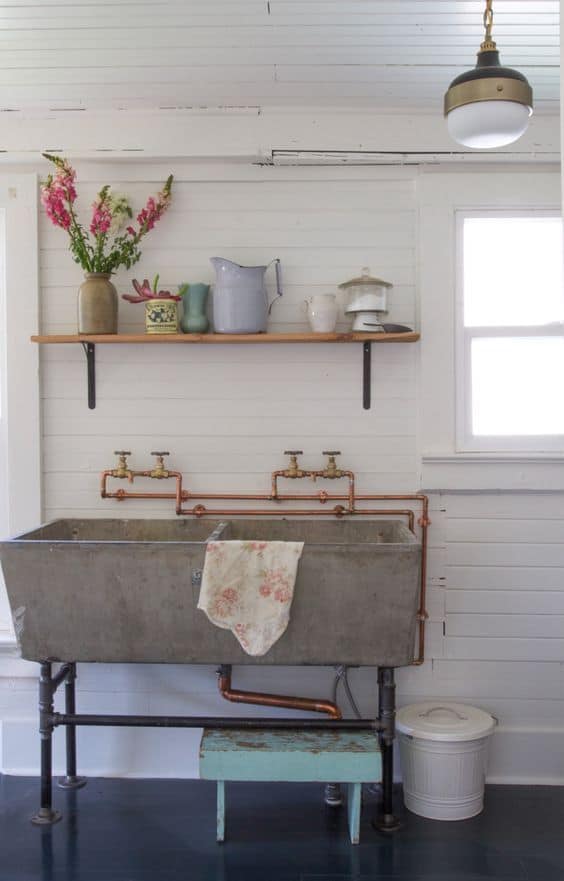
22. Give Your Bathroom the Industrial Look with an Exposed Pipe Sink Basin
One of the simplest ways to upcycle an old sink is to give it an industrial look. This can be easily achieved by exposing the pipes. First, remove the cabinet doors and any other hardware that is attached to the sink. Next, use a saw to cut away the drywall around the sink.
Once the drywall is removed, you should be able to access the pipes. Finally, use a wrench to loosen the connections and expose the pipes.
23. Install a Rustic Stone Vessel Sink for a Unique Look
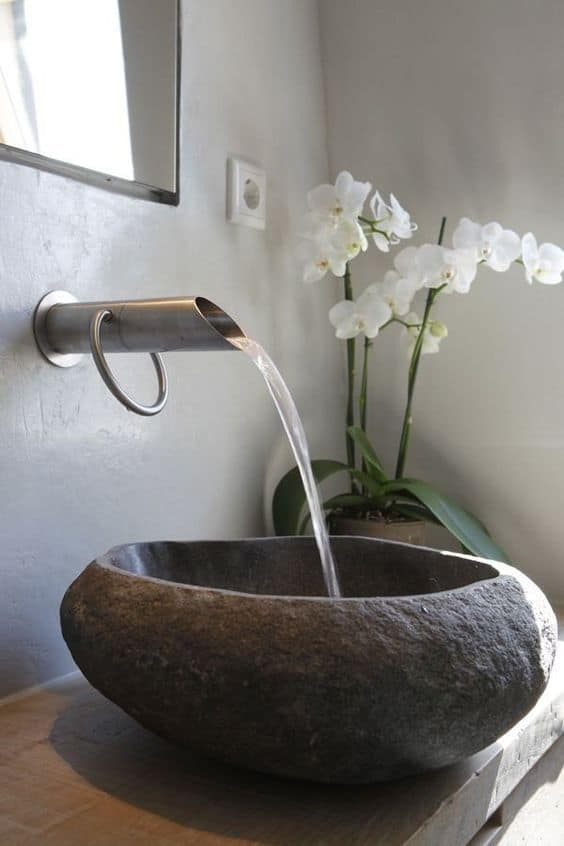
A stone vessel sink is a great way to add a unique touch to your bathroom. Not only do they look great, but they’re also quite easy to install. Start by measuring the hole in your countertop where the sink will go. Then, using a template or a round object as a guide, trace the outline of the sink onto the countertop. Next, use a scoring tool to lightly score the line you just traced.
This will help you make a clean cut when you use a saw to cut out the hole for the sink. Once the hole is cut, simply drop the sink in place and attach it to the countertop with silicone caulk.
24. Transform an Old Barrel into a Rustic Sink Basin
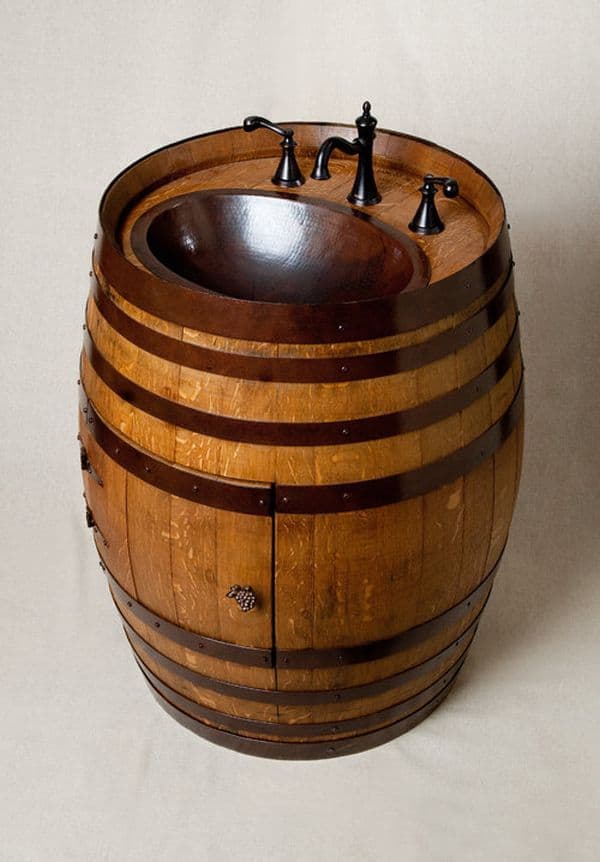
You can transform an old whiskey barrel into a rustic sink basin with just a few supplies and some basic carpentry skills. First, cut a hole in the barrel for the plumbing. Next, attach the faucet and drainage pipes. Then, build a frame to support the barrel and protect it from water damage. Finally, finish the project by adding a coat of sealant to the wood.
25. Create a Modern Vessel Sink Using Concrete and Copper Fixtures
This affordable DIY project is surprisingly easy, and it only takes a few hours to complete. You’ll need to start with a mold – you can either purchase one specifically for concrete sinks, or use a bowl or other container that’s roughly the right size and shape.
Once you’ve mixed the concrete and poured it into the mold, smooth it out and let it set. Then, just add your chosen copper fixtures and you’re all set
26. Hang a Vintage Porcelain Sink on the Wall for a Chic Look
A vintage porcelain sink can make a great addition to any bathroom. Not only is it a stylish statement piece, but it can also be a practical solution for small bathrooms. To hang a vintage porcelain sink on the wall, you will need to purchase a hanging bracket kit. Once you have the bracket kit, simply follow the instructions to secure the sink to the wall.
27. Build Your Own Storage Vanity with a Ceramic Sink and Floating Shelf

With some basic woodworking skills and a few power tools, you can create a functional and stylish piece of furniture that will add character to any room. The first step is to measure the space where the vanity will go and cut the baseboard and shelf to size. Next, attach the shelf to the wall using brackets or screws. Then, install the sink according to the manufacturer’s instructions.
Once everything is in place, you can start adding your personal touches, like painting or staining the wood, choosing new hardware, or adding decorative accents.
28. Make a Modern Corner Sink with a Marble Countertop
And although it may look complicated, it’s actually quite simple to put together.
Just follow these steps:
- Begin by measuring the space where you want your sink to go. Then cut a piece of plywood to fit that space.
- Next, cut your marble countertop to size. If you’re using a pre-made countertop, be sure to get one with an backsplash already attached.
- Once you have your countertop, apply a layer of adhesive to the plywood and attach the countertop. Be sure to use clamps or weights to keep it in place while the adhesive dries.
- Now it’s time to install your fixtures. If you’re using brass or another type of metal, you’ll need to drill holes for the screws and then attach the fixtures with screws. Finally, attach your faucet and drain assembly and you’re done.
A bathroom sink is one of the most important pieces in any bathroom. It must be strong and durable to withstand years of use, but it should also be stylish to make your bathroom stand out. With these 28 creative DIY projects, you can have the best of both worlds – a stylish and unique sink that will last for years to come.