Make your kitchen a place where you can cook and be creative with these DIY shelves! They’re not only an easy way to save money, but they’ll let everyone in on the fun of designing their very own storage unit.
When building your own DIY kitchen shelves, there are a few things to keep in mind. First, consider what material you want for the project- wood is by far the most popular, but metal and glass options also exist. Second, make sure that enough space will be available where these new storage units need installation; they shouldn’t take up more than their fraction of an entire room. Finally, think about how much design input would personalize this particular task.
Create your own kitchen shelves that will improve your woodworking skills while also adding a touch of both functional and versatile at the same time.
Table of Contents
1. Store Knives Safely and Securely
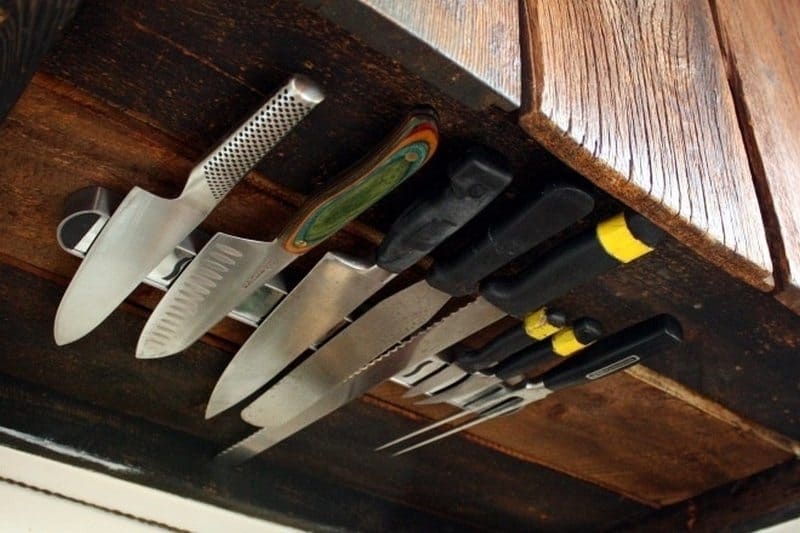
For an added touch of function and style, install a magnetic knife strip on one of the shelves. This will provide a safe and easy way to store your knives within reach, while also freeing up drawer space. Plus, it looks pretty darn cool. Just make sure to measure the width of your knives before purchasing the strip, so you can be sure it will accommodate them.
2. Use a Tension Rod to Create a Shelf For Spices
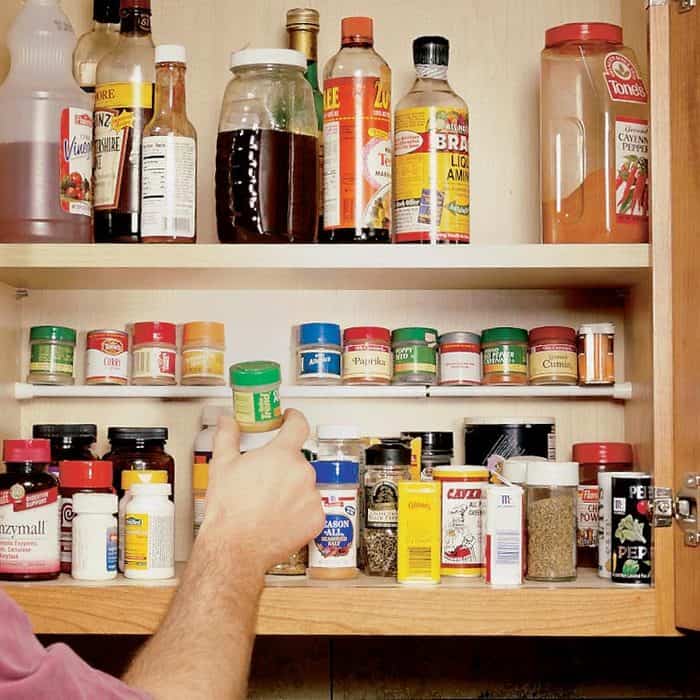
This is an especially useful solution if you don’t have a lot of counter space or if you want to free up some cabinets for other purposes. To create a kitchen shelf, simply screw a tension rod into the wall space and then place some jars or cans on the rod.
The weight of the jars will keep the rod in place and you’ll have instant access to all of your spices or canned goods. Plus, this solution is very inexpensive, and it’s easy to do for yourself.
3. Mount the Shelves on the Inside of Kitchen Cabinet Doors
This little DIY project is the best idea to add some extra storage without having to drill any holes in your cabinets. All you need is a piece of wood that’s the same width as your cabinet door, and a few dowels.
Attach the dowels to the door using screws, then screw the shelf into the dowels. You can use this new shelf to store spices, small appliances, or even just some pretty dishware. And since it’s mounted on the door, it’s easy to access, no more having to dig around in the back of your cabinets.
4. Hang Pots and Pans Underneath
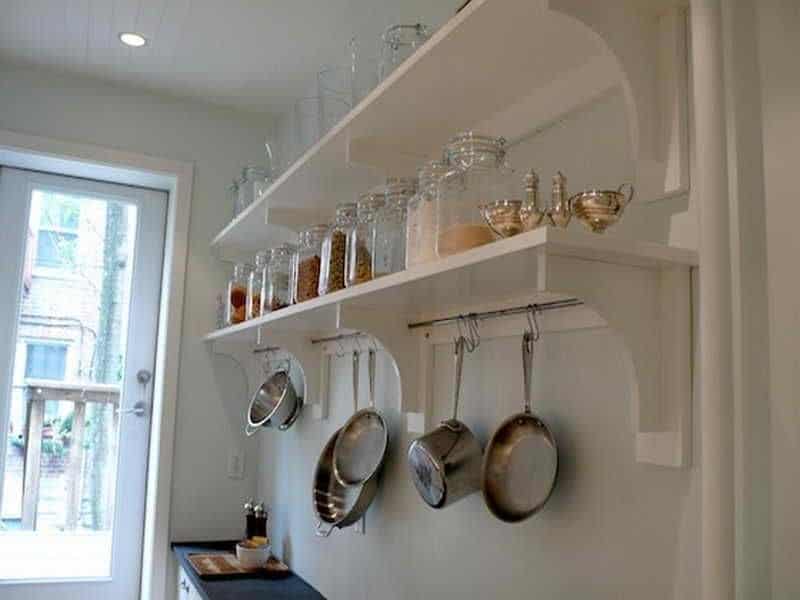
This will give you a place to store pots, pans, and other cooking equipment within easy reach. To hang pots and pans from hooks on the wall. Start by measuring the width of your chosen shelf. Then, mark out the location of the hooks using a pencil. Once you’ve determined where the hooks will go, use a drill to create pilot holes for the screws. Finally, screw the hooks into place and hang your cookware from them.
5. Add Shelves Above Your Refrigerator
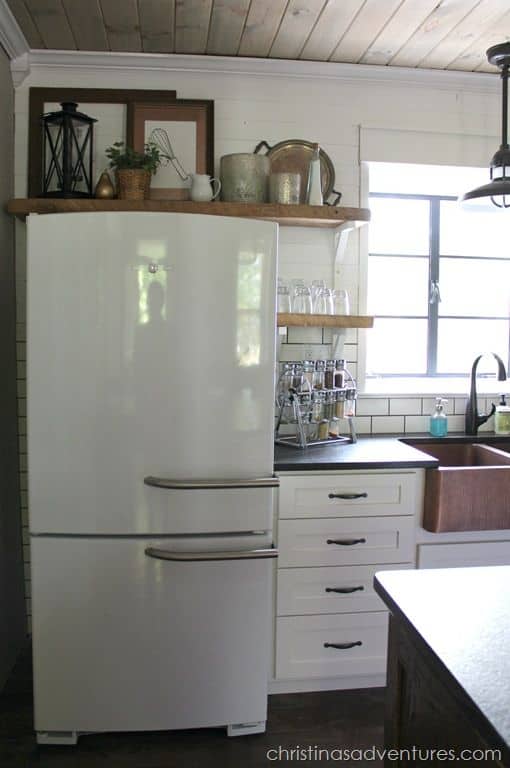
This is a cool DIY project that anyone can do, and it only takes a few hours to complete. First, measure the space above the stove or fridge and cut some shelves out of plywood or MDF. Next, use L-brackets or brackets to secure the shelves to the wall.
Make sure that the brackets are strong enough to support the weight of whatever you’ll be storing on the shelves. Finally, paint or stain the shelves to match your kitchen’s décor.
6. Repurpose An Old Ladder As a Storage Rack
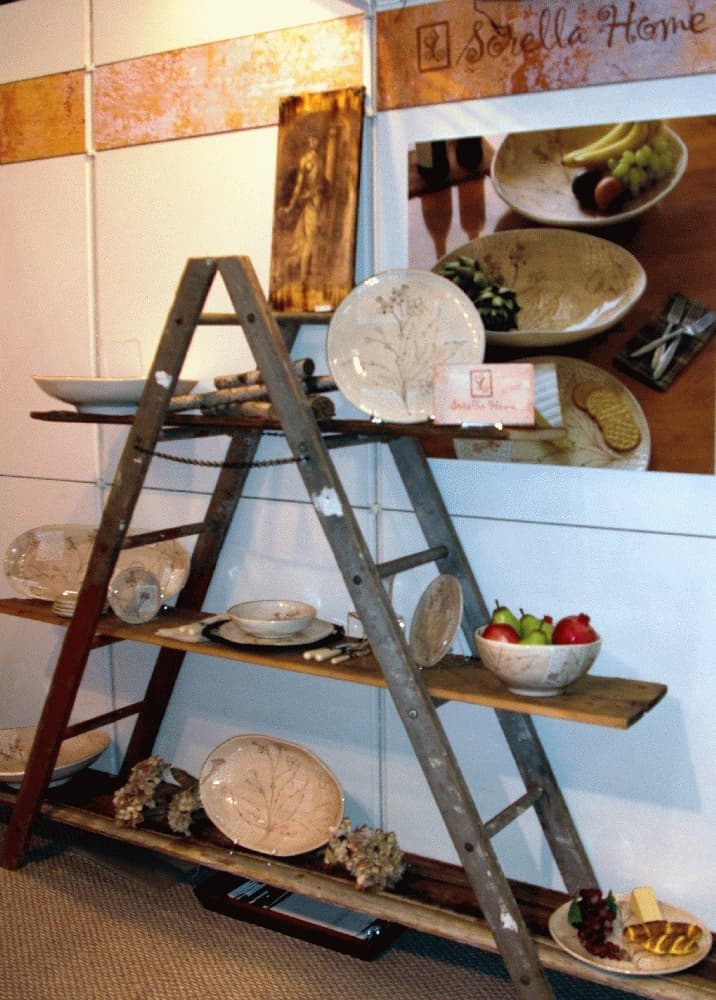
An old ladder can make a storage rack for a kitchen. Just lean it against a wall and you’ve got instant storage for pots, pans, and other kitchen utensils. This is a great way to repurpose an old ladder and save money on kitchen storage. Plus, it makes your kitchen look more rustic and unique. If you don’t have an old ladder, you can usually find them at thrift stores or garage sales. Just make sure to sand down the ladder and give it a few coats of paint before you use it in your kitchen.
7. Use Wire Basket To Organize Fruits and Vegetables
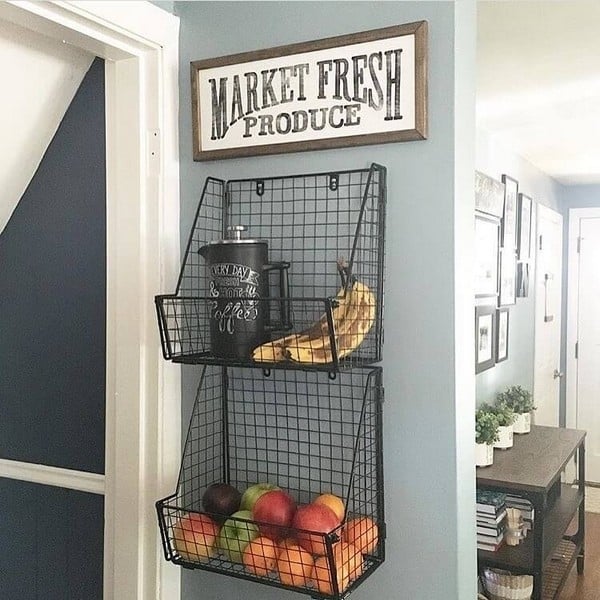
Wire basket shelves are a great way to store your canned goods, fruits, and vegetables. They provide ample space for all of the food items you need in one place while keeping them organized with wire baskets that can be easily taken off when not needed or replaced if they become dirty from spills! Plus, this project is easy enough even someone who isn’t very handy around home could do it- so there’s no excuse not too now to share their wisdom by installing some new storage ideas into every household everywhere.
8. DIY Wall Mounted Dish Rack For Plates And Bowls
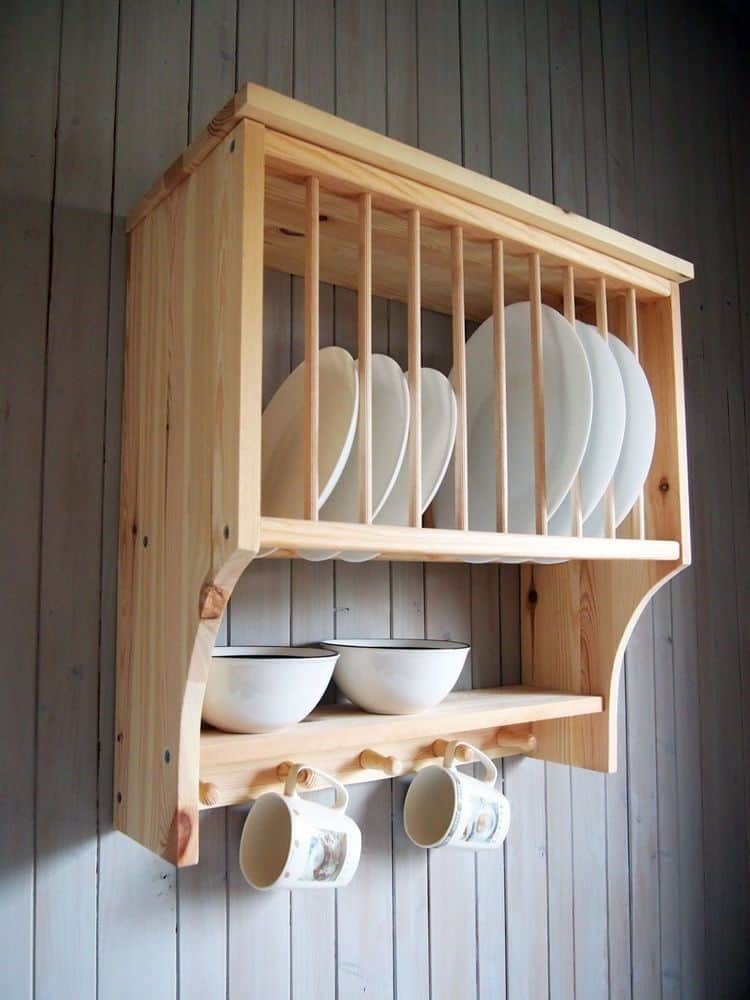
You can save a lot of money by making your own wall mounted dish rack.
You will need a few supplies for this project. First, you will need a piece of plywood that is at least 24 inches wide and 48 inches long and dowels. Next, you will need nails and screws. You will also need a drill and a jigsaw.
To start, cut the plywood into two pieces that are 24 inches wide and 24 inches long.
Next, mark where you want the shelves to go on the wall. It is best to use a level so that your shelves are level when you put them up. Once you have marked the location of the shelves, use the drill to make pilot holes in the wall.
Finally, use the jigsaw to cut out slots for the plates and bowls. Make sure that the slots are wide enough so that the dishes will not fall through. Once you have cut all of the slots, your dish rack is ready to use.
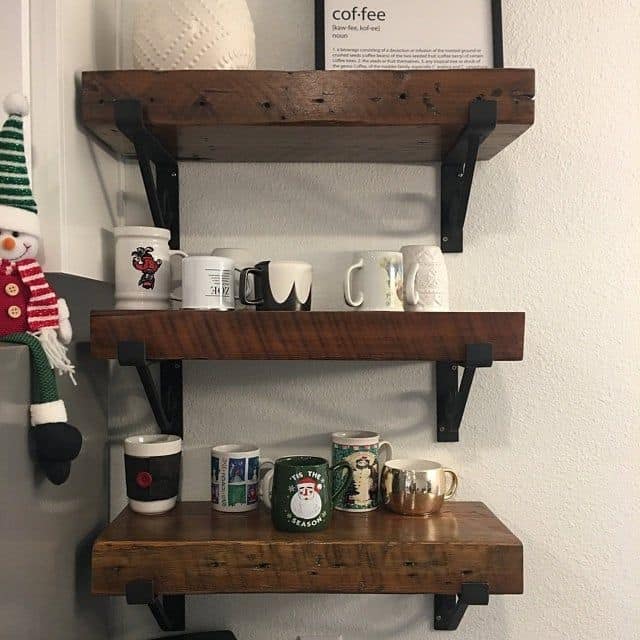
9. DIY $15 Chunky Wooden Shelf
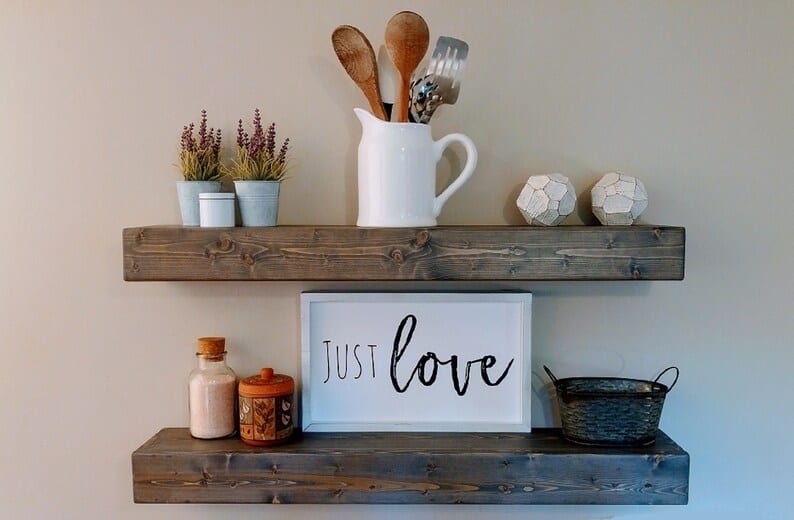
These chunky wooden floating shelves are the perfect DIY project for a kitchen makeover on a budget! They add tons of character and are really easy to make. Plus, they only cost about $15 each to build. Here’s what you’ll need to get started:
- 2×4 lumber
- Plywood
- Wood glue
- Nails or screws
- Paint or stain
10. DIY Under Cabinet Knife Block
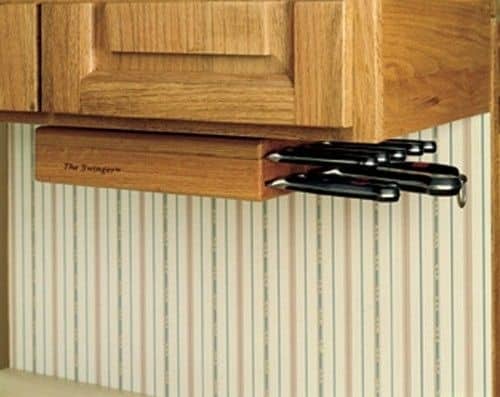
Utilizing space that would otherwise go unused, these shelves provide the perfect place to store everything from dishes to spices. And the best part is that they can be customized to fit your specific needs. For example, if you’re short on counter space, try adding shelves to the undersides of your cabinets. Or, if you’re looking for a place to keep your knives within reach, try adding a block to one of your shelves.
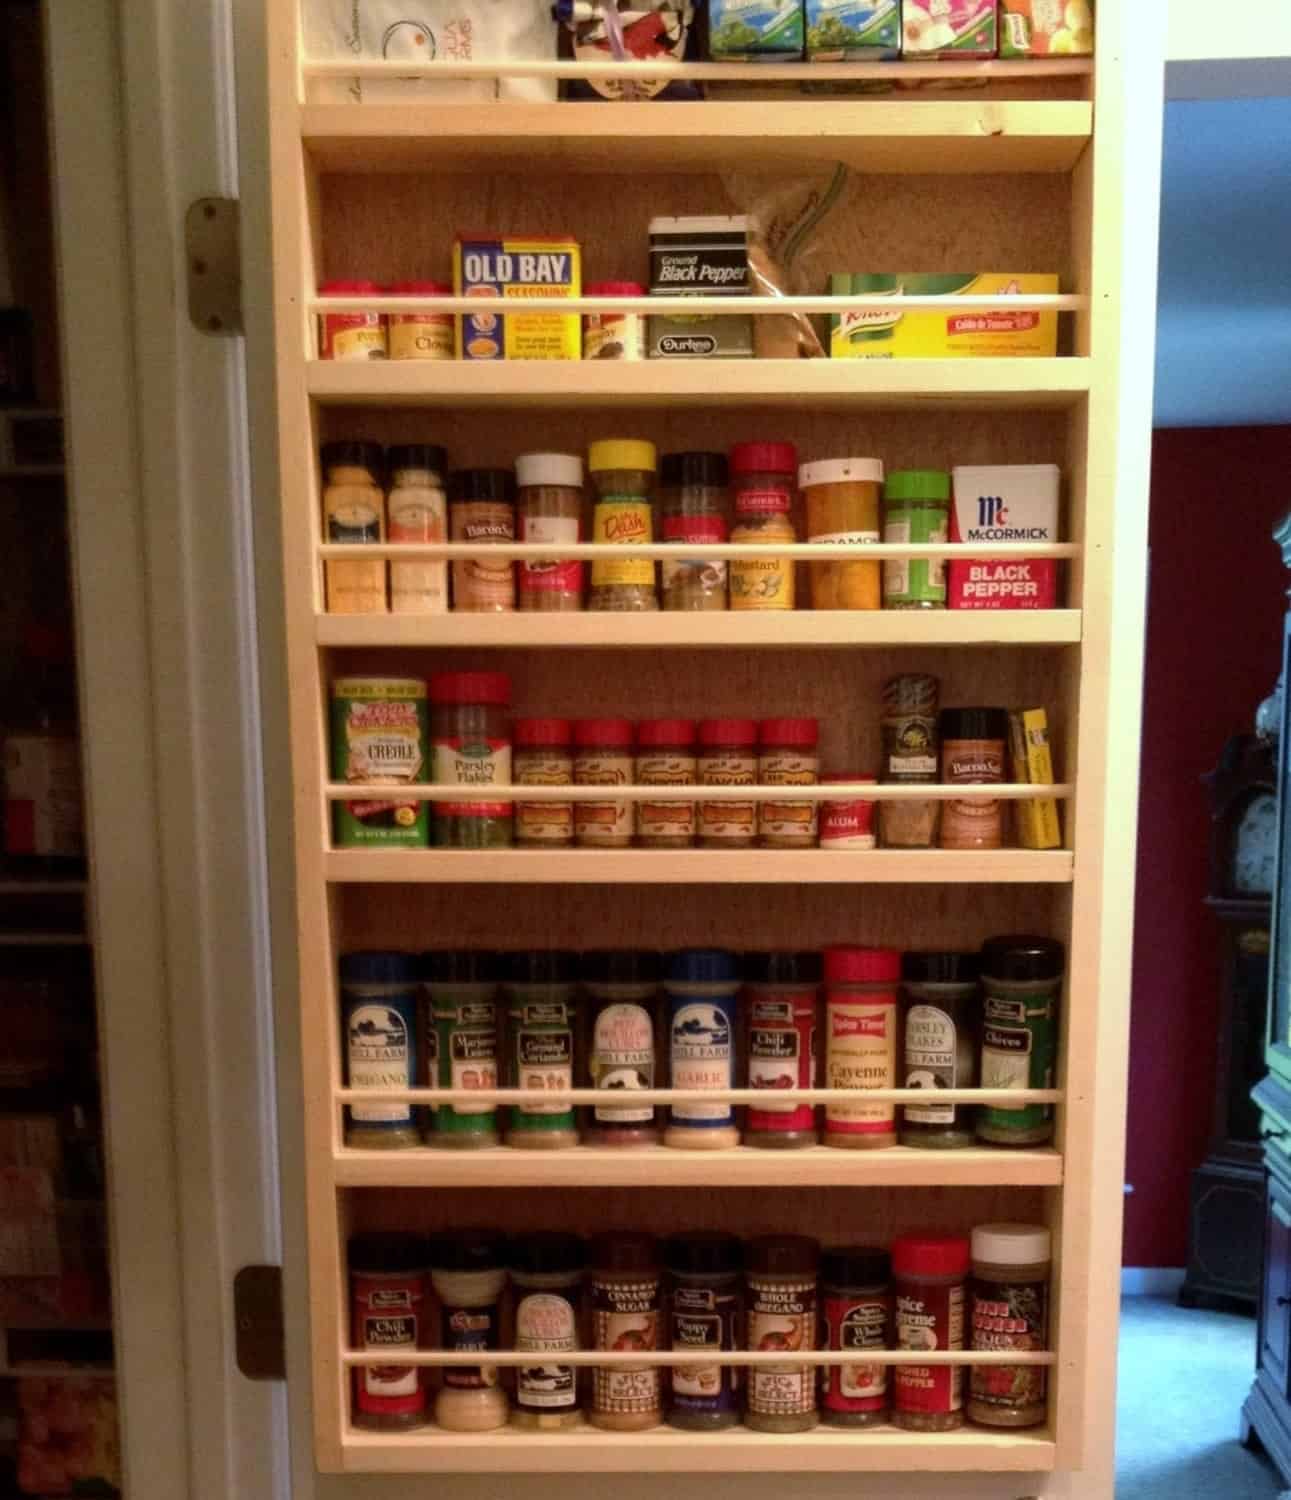
11. DIY Pull-Out Spice Rack
This type of rack is designed to fit into the space between your countertop and cabinets, and it provides easy access to your spices. To build a pull-out spice rack, you will need a few supplies, including shelf brackets, wire shelving, and drawer slides. You will also need to measure the space between your countertop and cabinets to make sure that the rack will fit. Once you have all of your supplies, you can follow the instructions below to build your own Pull-Out Spice Rack.
- Measure the space between your countertop and cabinets, and then cut two pieces of wire shelving to fit.
- Attach the wire shelving to the shelf brackets using screws or bolts.
- Install the drawer slides onto the bottom piece of wire shelving.
- Attach the other piece of wire shelving to the drawer slides.
- Place your spices onto the shelves and then slide the rack into place between your countertop and cabinets.
12. DIY Canning Jar Storage Shelf
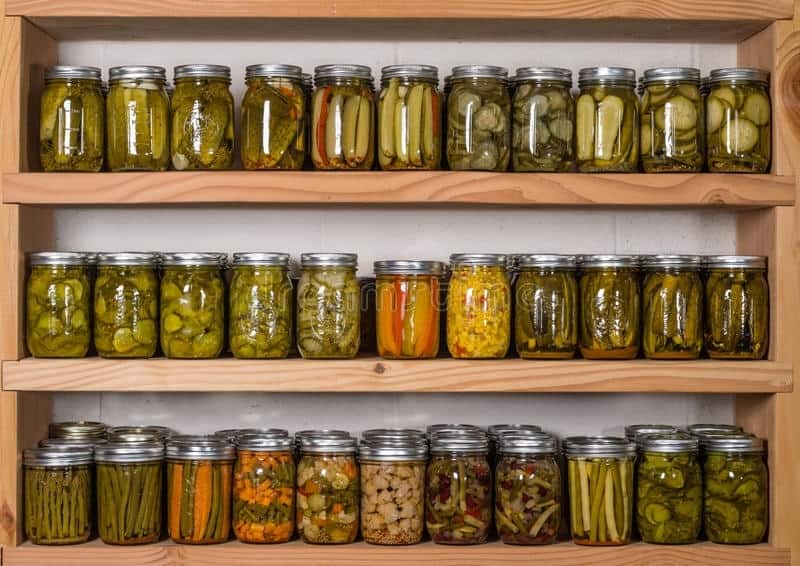
Canning jars are a great option for storage because they come in a variety of sizes and can be used for a variety of things, from spices to flour. Plus, they’re easy to grab when you need them. To build a canning jar storage shelf, start by measuring the space where you want to put the shelf. Then, cut a piece of wood to size and screw it into the wall. Next, drill holes into the bottom of the jars and screw them onto the board. Finally, add any other decorations or accents you like.
13. DIY Pot Lid Rack
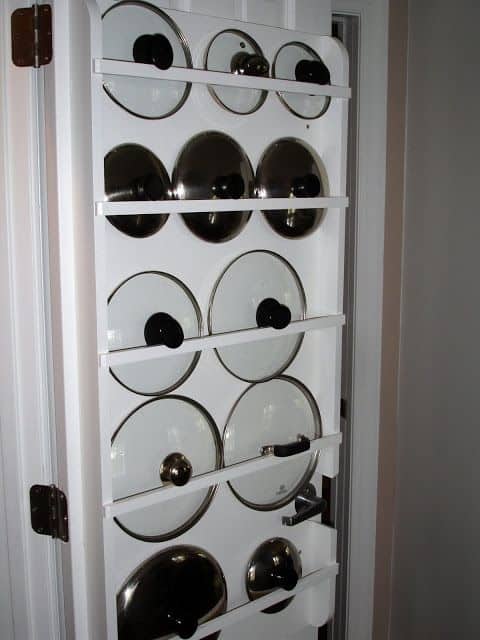
This easy project will free up some much-needed counter space and help you keep your pot lids organized. All you need is a length of wood (we used a 1×4), some screws or nails, and some hooks. You can finish the wood however you like, or just leave it as is. Once you have your materials, just follow these easy steps:
- Cut the wood to size (ours was about 18 inches long).
- Attach the hooks to the underside of the shelf, spaced evenly apart.
- Hang the shelf on the wall using screws or nails
14. Wall Mounted Pan Rack
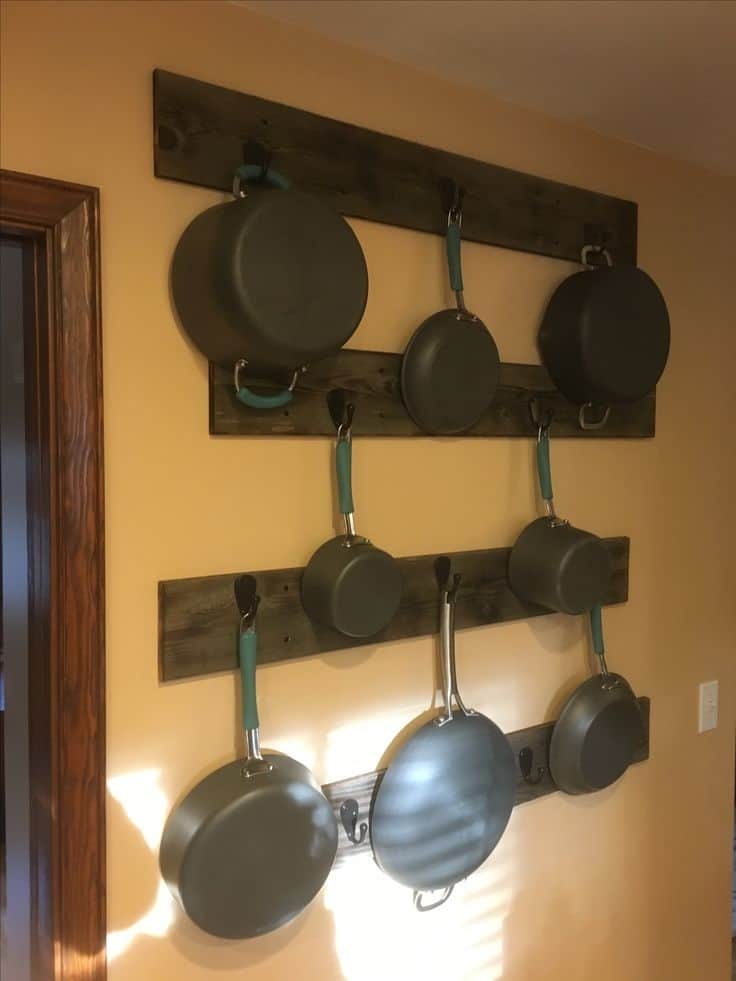
This can be used to store pots, pans, and other cooking utensils. You can also use them to hanging plants or even creating a place to store spices. The most important thing when choosing a wall mounted pan rack is to make sure that it is the correct size for your kitchen.
You will also want to make sure that it is made of durable materials so that it will last for many years. Once you have found the perfect wall mounted pan rack for your kitchen, you will be able to enjoy all the benefits that it has to offer.
15. DIY Plant Ledges
Plant ledges are a popular type of kitchen shelf, and they’re easy to make yourself with just a few supplies from the hardware store. Start by measuring the width of your windowsill. Then, cut a piece of pine board to that width. Next, use a drill to create evenly spaced holes along the top edge of the board. Finally, thread some plant pots onto screws or hooks and hang them from the holes you drilled.
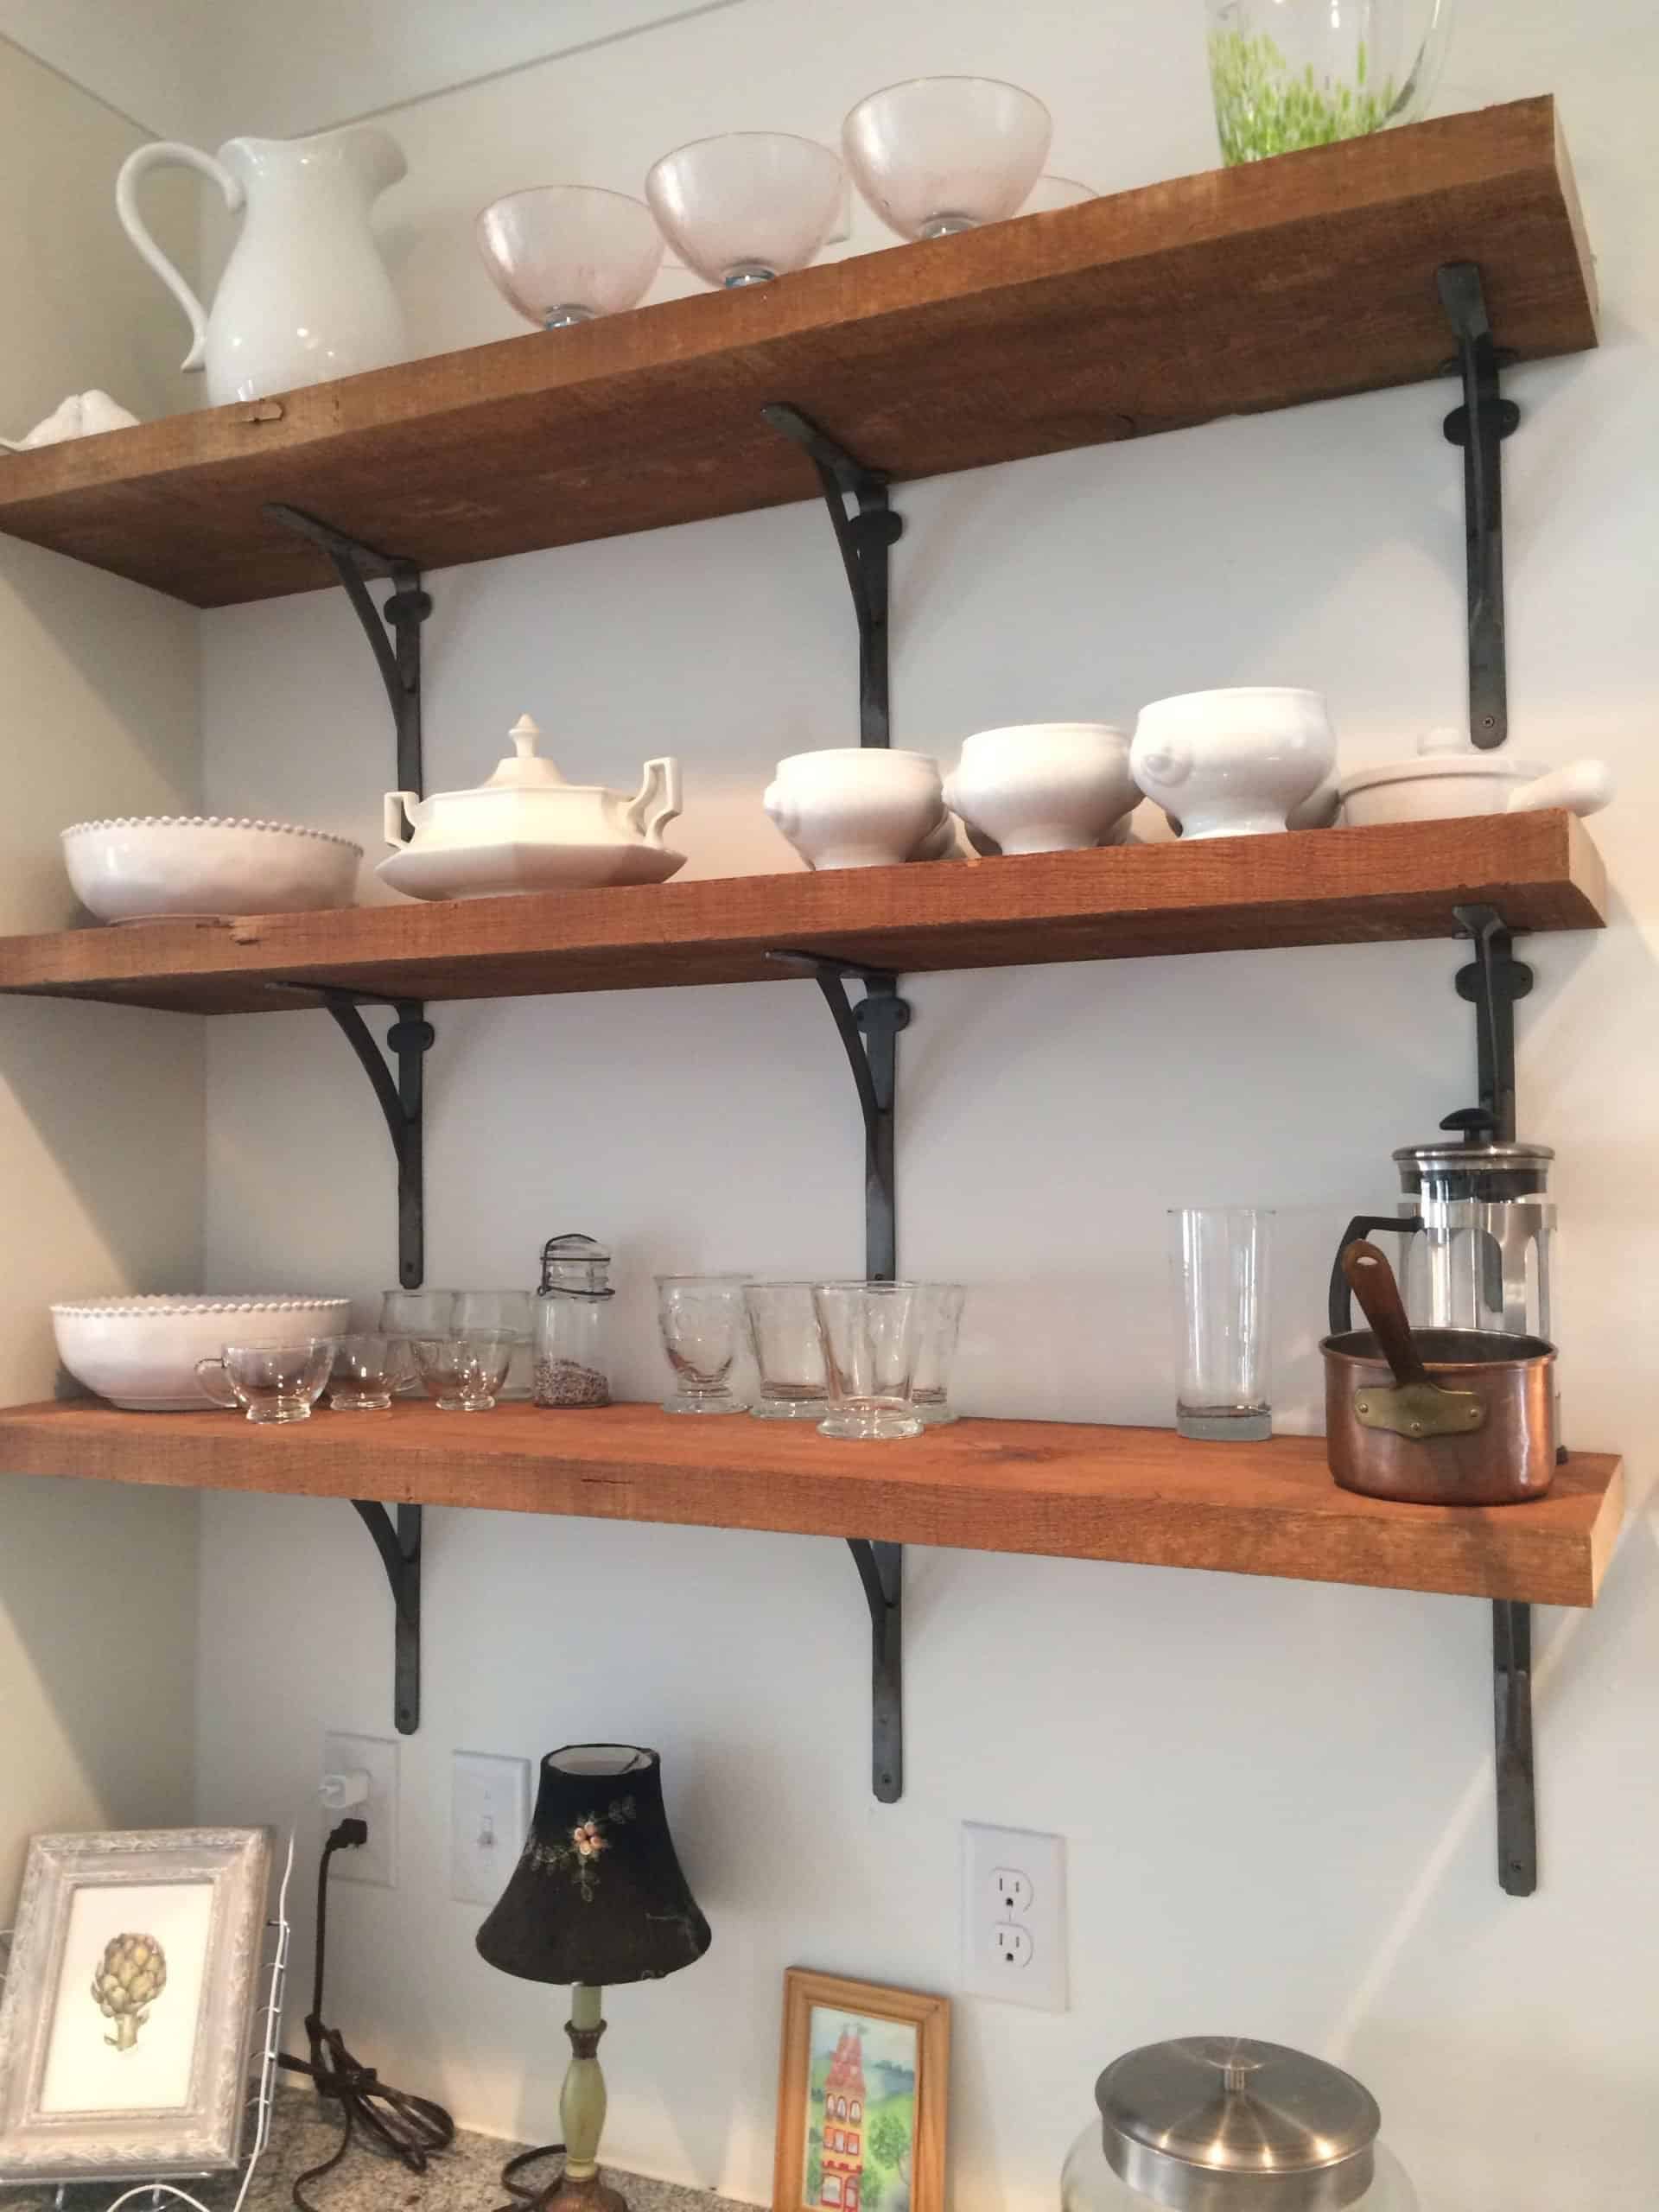
16. DIY Reclaimed Kitchen Shelves
Reclaimed wood shelves are a popular option for DIY-ers, as they add a bit of rustic charm to the kitchen. Building your own shelves is surprisingly easy, and you can find all the supplies you need at your local hardware store.
Once you’ve got your materials, simply cut the wood to size, sand down any rough edges, and stain or paint it to match your kitchen’s décor. Then, use some heavy-duty brackets to secure the shelves to the wall. In no time at all, you’ll have some beautiful new kitchen shelves that are both stylish and functional.
17. Maximize The Corner Spaces
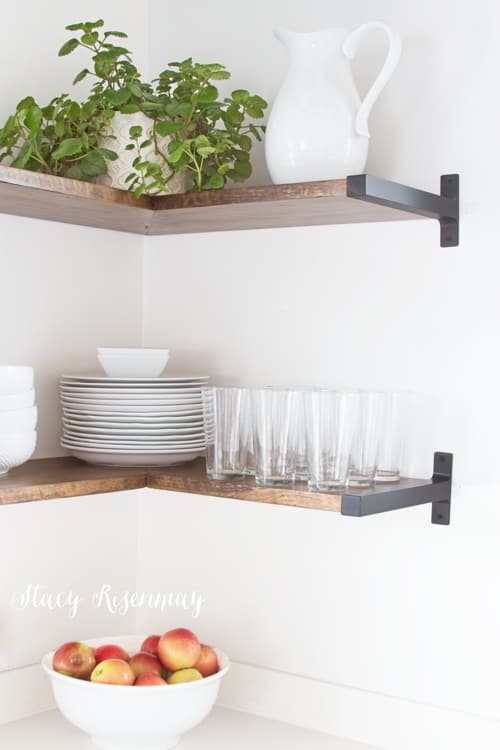
It’s a relatively easy project that even beginner can handle, and it’s a great way to customize your space to fit your specific needs. You can find corner shelving units at most home improvement stores, or you can easily make your own using basic woodworking skills.
To build your own shelves, start by measuring the dimensions of your corner space. Cut four boards to these dimensions, then use a drill to create holes for screws at each corner. Next, screw the boards together, then sand and paint them to match your kitchen décor. Once the paint is dry, mount the shelves to the wall using screws or nails. Then, add baskets, jars, or other items to help organize your space.
18. DIY Floating shelves
What’s not to love about floating shelves? They’re easy, quick and they can really bring some personality into your space. Plus, if you need more room for dishes or cooking utensils then these are perfect. You can start by measuring the area where you want to install the shelves. Then, cut the lumber to size and sand the edges smooth. Next, stain or paint the wood to match your kitchen décor.
Once the wood is dry, attach the supports to the wall using screws or brackets. Finally, slide the shelf boards into place and secure them with brads or screws. With just a few hours of work, you can transform your kitchen with DIY floating shelves.
19. Farmhouse Style DIY Open Shelving
The shelves in a farmhouse kitchen are no exception. DIY open shelving is a great way to add storage to your kitchen without making it feel too cluttered. Plus, it can be a fun weekend project that you can do with the family. Here are some tips for creating your own DIY farmhouse style kitchen shelves:
- A saw (circular or hand)
- Plywood or lumber
- Paint or stain
- Hardware (nails, screws, brackets)
- Level
- Tape measure
20. Easy and Inexpensive DIY Wooden Crate Shelves
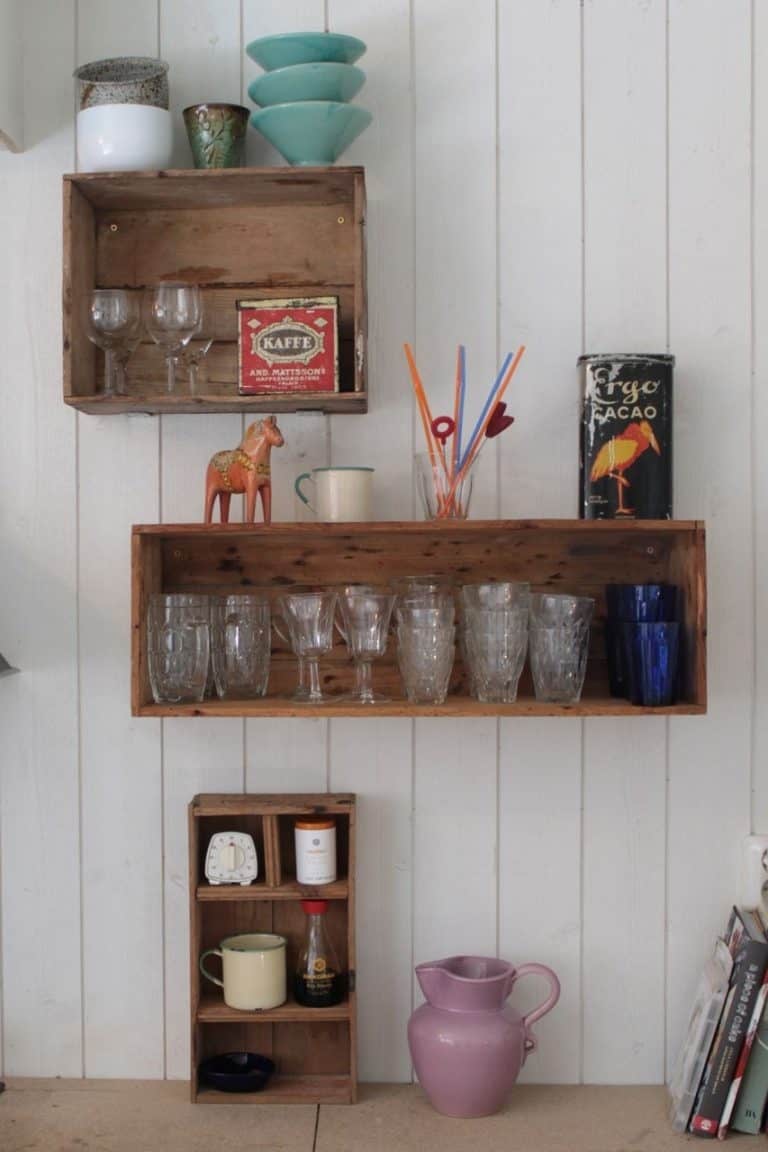
Made from inexpensive wooden crates, these shelves can be put together in just a few hours and are the perfect way to add extra storage to your kitchen. Plus, they add a touch of rustic charm that is sure to please. To get started, simply stack the crates in any configuration you like and secure them together with screws. Then, screw the shelves to the wall using heavy-duty wall anchors.
And that’s it! Now you have sturdy, stylish shelves that are perfect for storing all of your kitchen essentials.
21. DIY Pallet Wood Open Shelving
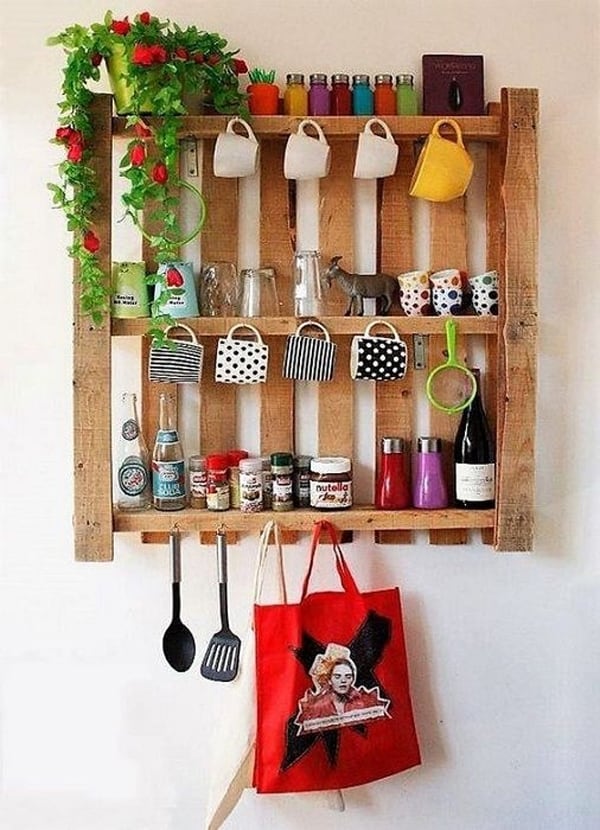
For this project, you’ll be using pallet wood to create open shelving for the kitchen. This type of shelving is perfect for organizing spices, cookbooks, and other small items.
The first step is to dismantle the pallets and remove all of the nails. Once the pallets are dismantled, use a saw to cut the boards into desired lengths. Next, sand down the boards to smooth out any rough edges. Once the boards are sanded, it’s time to assemble the shelves. To do this, nail the boards together at the corners. Once the shelves are assembled, stain or paint them to match your kitchen décor. Finally, install them in your kitchen and enjoy your new storage space.
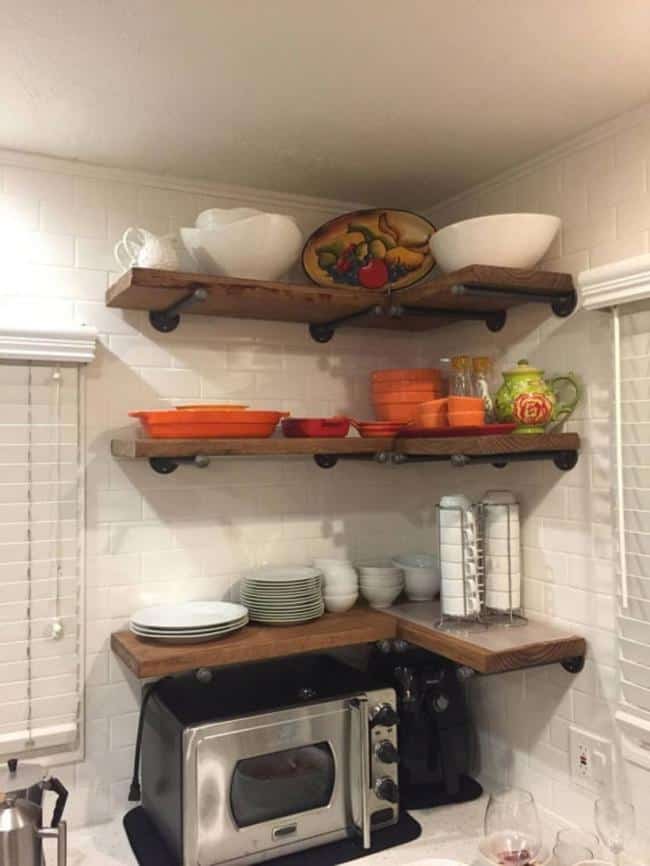
22. DIY Industrial Pipe Shelving
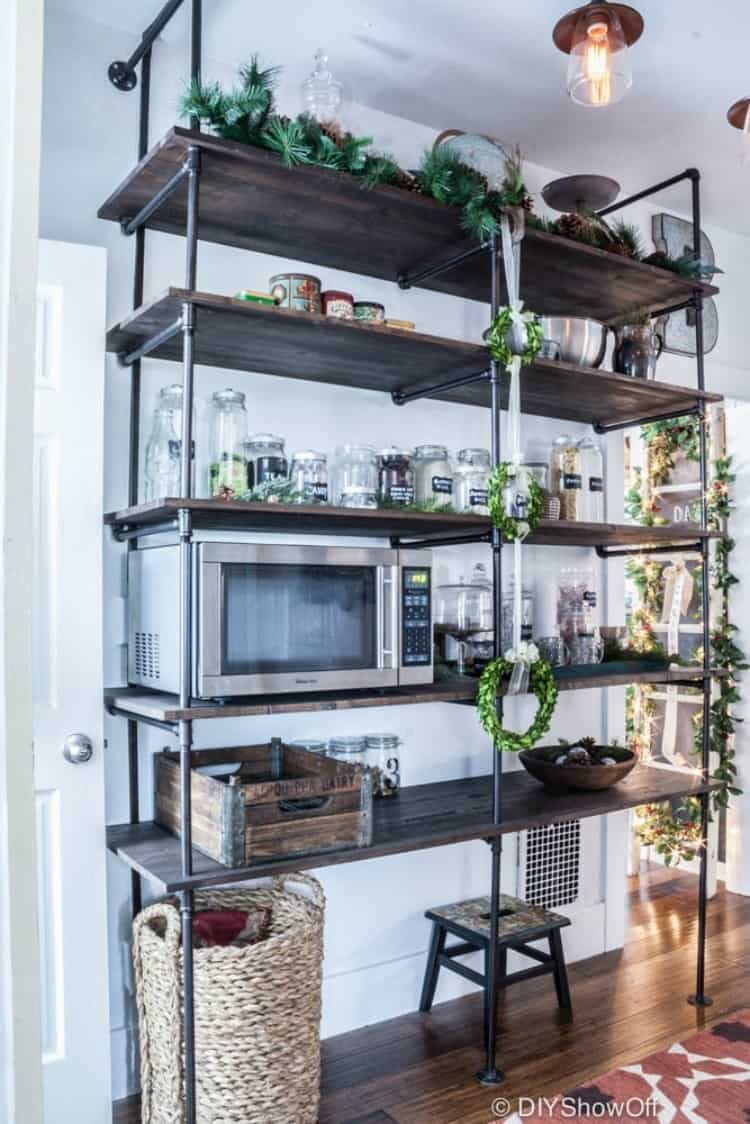
This type of shelving is easy to DIY, and it can add a touch of industrial chic to any space. Plus, it’s incredibly versatile-you can use it to store everything from dishes to spices. To get started, you’ll need some basic materials like pipes, fittings, and brackets. You can find these at any hardware store. Once you have your materials, simply follow the instructions below to build your own industrial pipe shelves.
First, measure the walls where you want to install your shelves. Then, cut your pipes to size using a hacksaw. Next, assemble the pipes and fittings according to the instructions that come with your kit. Once everything is connected, mounted the shelves on the brackets. Finally, add your desired shelf liner and arrange your items on the shelves.
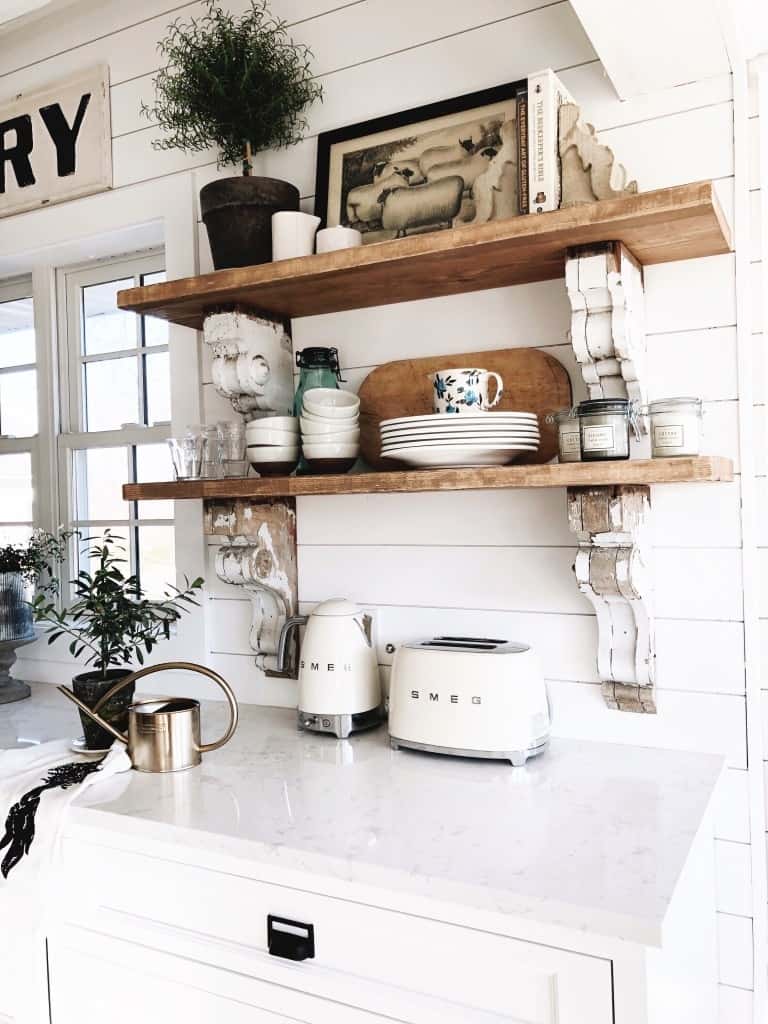
23. Rustic Glam Kitchen Makeover with DIY Wood Shelves
If you’re interested in adding rustic DIY wood shelves to your own kitchen (or any other room in your house), here’s what you’ll need:
- Plywood (I used 1/2″ thick plywood for my shelves, but you can use whatever thickness you like)
- Wood stain (I used a dark walnut stain for my shelves, but you can use any color stain or paint that you like)
- Polyurethane (this is optional, but it will help to protect your shelves from scratches and everyday wear and tear)
- Shelving brackets (I used these decorative metal brackets, but you can use any type of bracket that you like)
- Screws (these will be used to attach the brackets to the wall)
- Drill (this is optional, but it will make it easier to attach the brackets to the wall)
- Tape measure
- Pencil
24. Adding Wrap Station and Spice Rack

When adding wrap station, it’s important to make sure that the shelves are level and evenly spaced. You’ll also want to consider the height of the shelves, as this will determine how much storage space you have. First, choose the location for your shelves.
The best spots are usually near the refrigerator or stove, where you can easily reach them while you’re cooking. Then, measure the width and height of the space where you want to install the shelves.
Cut two pieces of wood to these dimensions and drill holes in each piece for the screws. Next, attach the brackets to the wall using the screws. Finally, slide the shelves onto the brackets and fill them with your wrapping paper, spices, or other kitchen essentials.
These are the list of shelves you can DIY to help you organize your kitchen. By adding DIY kitchen shelves it will give extra space for your belongings and it will also make your kitchen look more stylish.