Complement the porch and yard in your house with the best outdoor chair. It might be a little pricey. Hence, why not try building one yourself?
There is nothing to worry about building your own outdoor chair, even if you are a beginner in woodworking skills. What is more, making this kind of chair by yourself will significantly lower the costs.
These DIY outdoor chair plans will help you create an attractive and comfortable piece of furniture for your yard or patio.
We’ve provide 26 different DIY outdoor chair plans that you can use as inspiration. These chairs are all made from materials that can be found at your local hardware store or even in your house, so they are perfect for anyone who wants to save money on their home improvement projects.
Table of Contents
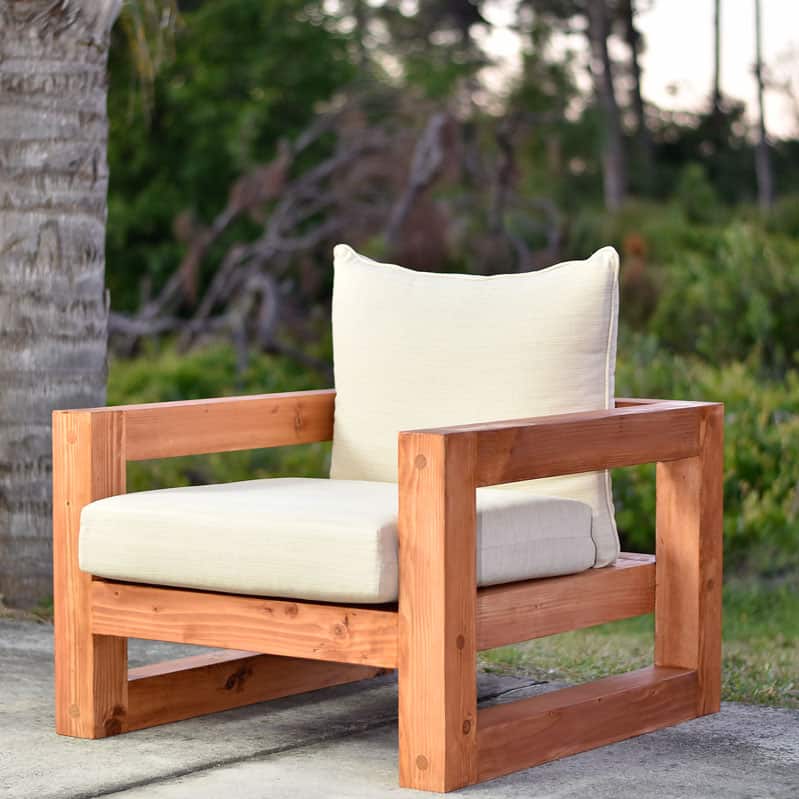
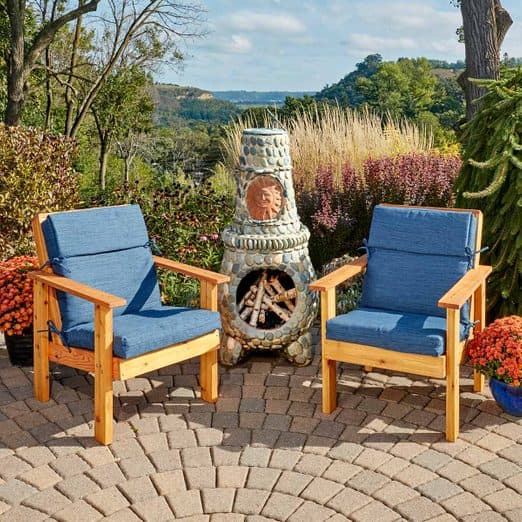
1. DIY Cozy Outdoor Furniture
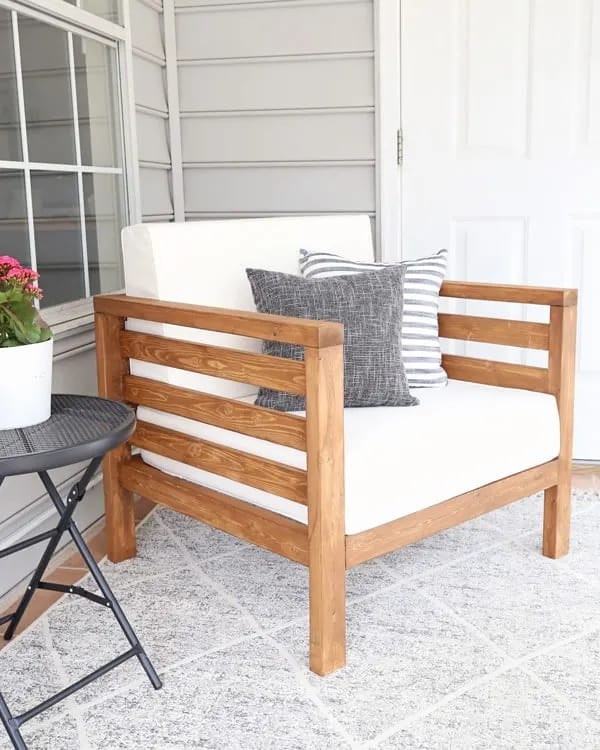
This kind of outdoor chair is the perfect project for anyone who loves spending time especially during summer. The cushion makes it extra comfortable, and the simple design means it’s easy to build. Best of all, this chair can be easily disassembled for storage or transport.
With the following supply list, you can create your own chair:
- Wooden boards
- Saw
- Drill
- Weather-friendly cushions
2. DIY Adirondack Chair Plans
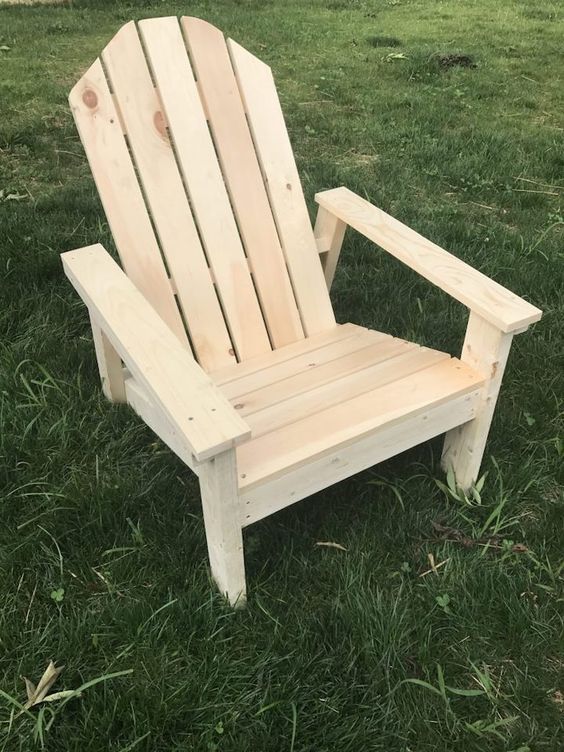
Make your own Adirondack chair that will be a cool feature in your yard. This classic design is fun and easy to build.
You will have a precious leisure time outdoor enjoying the summer breeze.
To make this kind of chair, you will need:
- Tape measure
- Plywood
- Circular saw
- Jigsaw
- Hammer
- Nail Gun
- Staple Gun
- Paint or Stain
3. DIY Outdoor Rocking Chair
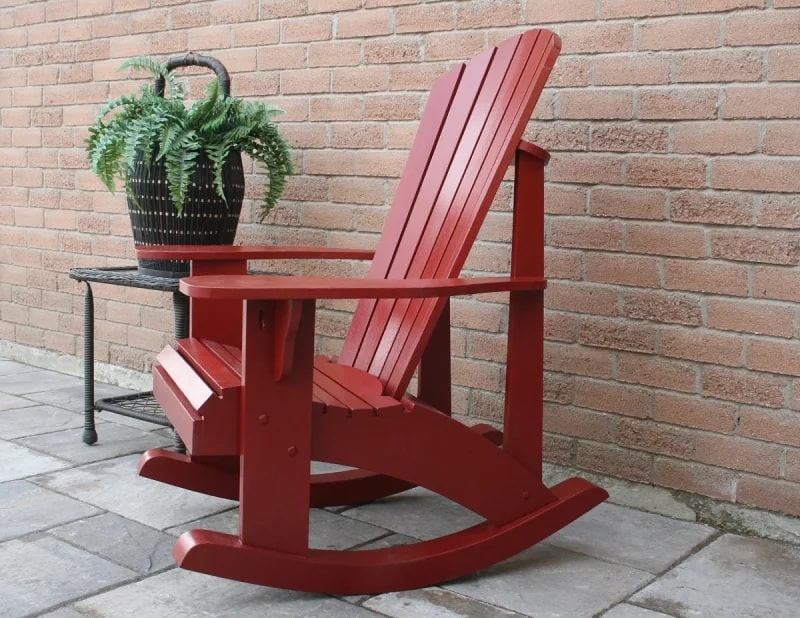
One of the advantages of this rocking chair is that it can be placed anywhere in the house, including the porch or patio. You can make this chair with some old pallets and a few other materials. The steps are easy to follow and make this an excellent project for beginners.
Supplies needed:
- Old Pallets
- Circular saw
- Jigsaw
- Hammer
- Nail Gun
- Staple Gun
- Paint or Stain
- Polyurethane
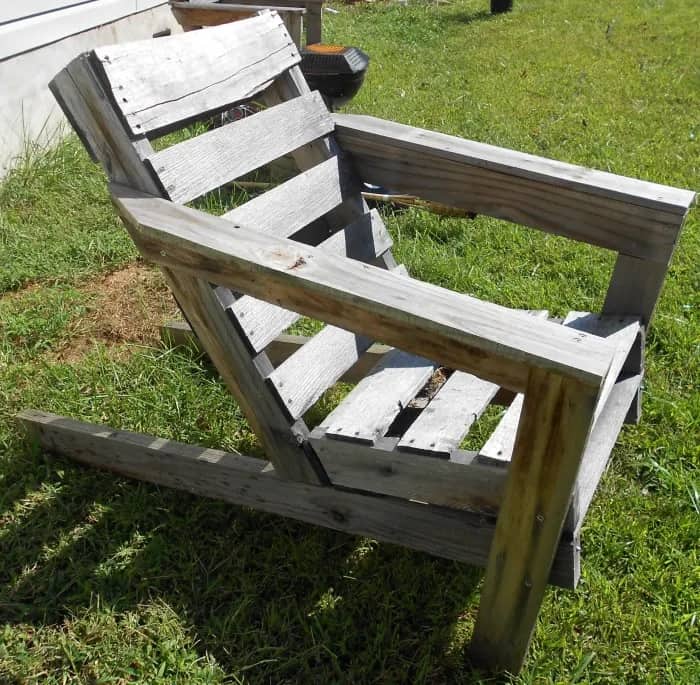
4. Budget Friendly Chair
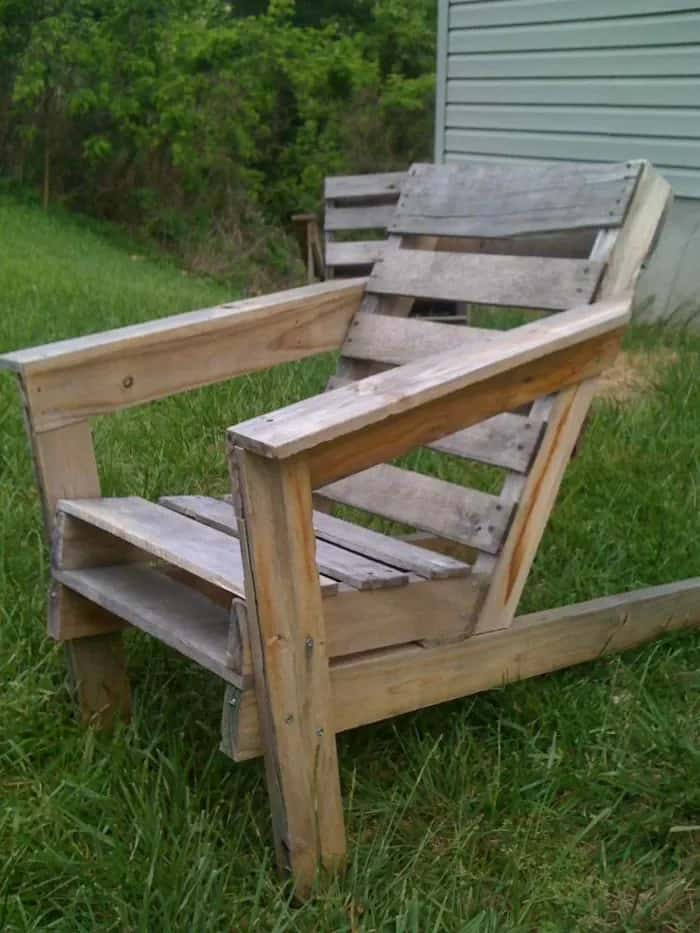
This sturdy chair is made from reclaimed wood, which is also stylish at the same time. It’s also easy to build, so you can enjoy your new chair in no time. Simply follow our step-by-step instructions and you’ll be sitting back and enjoying the outdoors in your new chair before you know it.
To get started, simply measure and cut the lumber to size according to the plans. Then, assemble the frame of the chair using screws or nails. When the frame is complete, add reclaimed wood slats to the seat and back for added comfort and style. Finish off your chair with a coat of sealer or paint in your desired color.
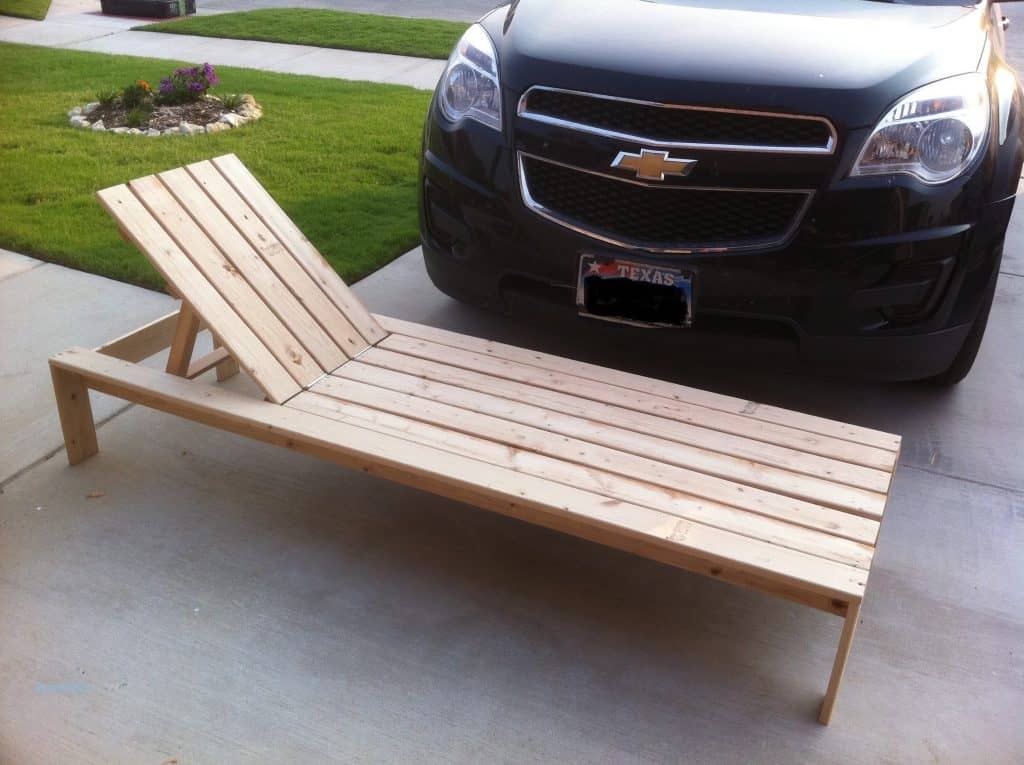
5. Choose the Modern Design
Rather than the classic slanted back and wide arm rests, this chair has a much more streamlined look. The lack of arms makes it much more comfortable to lounge in, and the high back provides ample support for your head and neck. The seat is also slightly tilted, so you can recline in style.
Ensure you choose the best material for your project like cedar or redwood or simply choosing pressure-treated lumber. Next, cut them to size according to your measurements. Assemble the frame of the chair and crosspieces to reinforce the structure. Then, add the seat and backrest.
After all, attach legs to the frame and finish by adding any trim or embellishments you desire.
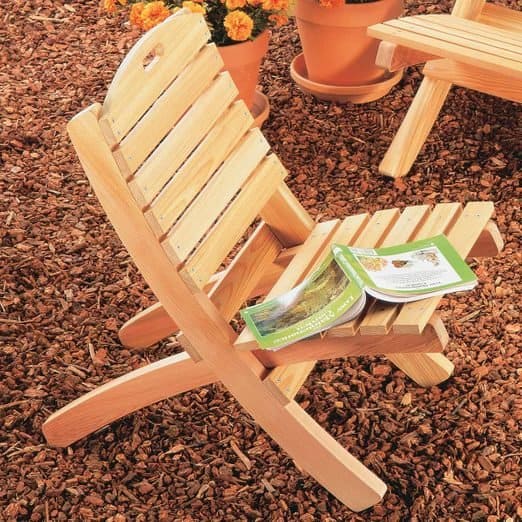
6. DIY Folding Outdoor Chair
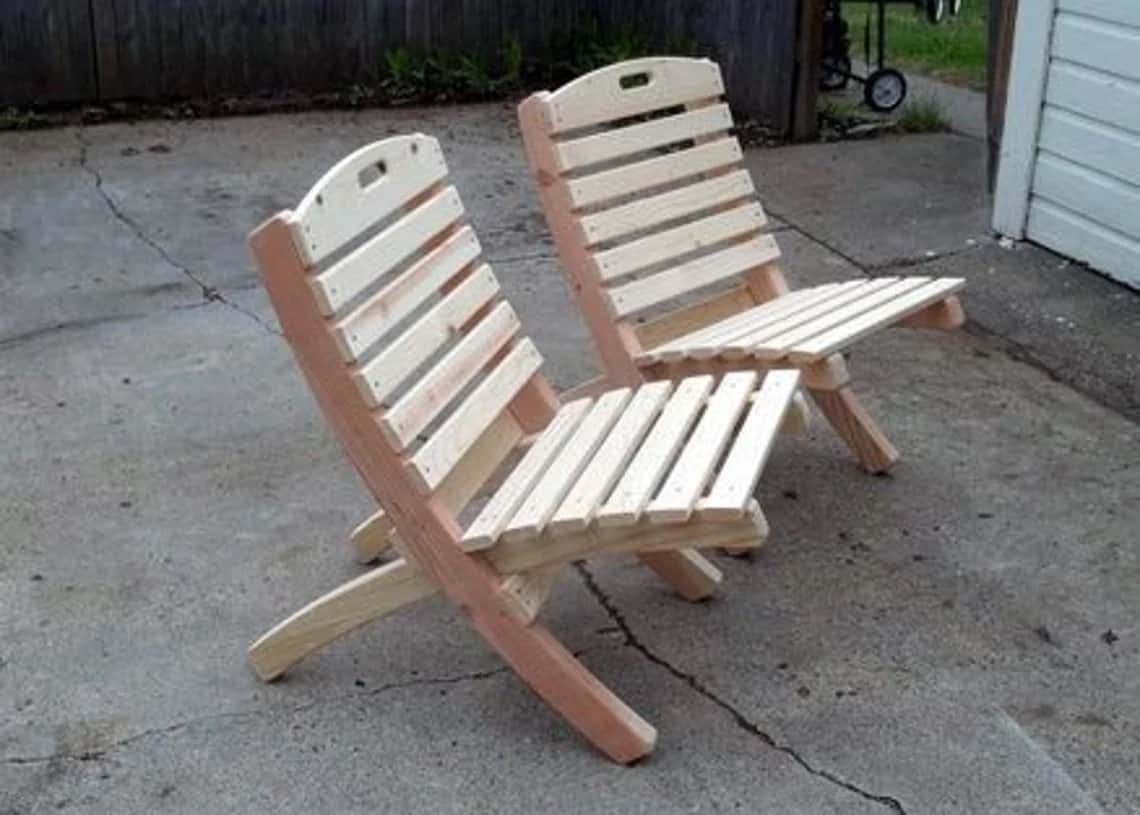
This DIY Folding Outdoor Chair is easy to build and only requires a few materials. The best part is that it can be easily folded up and stored away when not in use.
First, cut two pieces of plywood to the following dimensions: 18″ x 32″ for the seat and back, and 12″ x 18″ for the legs. Next, use a jigsaw to cut out the seat and backrest from the larger piece of plywood. Then, cut the legs to size from the smaller piece of plywood.
Once all of your pieces are cut, sand them down smooth with fine-grit sandpaper. Then, assemble the chair by attaching the legs to the seat and backrest using wood screws. Be sure to pre-drill pilot holes before screwing in the screws. Finally, finish off the chair by staining or painting it to your desired color.
7. Easy Outdoor Chair Plans
The perks of this easy project is that it is a beginner friendly project that can be completed in a couple of hours. Also, this chair costs less than $20 to make!
What you’ll need:
- Drill
- Jigsaw
- Hammer
- Nails or screws
- Paint or stain
First, cut your boards to size. We cut our boards at 24 inches, but you can adjust the length to fit your needs. Once the boards are cut, use a drill to make two pilot holes in each board. These pilot holes will make it easier to screw the boards together later.
Next, take two of the boards and attach them together using screws or nails. Repeat this step until all of the boards are attached.
Now, it’s time to add the back support! Cut a board to fit between the two side pieces and attach it using screws or nails. Finally, add a seat cushion and enjoy your new chair.
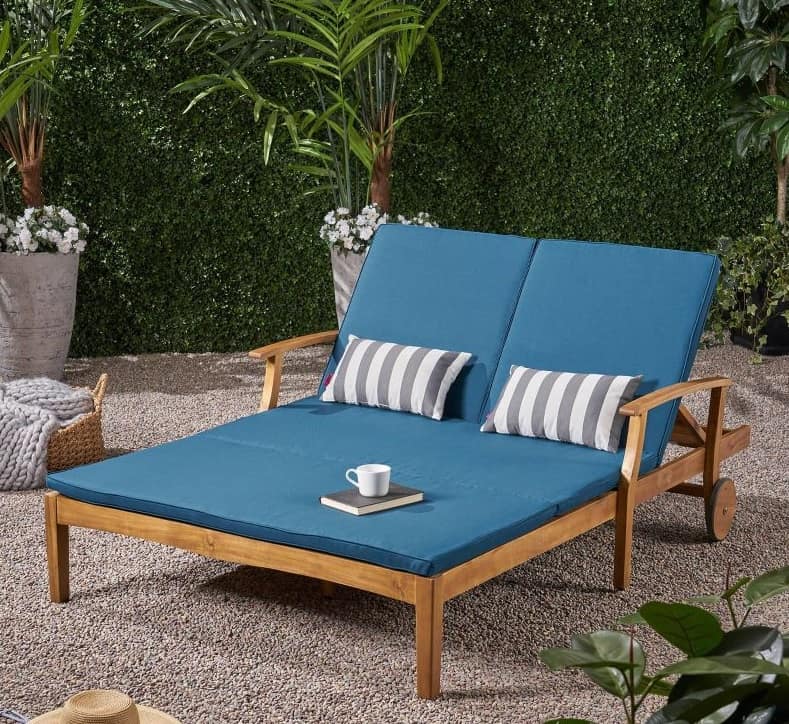
8. Outdoor Lounge Chair Plans
A comfortable outdoor lounge chair is a must-have for any backyard oasis. Fortunately, with a little time and effort, it’s easy to build your own. This simple project is designed for anyone to be able to build, regardless of skill level. The first step is to choose the right materials. For the frame of the chair, you’ll need two 2x4s and two 1x4s.
For the seat and backrest, you can use either planks of wood or outdoor fabric. If you’re using wood, make sure to choose a weather-resistant variety like cedar or teak. Once you have your materials, it’s time to start building!
Cut the 2x4s to size and assemble the frame using screws or nails. Then, attach the seat and backrest. If you’re using fabric, simply staple it in place.
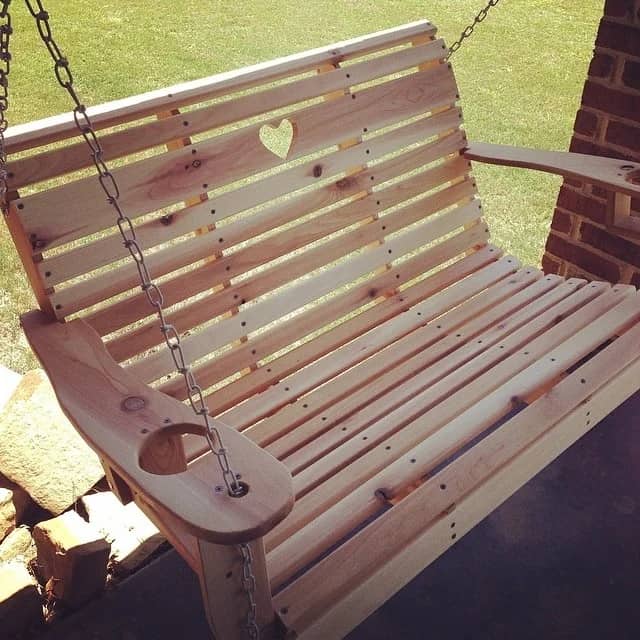
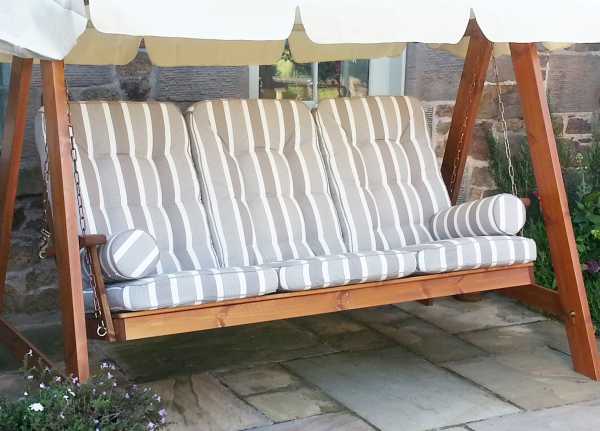
9. DIY Porch Swing Chair
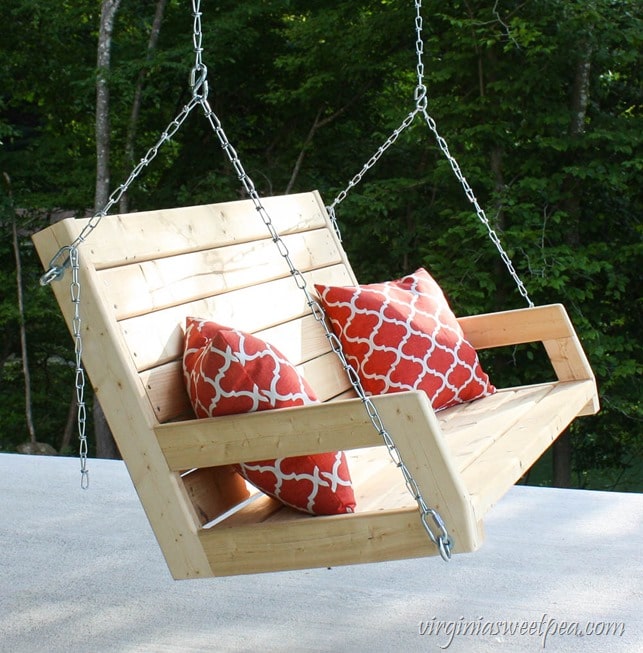
Enjoy the summer breeze in this comfortable seat. You can build this porch swing chair for about $130. This project will take you several hours to complete. But it will be worth it when you can relax in your new chair. Other than that, it is not a big deal if you are a newbie in woodworking projects. The plan is straightforward and the steps are easy to follow.
You can find the tutorial for this project here:
Materials needed:
- Pine wood
- Cedar boards (optional)
- Lag screws & washers
- Paint or stain (optional)
- Porch swing chain kit
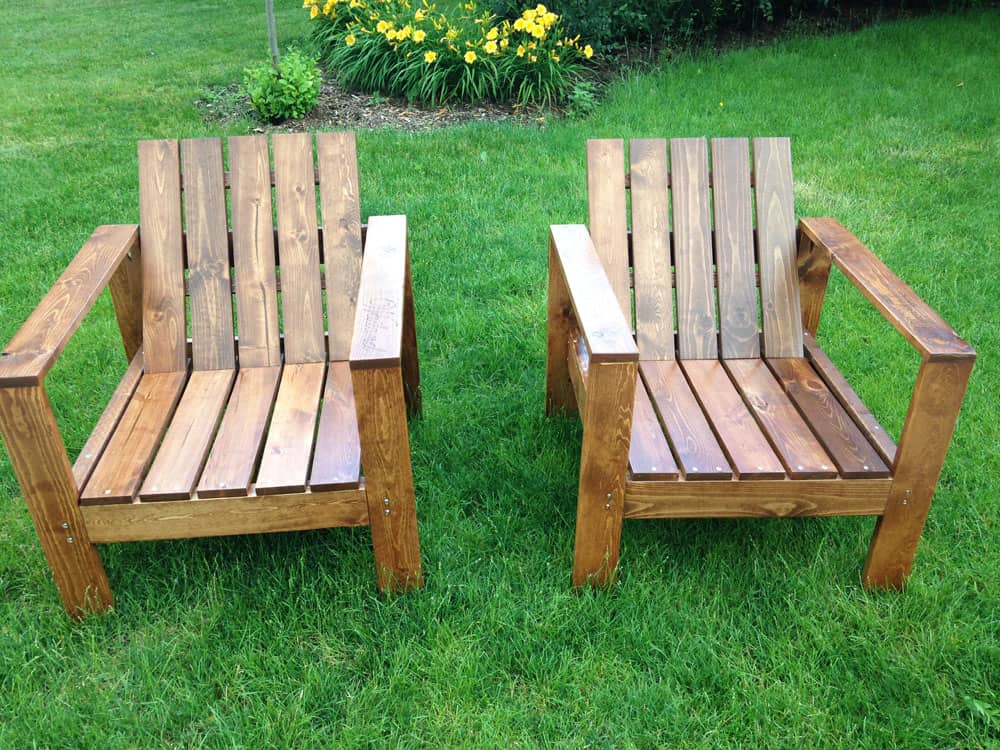
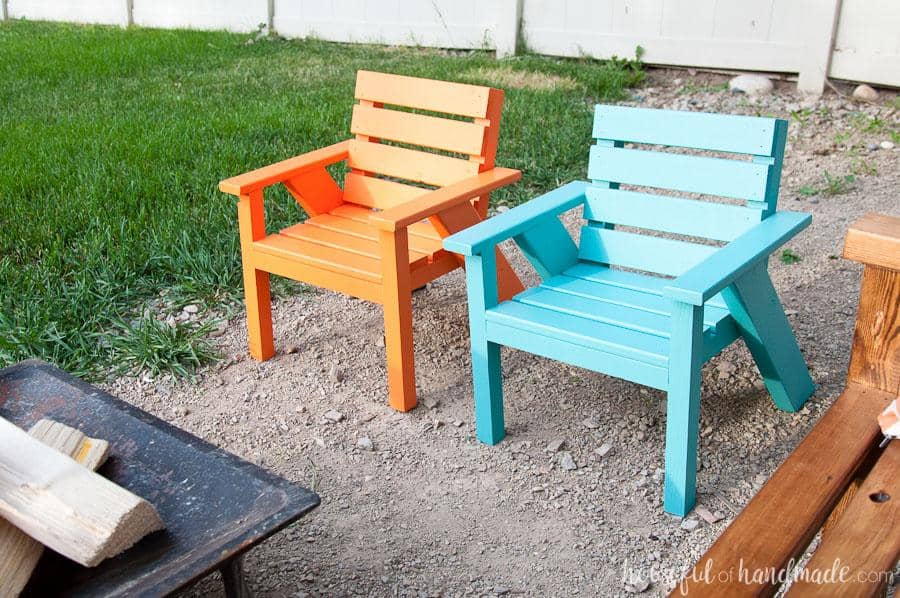
10. Double Outdoor Chair Plans
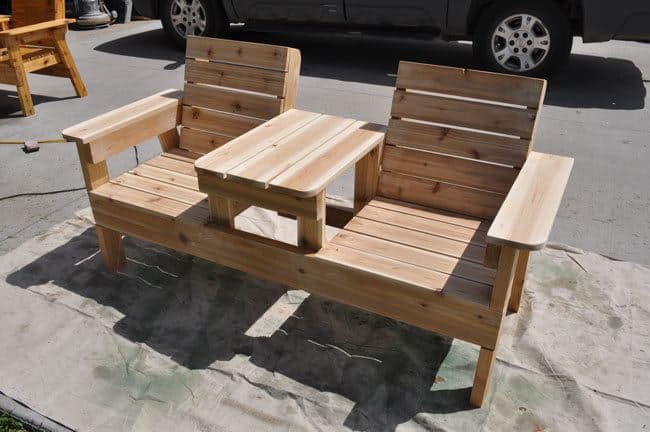
You could even build them for less if you use pallet wood or reclaimed lumber. The design features a slatted back and seat, which not only looks great but is also very comfortable. If you want to build these chairs, you’ll need two 2x4s for the frames, five 1x6s for the slats, and one 2×2 for the legs. You’ll also need screws, sandpaper, wood glue, and exterior paint or stain.
To build the chairs, start by cutting the 2x4s to size for the frames. Then cut the 1x6s into slats and the 2×2 into legs. Assemble the frames using screws and glue, then attach the slats with screws. Finally, sand everything down for a smooth surface and finish with paint or stain.
11. Oversized DIY Patio Chair
Building an oversized outdoor chair is a great way to add additional seating to your patio or deck. This chair is also perfect for relaxing in after a long day, which can also accommodate more people.
To build this chair, you will need:
- Tape measure
- Plywood
- Circular saw or hand saw
- Jigsaw
- Drill
- Cordless drill
- Power sander
- Staple gun and staples
- Outdoor fabric
- Pillow stuffing
- Paint or outdoor sealant
First, cut the plywood pieces for the chair seat and back according to the measurements in the plans. Next, use a jigsaw to cut out the armrests from the remaining piece of plywood. Drill holes for the dowels that will join the seat and back pieces to the armrests.
Sand all of the pieces smooth, then paint or seal them to protect them from the elements. Assemble the chair according to the plans, then staple outdoor fabric over the plywood. Add stuffing to the cushions and enjoy your new chair.
12. Stain the Wooden Chair
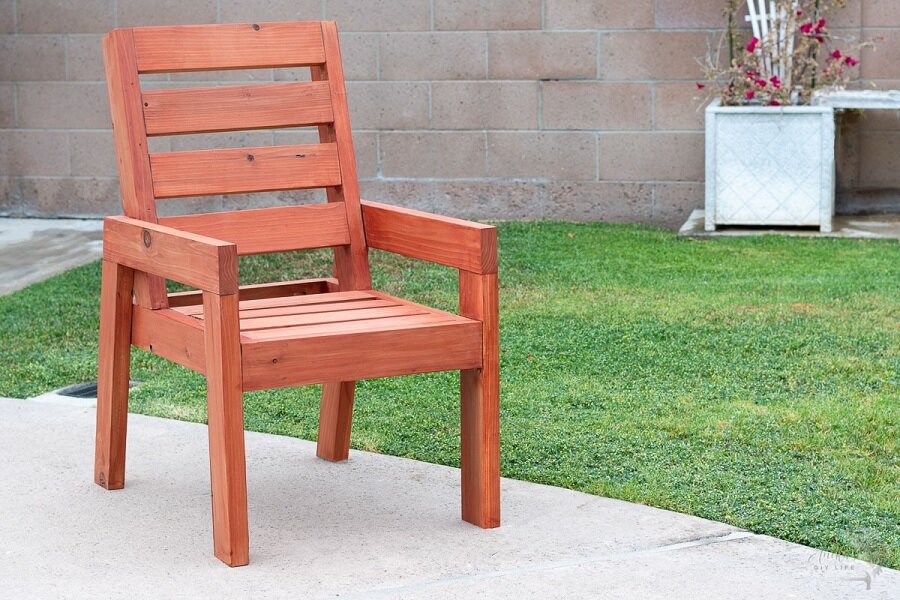
Challenge your creativity and woodworking skill by building this DIY outdoor chair. The design is inspired by the Adirondack style with its wide arms and slanted backrest. You can build it using either cedar or pine lumber.
Materials:
- Mendocino redwood
- Exterior wood screws
- Stain or paint (optional)
Tool Lists:
- Circular saw
- Jigsaw
- Power drill
- Tape measure
- Paintbrush
- Sander
13. Kids Outdoor Chair Plans
This is a great weekend project that can be completed in just a few hours, and it’s a great way to teach your kids the basics of woodworking.
Plus, they’ll love having their very own chairs to sit in when they’re spending time in the yard or garden. To get started, you’ll need to gather a few supplies.
You’ll need some wood boards, a saw, sandpaper, nails, and paint or sealer. Once you have all of your materials, you can begin following these easy steps. Cut the wood boards to size according to the dimensions in the plans.
Sand down the edges of the boards until they’re smooth. Assemble the chair using nails or screws. Apply paint or sealer to protect the wood from the elements.
14. Hammock Outdoor Chair Plans
Hammocks are an excellent way to spend time outdoors. They come in all shapes and sizes, so you can find one that suits your needs perfectly.
A hammock chair is also relatively easy to make. It just takes some rope for the bottom ties as wood or metal frame material, hooks on either side of where ever person would sitting when using this type seat.
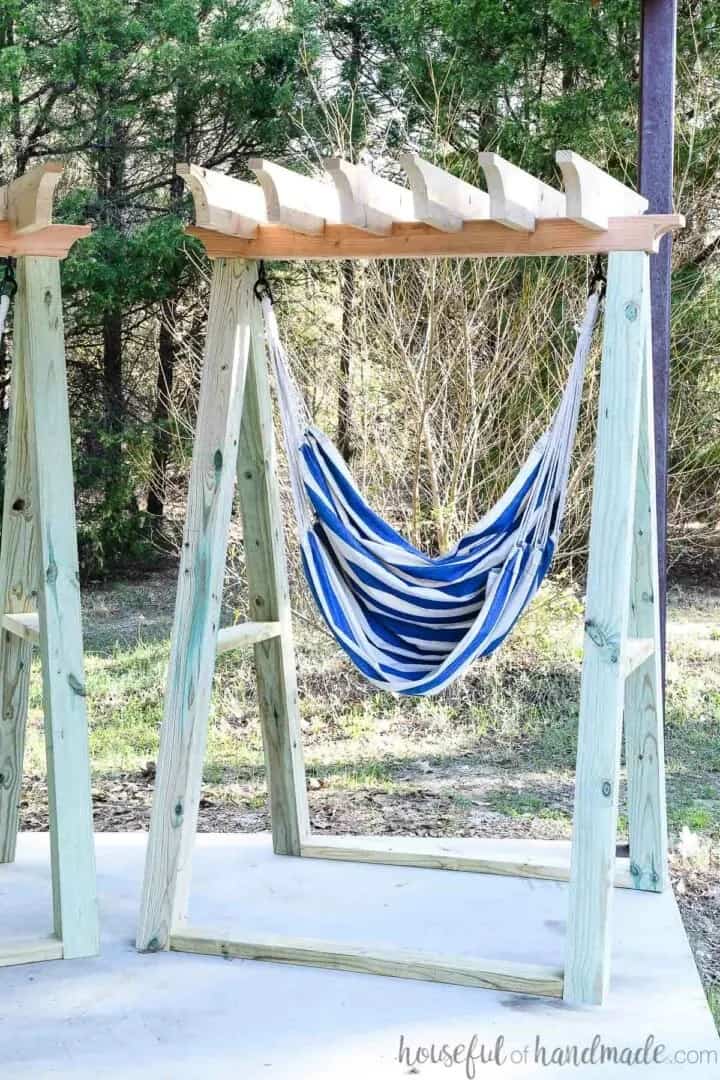
15. Hanging Outdoor Chair Plans
Hang the outdoor chair on the porch where this will make the space feels bigger. This hanging chair is also a great idea if you don’t have enough space to put the regular outdoor chairs. You can make this hanging chair by following this tutorial.
But first, get the supplies:
- Plywood
- Rope or Chain
- Wood stain or Paint (optional)
16. Garden Bench Plans
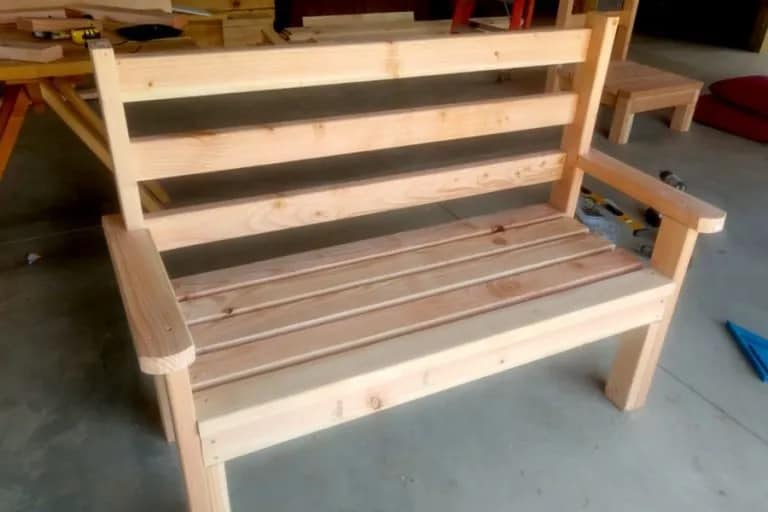
Enjoy the beauty of your garden by sitting on this garden bench. With some easy to find material, you can build your own garden bench in no time.
You will need some lumber, a drill, screws, and paint or stain. To begin, cut the lumber to size. Then, use the drill to create pilot holes in the lumber. Next, screw the pieces of lumber together using screws. Finally, paint or stain the bench as desired.
17. Add the Outdoor Cushions
This unique outdoor chair features a swinging seat, but it also has a built-in footrest that makes it perfect for relaxing in the sun.
Along with some basic carpentry skills and a little bit of time, you can build this great chair for your porch or yard. For an extra comfort, you can add a cushion with any color as you desire.
What you will need:
- Tape measure
- Plywood
- Circular saw
- High-grit sandpaper
- Stain or paint
- Cushion
- Chains
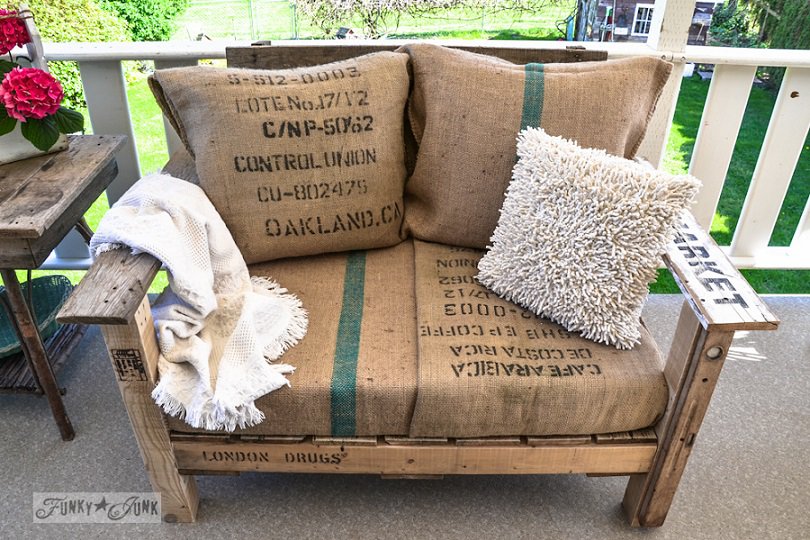
18. Wooden Pallet Outdoor Chair Plans
The best part is that this project can be completed in just a few hours, and for a fraction of the cost of purchasing a similar chair from a store.
To get started, simply gather together a few pallet boards and some simple tools. Once you have everything you need, follow the step by step plans below to construct your very own pallet chair.
- Begin by dismantling the pallets. Carefully pry apart the boards using a crowbar or hammer, being careful not to damage them.
- Cut the boards to size using a saw. You will need four boards for the seat and backrest, and two boards for the legs.
- Assemble the frame of the chair by attaching the seat and backrest boards to the leg boards with screws or nails.
- Add cross braces between the legs for additional support, if desired.
- Finally, sand down any rough edges and finish the chair with paint or sealant to protect it from the elements.
19. Folding Lawn Chair Plans
To save space, this kind of chair can be nested together when not in use. Simply fold one chair flat and place it on top of another chair, then secure them together with a bungee cord or strap.
When it’s time to use them again, simply unfold both chairs and they’ll be ready for use. Building your own folding lawn chair is a great way to save money and get exactly the chair you want. Plus, it’s a fun project that you can complete in just a few hours.
20. Rustic Outdoor Chair Plans
Accentuate the beauty of nature with this outdoor chair. The simple design means that it can be built from inexpensive and readily available materials. And the rugged beauty of the finished product will add character to any outdoor space. So take some time to gather the supplies and follow the instructions. Also, you only need some basic woodworking tools.
21. DIY Outdoor Chair Plans: Simple Chair Design
The simple design will match any kind of design in your house, which is worth having. On the other side, it is an easy project you can do during your free time and can be done within hours. Plus, it is perfect if you are a new DIYer.
Simple materials list:
- Two pieces of wood
- Nails
- Hammer
- Paint or varnish (optional)
- Cushions
How to make the DIY outdoor chair:
Start by nailing the two pieces of wood together. Make sure the nails are evenly spaced out.
Once you have the frame of the chair, start painting or varnishing it (optional). When the paint is perfectly dry, you can start attaching the cushion to the chair.
22. PVC Pipe Outdoor Lounge Chair
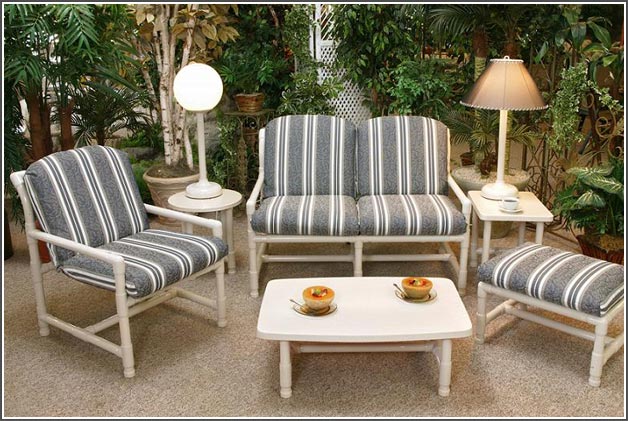
This must be one of the best affordable choice if you are planning to add some extra chairs outdoor. Besides affordable, the PVC also weather-friendly, which is more durable. It’s simple to build using basic PVC pipes and fittings, and you can customize it with any cushion or fabric of your choice. Plus, it’s lightweight and easy to move around, so you can enjoy your new chair in any spot you like.
23. Outdoor Movie Theater Chair

This project is perfect for anyone who loves spending time outdoors, and it’s a great way to add some extra seating to your backyard. This chair is comfortable and easy to build, and it’s also a great project for anyone who loves spending time outdoors.
To build this chair, you’ll need:
- Plywood
- One pound of eight-penny nails
- Outdoor paint or stain
- A drill
- A saw
24. DIY Camping Stool
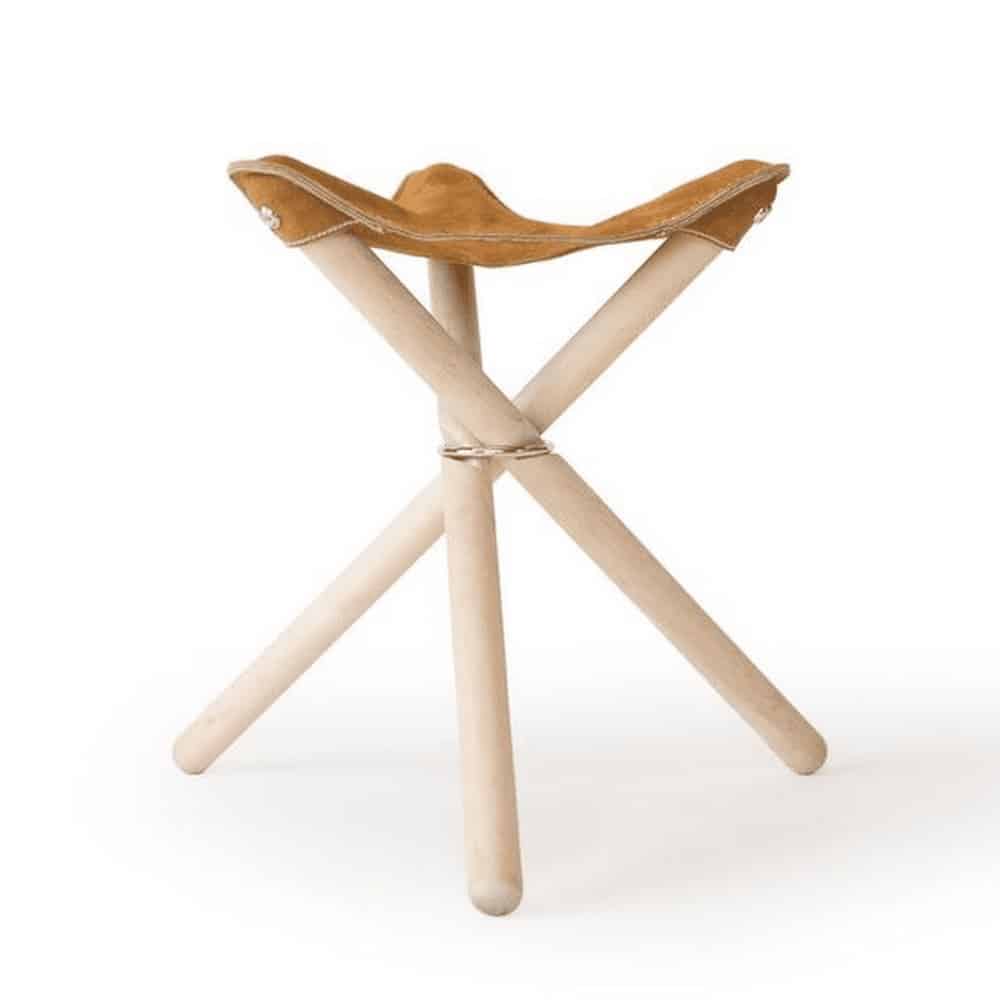
A foldable camping stool is an essential piece of gear for any camper, hiker, or wildlife photographer. Not only does it provide a comfortable place to sit, but it also fold up small enough to fit in your backpack. The best part about a foldable camping stool is that it can be easily made at home with a few simple supplies.
What you will need:
- 3 pcs–1 1/8” Birch hardwood dowels
- 1 pc – brass 2.75” bolt
- 1 pc–1.5” eye-hole bolt
- 2 pcs–brass acorn nuts
- 3 pcs–brass washers
- 3 pcs–brass finishing washers
- 3 pcs -brass 1” wood screws
- Finish
- Leather or other heavy material for the seat
With these materials, you can easily make your own foldable camping stool that will serve you well on all your adventures.
25. Wine Barrel Outdoor Stools
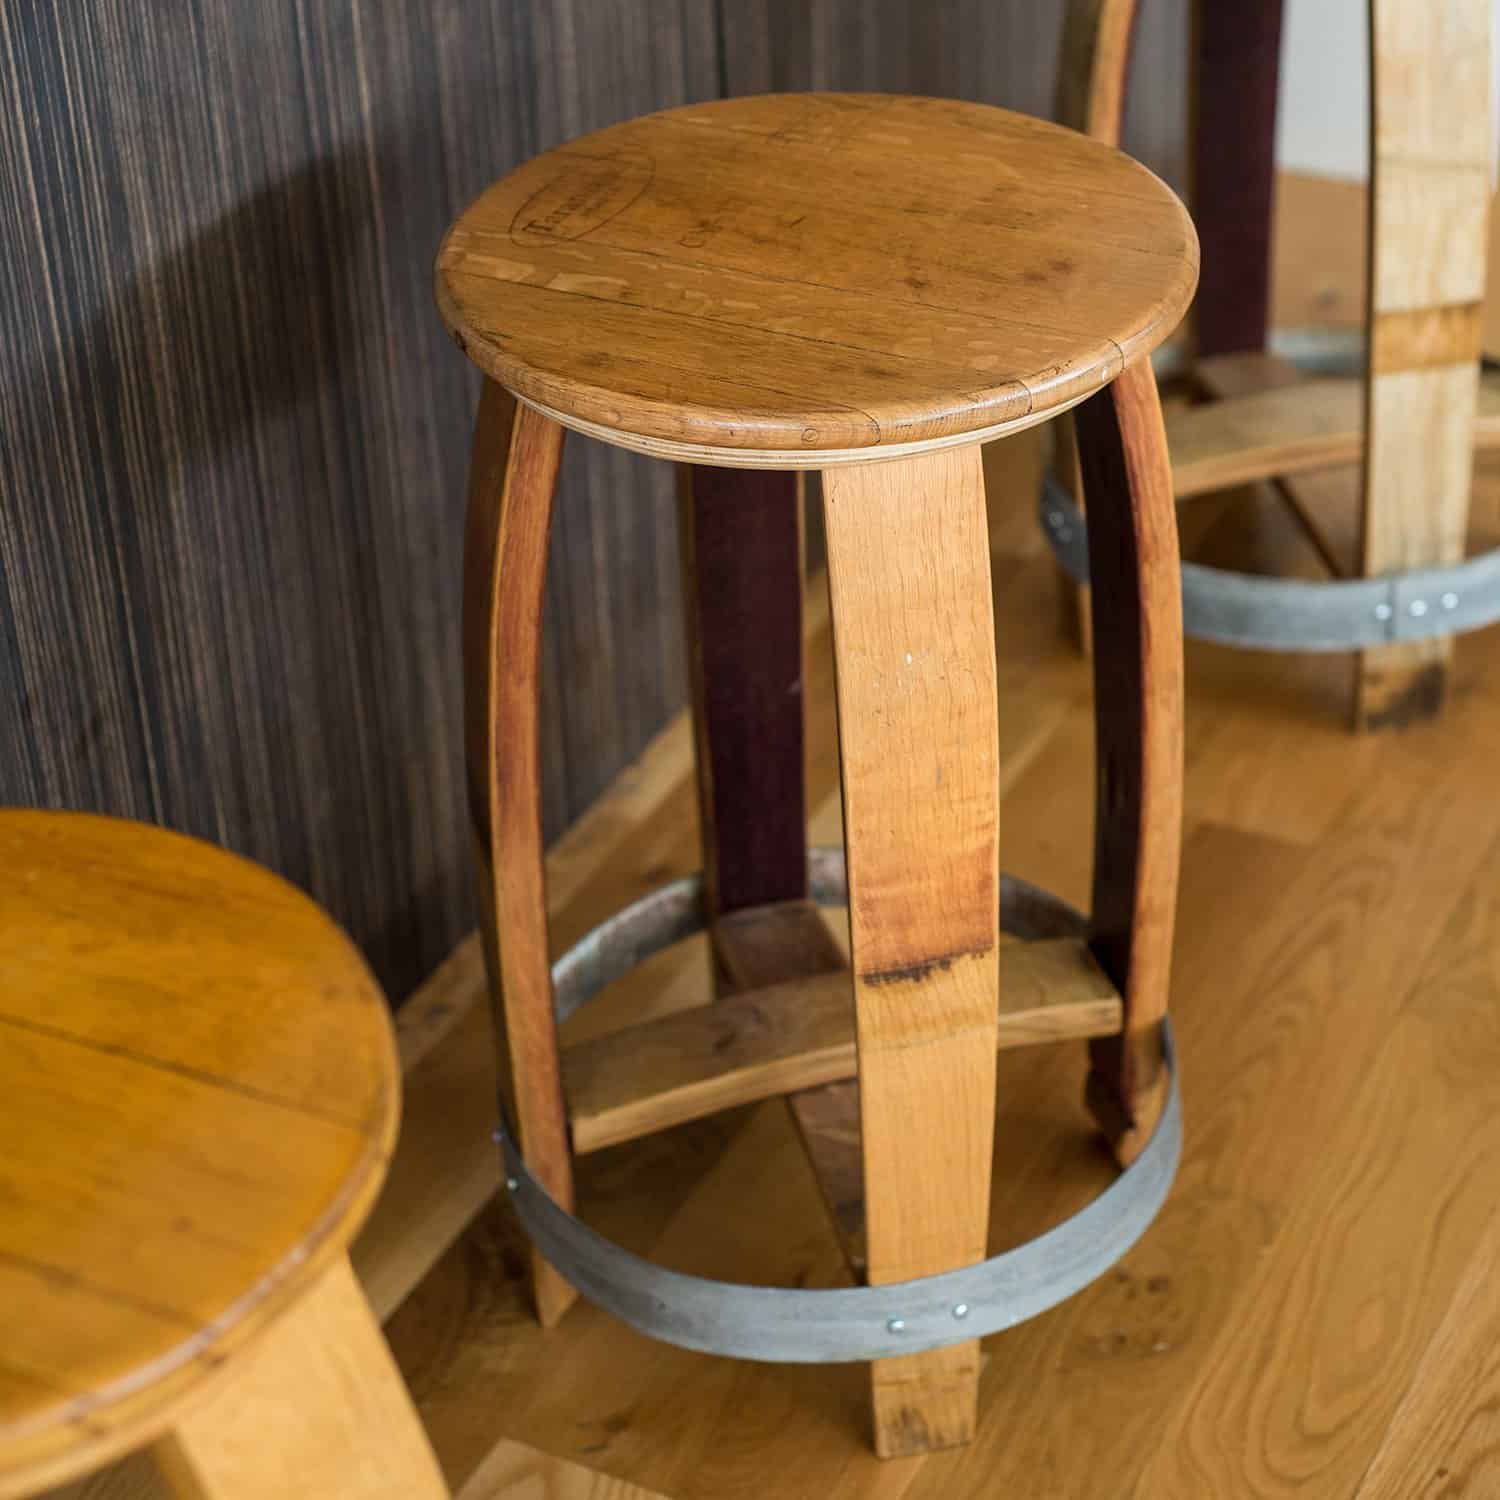
This is a great DIY project for anyone who enjoys working with wood. You can find barrels at your local winery or online.
When you have your barrels, you’ll need to cut them in half lengthwise. Then, using a jigsaw, cut out the circular seat. For the legs, you can either use the remaining barrel staves or some 2×4 lumber. Attach the legs to the seat using screws and glue. Finally, sand down the edges and finish as desired. These stools are sure to be a conversational piece at your next outdoor gathering.
26. Wooden Cable Spool Adirondack Chair
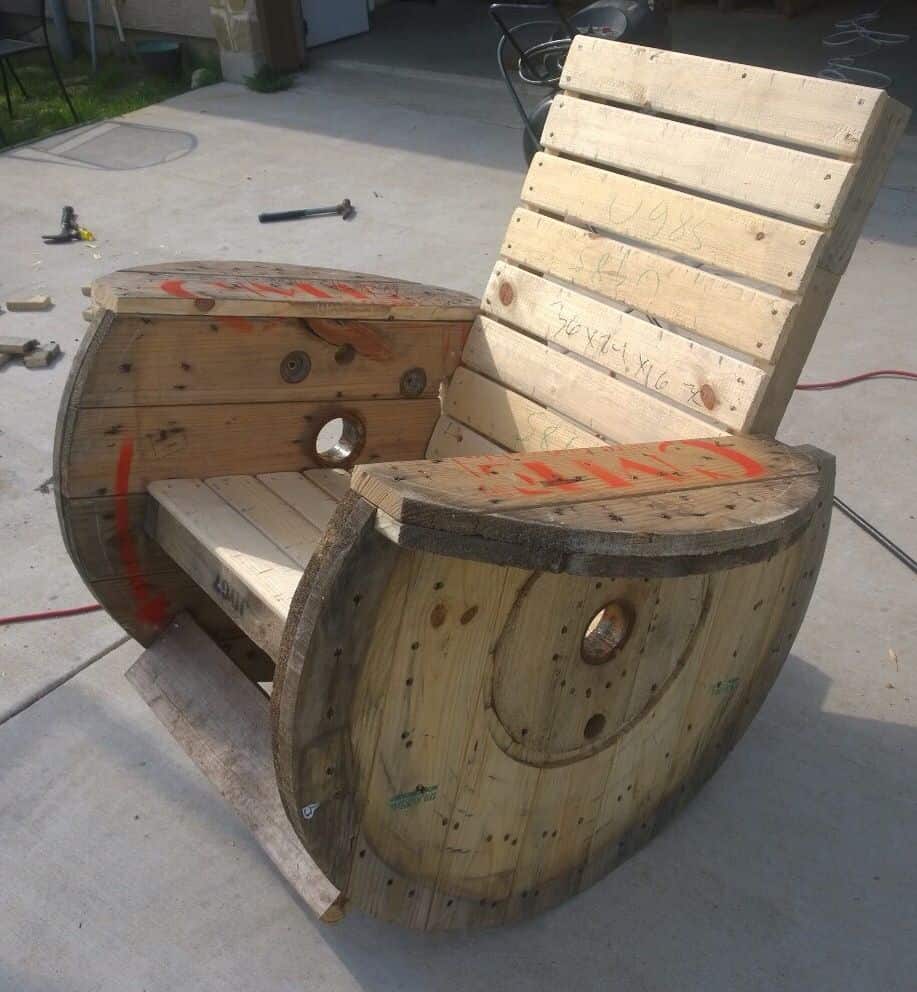
Upcycle the wooden cable spool into a rocking chair that will be a perfect feature in your yard, and be the best place to stay during the summer day. To get started, you’ll need to remove the top and bottom panels from the spool. Then, sand down the edges of the spool to smooth them out. Next, use a jigsaw to cut out the back and seat of the chair.
After the back and seat are cut out, sand them down until they’re smooth. Finally, attach rocking chair runners to the bottom of the spool and add a cushion to the seat.
Building your own outdoor chair is a fun and easy project that can be completed in just a few hours. With these 26 DIY outdoor chair plans, you can choose the perfect design for your porch or yard. So gather your materials and get started today.