The kids bookshelf can be the perfect solution to accommodate their book collection and help the room clean.
It is durable and able to hold a decent amount of weight, which is perfect for storing heavier items. It can accommodate a small or large collection, and it’s a great way to keep your child’s favorite books organized and within easy reach. Ensure it accessible so it can also easily be arranged when you finished reading some books.
In this blog post, we will provide 28 easy DIY kid bookshelf plans that can get it done quick and make sure their space feels like home again.
Table of Contents
1. DIY Bookshelf with Simple Step
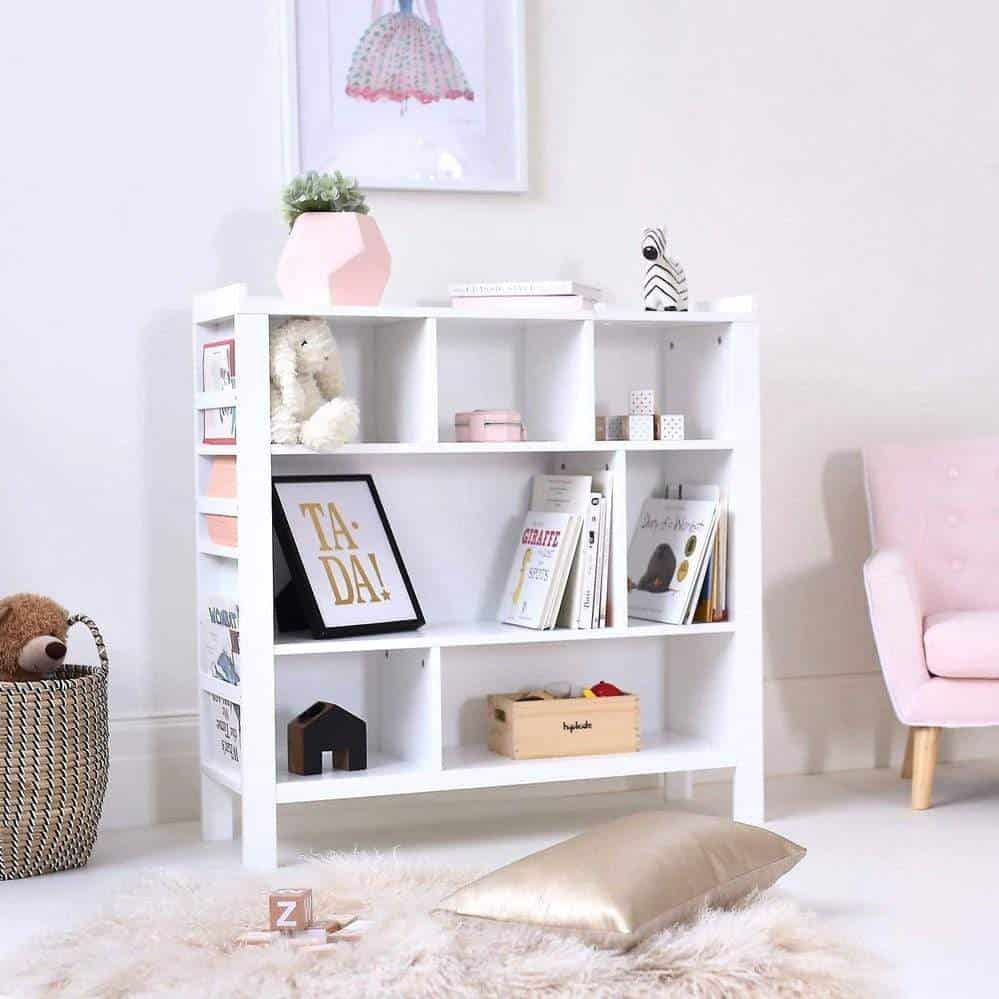
This bookshelf is designed with both kids and parents in mind. The clean, white lines will complement any child’s bedroom or playroom, and the open shelves make it easy to find just the right book. On the other side, this piece of furniture can easily blend into any room decor.
What you’ll need:
- White paint
- Paintbrush
- Wooden boards (cut to size)
- Nails
- Hammer
Instructions: Paint the wooden boards white using a paintbrush. Once dry, nail the boards together to create a shelf. Place in your child’s room or playroom.
2. Tree Bookshelf
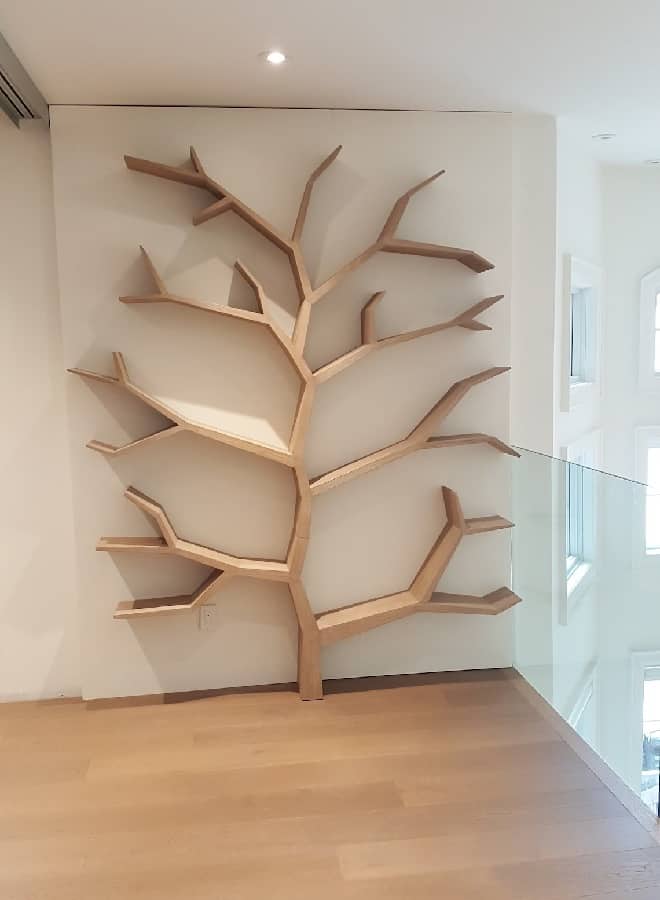
This sturdy bookshelf is made from sustainable materials and features a beautiful tree design. The bookshelf has five levels, so it can accommodate a growing collection.
The top level is also removable, making it easy to add or remove books as needed. The Tree Kids Bookshelf is a great way to encourage your child to read more, and it makes a beautiful addition to any room.
Here is a list of everything you’ll need to build a tree-shaped bookshelf for your little one:
- One large piece of plywood
- One smaller piece of plywood
- Paint or stain
- Ruler or measuring tape
- Circular saw
- Jigsaw
- Drill
- Screws
- Toggle bolts
3. DIY Corner Book Storage
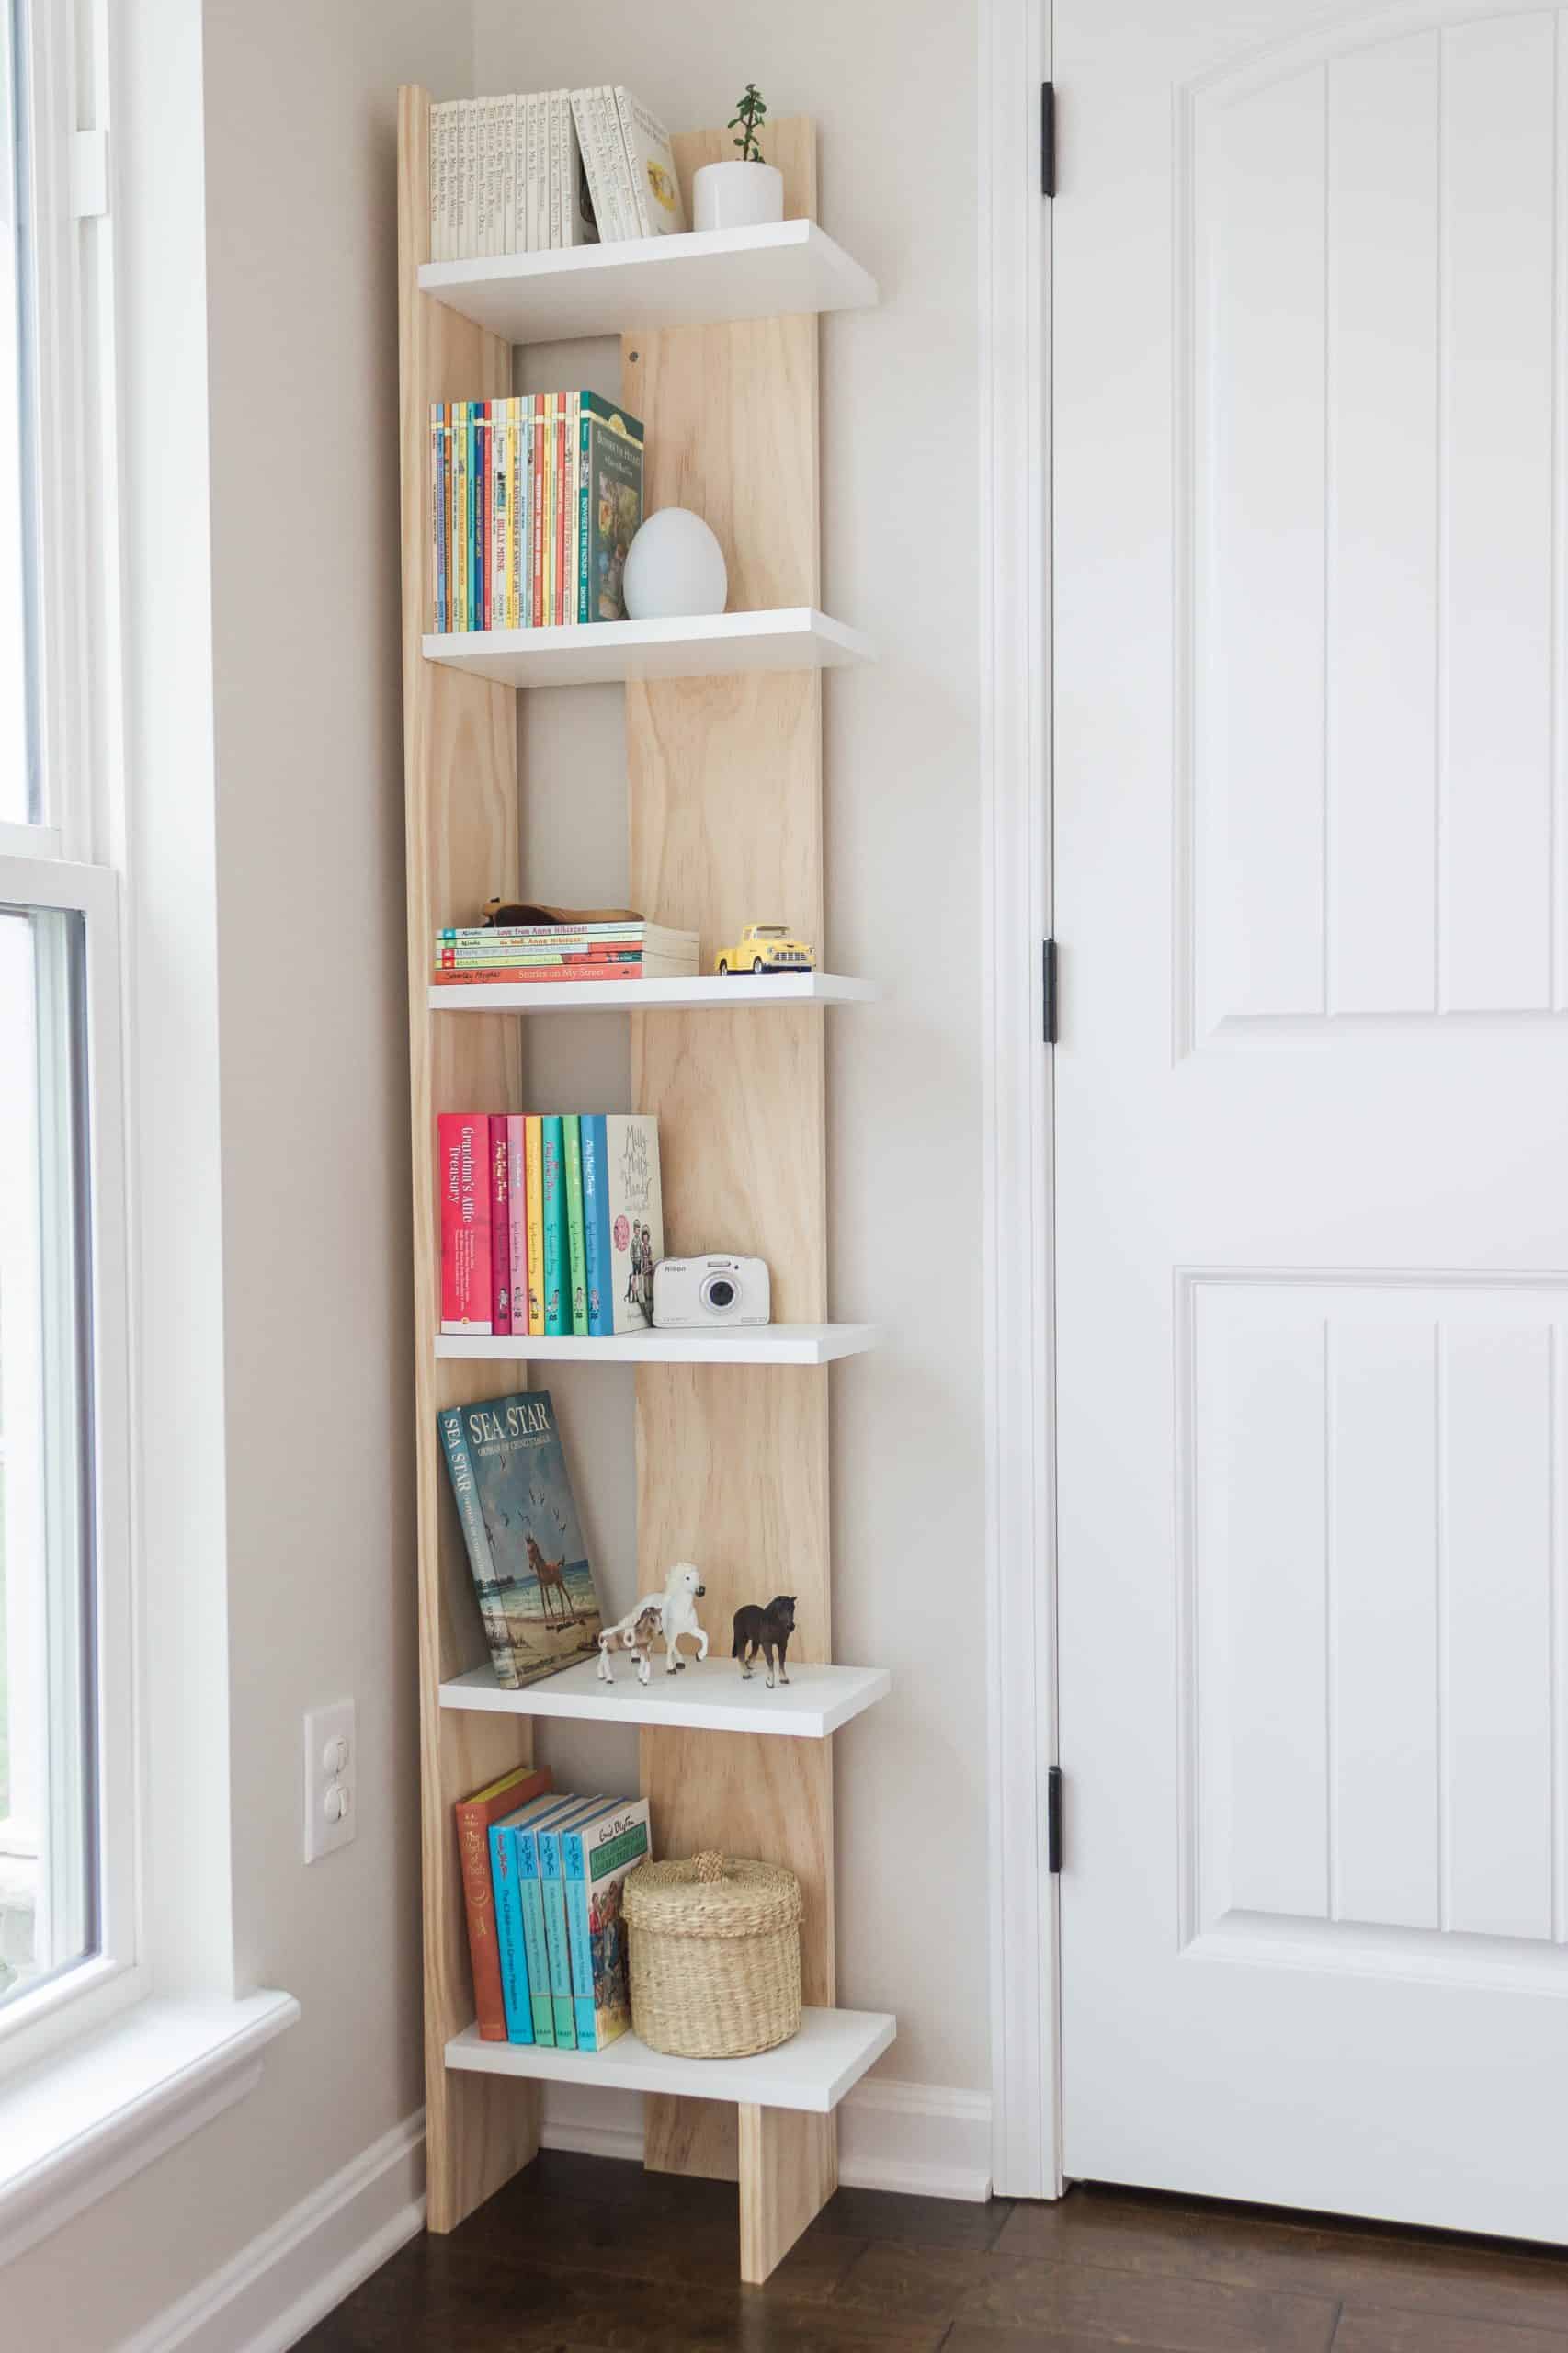
Installing the bookshelf in the corner of the kid’s playroom can be a smart way to maximize the limited area. The thing is that it can be done within hours during your leisure time.
To get started, you’ll need to cut four boards to the same length. Next, attach the boards together using wood glue and clamps. Once the glue has dried, sand the edges smooth. Then, paint or stain the bookshelf as desired. Finally, add some decorative details like bookends or wall decals.
4. IKEA Bookshelf Hacks
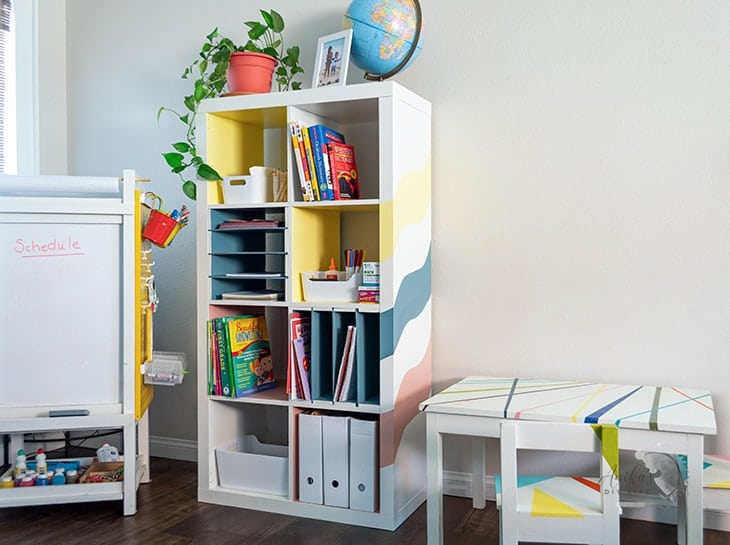
With a few simple supplies, you can turn an IKEA bookshelf into a fun and functional storage piece. For added durability, consider adding felt pads to the bottom of each shelf. This will help protect the finish from scuffs and scratches.
If you want to add a personal touch, consider stenciling or painting the shelves. You can also use decals or fabric to create unique designs.
5. Floating Bookshelves
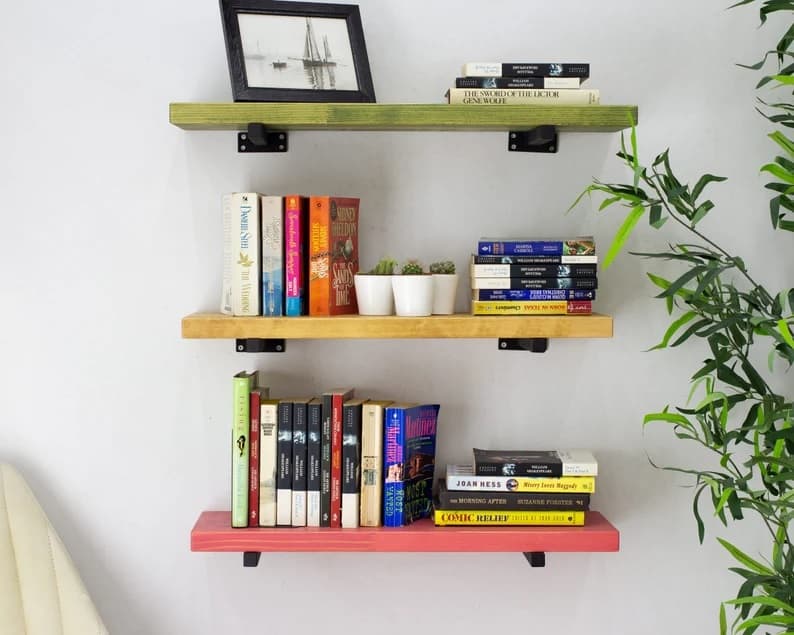
It is the smart hack to free up space of the playroom. It is not only good to organize books but also can act as a beautiful display for the room.
You can make it more attractive by adding colorful LED lights behind the shelves. It will surely be loved by your kids and they will spend more time reading books.
To make this DIY bookshelf, you will need some wooden boards, drill, screws, and brackets. First, cut the wooden boards into equal sizes according to the desired length of your bookshelf. Then, drill holes on both ends of each board. Next, connect the boards together using screws and brackets. Finally, install the shelves on the wall using screws and wall anchors.
6. DIY Reclaimed Wood Kids Bookshelf
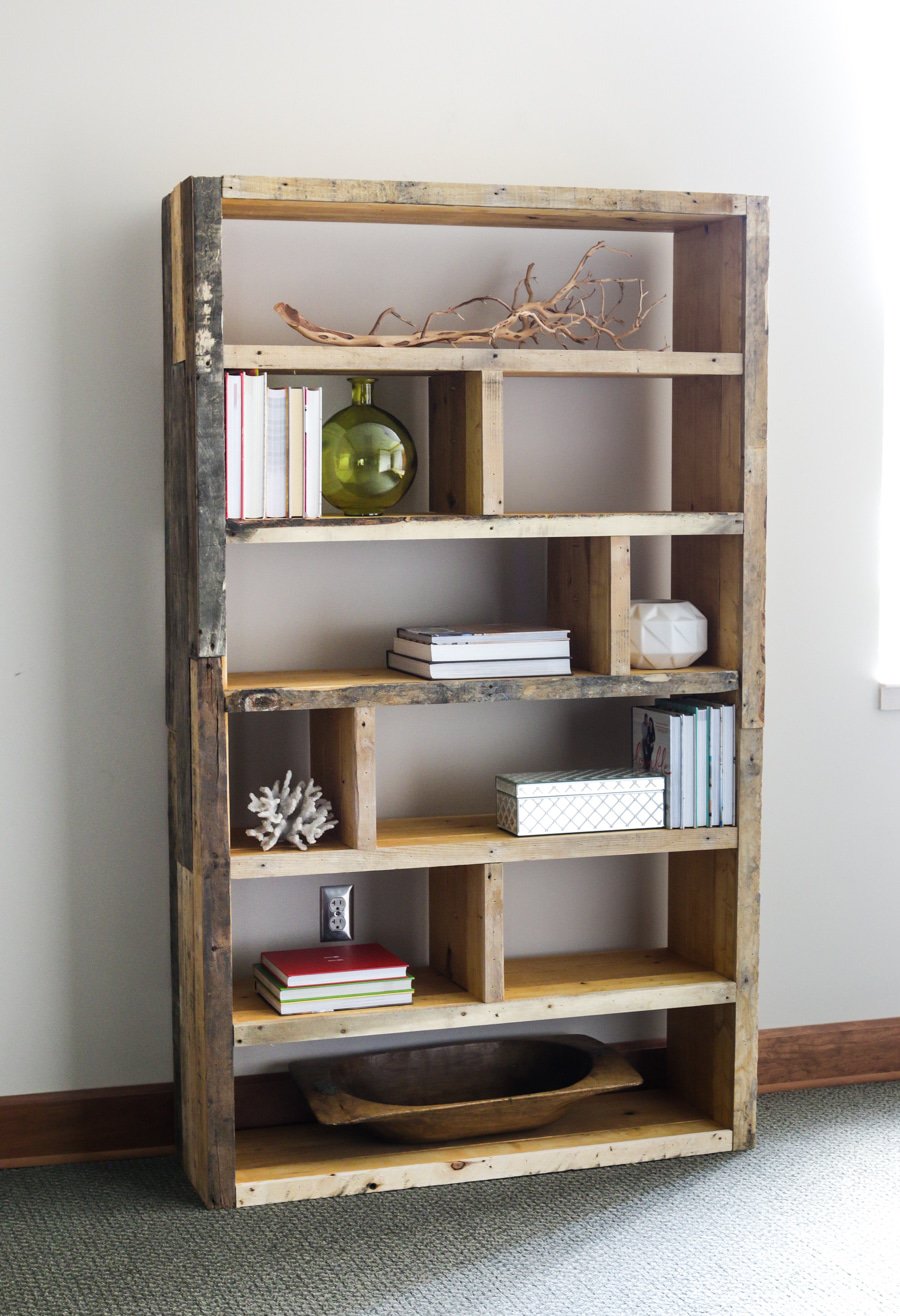
This DIY bookshelf is made from reclaimed wood, so it has a rustic look that will fit in with any decor. Plus, it’s easy to build; all you need are some basic tools and supplies.
Best of all, the bookshelf can be customized to fit your child’s needs. For example, you can add shelves of different heights to accommodate larger or smaller books. You can also paint or stain the wood to match your child’s room.
7. DIY Rain Gutter Bookshelves
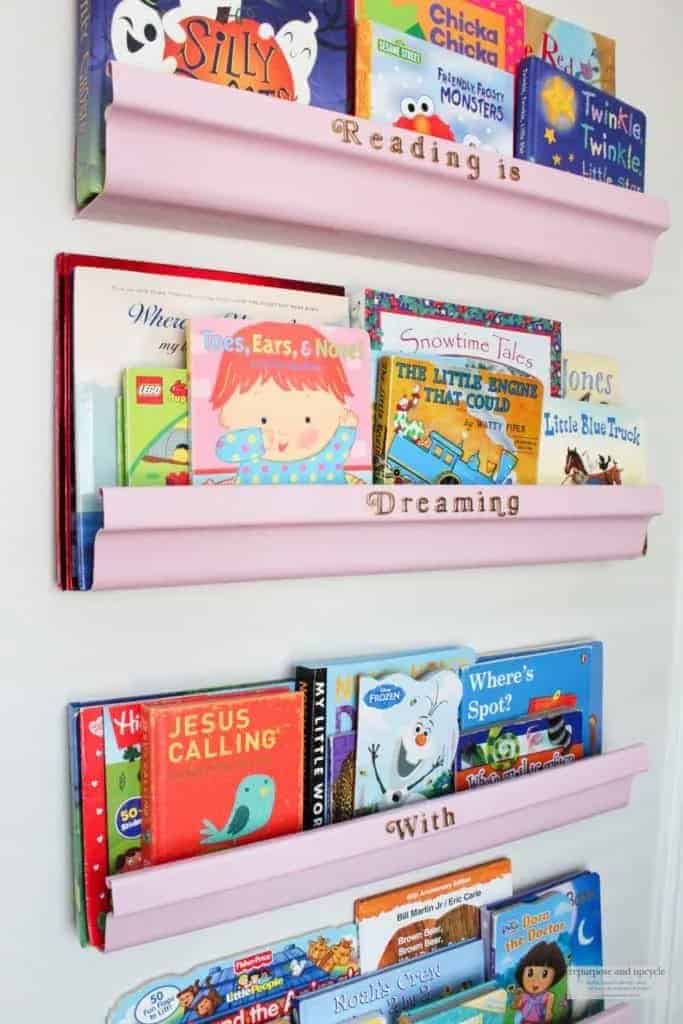
To make this rain gutter bookshelf, all you need is a length of rain gutter, some brackets, and some paint. If you want, you can also add additional embellishments like stickers or decals.
Once you have everything you need, simply follow these steps:
- Cut the rain gutter to the desired length. If you’re making shelves for multiple children, you may want to consider creating different-sized shelves.
- Install the brackets at either end of the gutter. Make sure they’re installed securely so that the gutter doesn’t slip out.
- Paint the rain gutter in the color of your choice. You can also use spray paint for a quicker and easier option.
- Allow the paint to dry completely before adding any stickers or decals. Then, position the rain gutter on the wall and fill it with books.
8. PVC Pipe Bookshelves
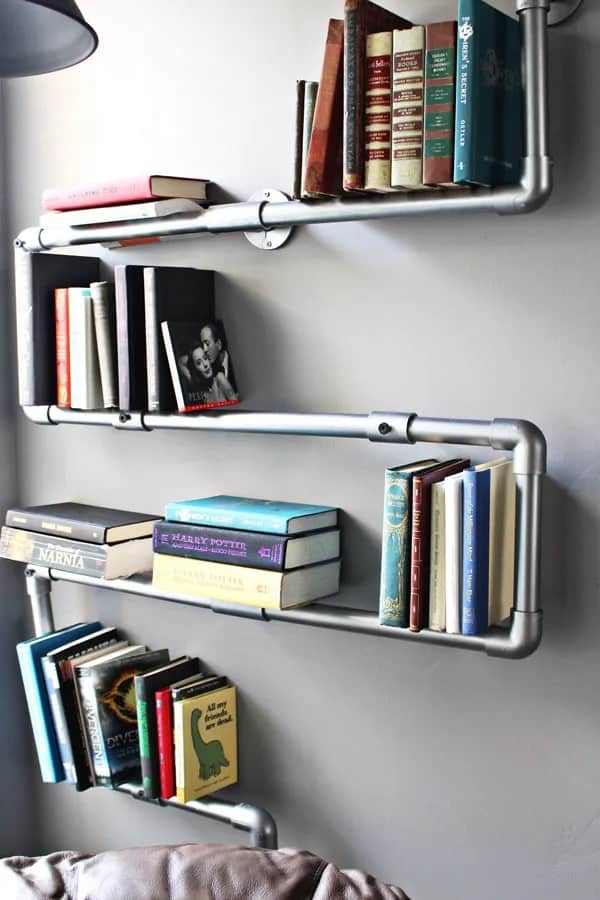
This woodworking project is easy enough for even beginning DIYers, and the finished product is both sturdy and stylish. Plus, it’s a great way to recycle those old PVC pipes that are taking up space in your garage!
To get started, simply measure and cut your pipes to size. Then, assemble the pieces using PVC glue or tape. Once the shelves are assembled, they can be painted or left naturally. Finally, add some hooks or brackets to the back so you can hang them on the wall.
9. Rustic Industrial Bookshelf Projects
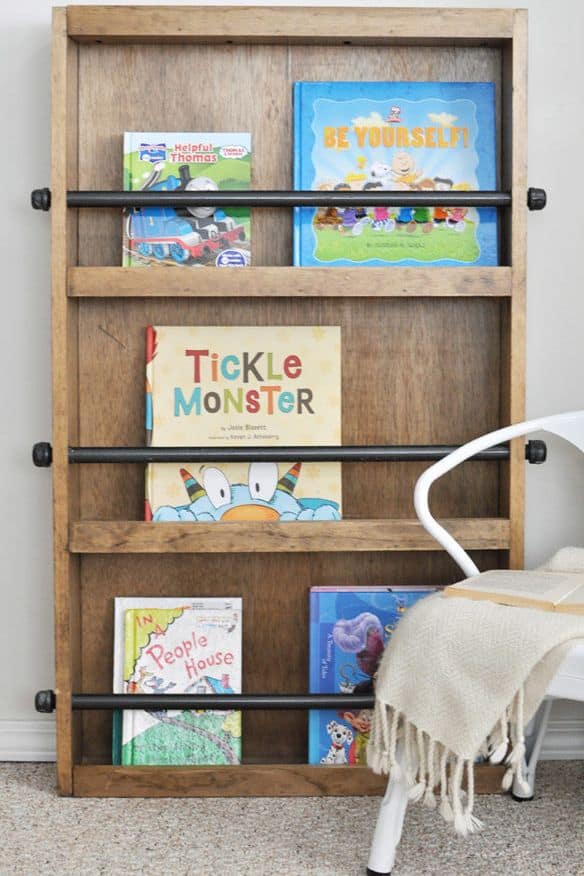
The rustic style offers you the beauty of nature and the touch of warmth to the playroom. This DIY bookshelf is both stylish and functional, perfect for storing all of your child’s favorite books. This plan uses reclaimed wood, giving the bookshelf a rustic look that will fit perfectly into any playroom décor.
Shopping list:
- Reclaimed wood
- Nails
- Hammer
10. Painted Plywood Bookshelf Plan
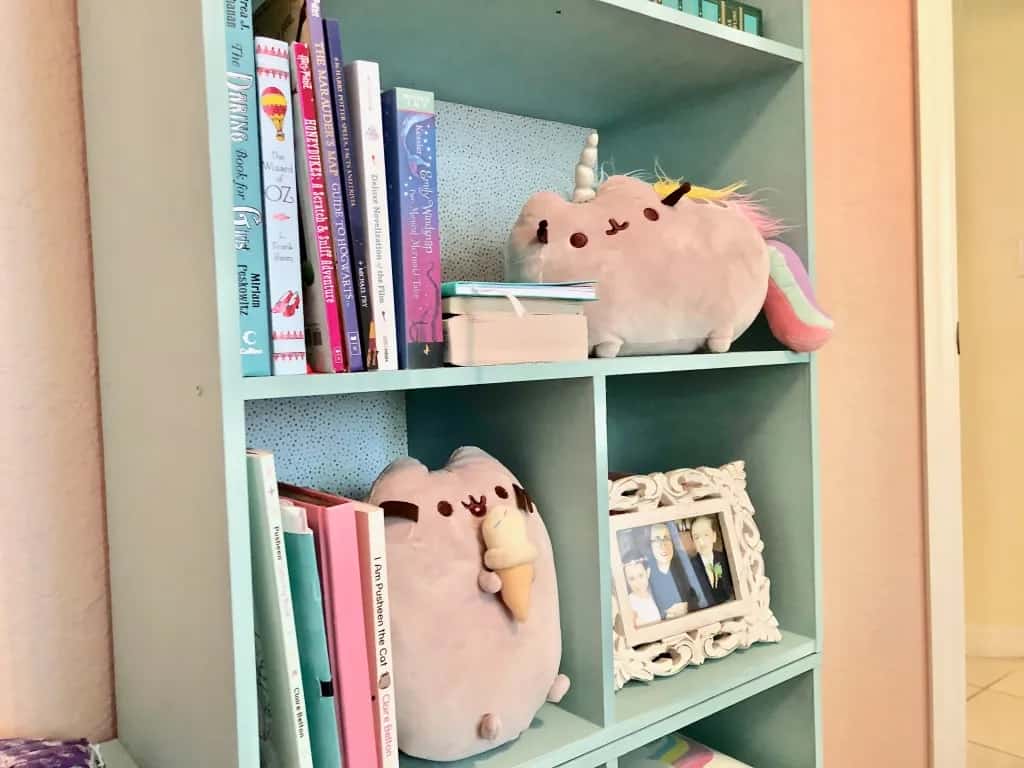
Create a versatile feature in the playroom through the construction of this painted DIY bookshelf. The design makes use of plywood and MDF boards to achieve a sturdy build, while the blue paint finish gives it a pop of color.
What you will need:
- Wooden plywood
- MDF boards
- Blue paint
- Clamps
Instructions:
Start by cutting your plywood and MDF boards to size. Assemble the bookshelf frame using wood glue and clamps, then allow the glue to dry completely. Next, paint the entire bookshelf blue and allow the paint to dry. Finally, attach the back panel to the bookshelf using screws or nails.
11. Lego Bookshelf
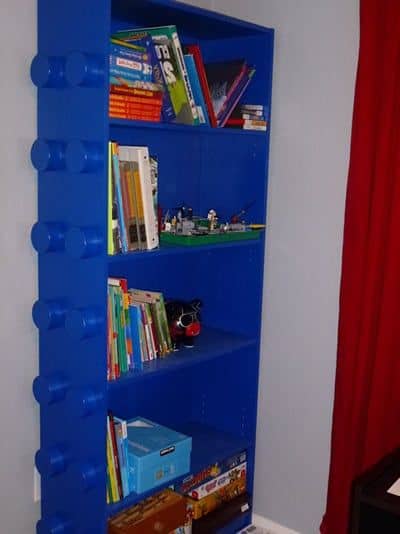
It’s a great way to add some color and life to your child’s bedroom or playroom while giving them a place to keep all their favorite books through this Lego bookshelf. To get started, you’ll need a baseplate, some bricks, and a bit of creativity. Once you have your materials, simply stack the bricks to create shelves of varying sizes.
Then use the baseplate to create a backdrop for your child’s favorite toys or storybooks. If you want, you can even add hooks to the sides of the bookshelf so that your child can hang up their jacket or backpack.
12. Spine Bookshelves
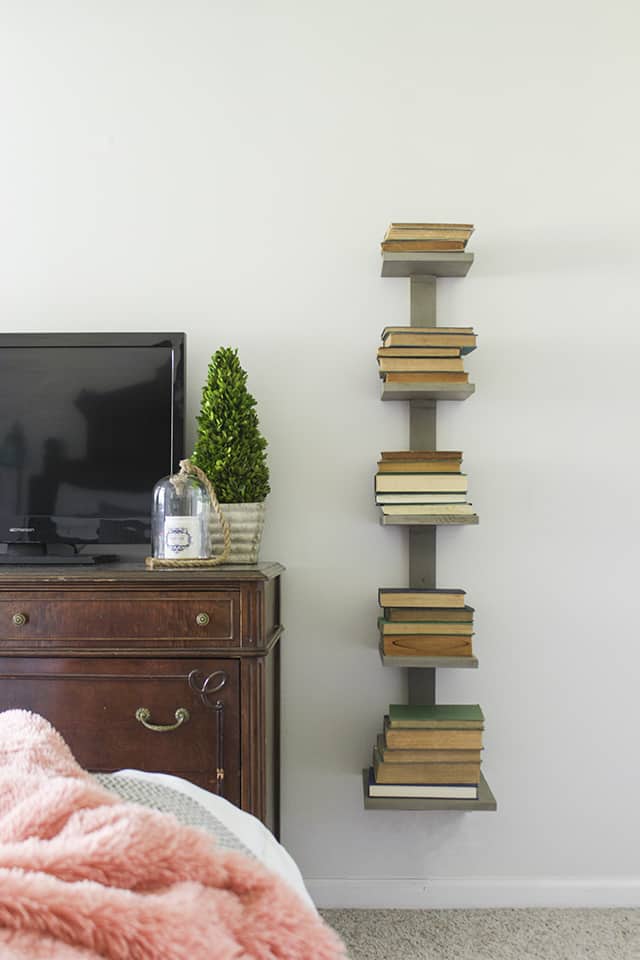
This spin bookshelf will display your kids’ book collection in a way that is both stylish and functional. It’s a great way to encourage your kids to read more, and it’s also a perfect addition to any playroom or bedroom.
To make this DIY bookshelf, you will need:
- Drill
- Saw
- Wood screws
- Level
- Tape measure
- Wood glue
- Clamps
- Sandpaper
- Paint colors or stain (optional)
13. Cardboard Box Bookshelves
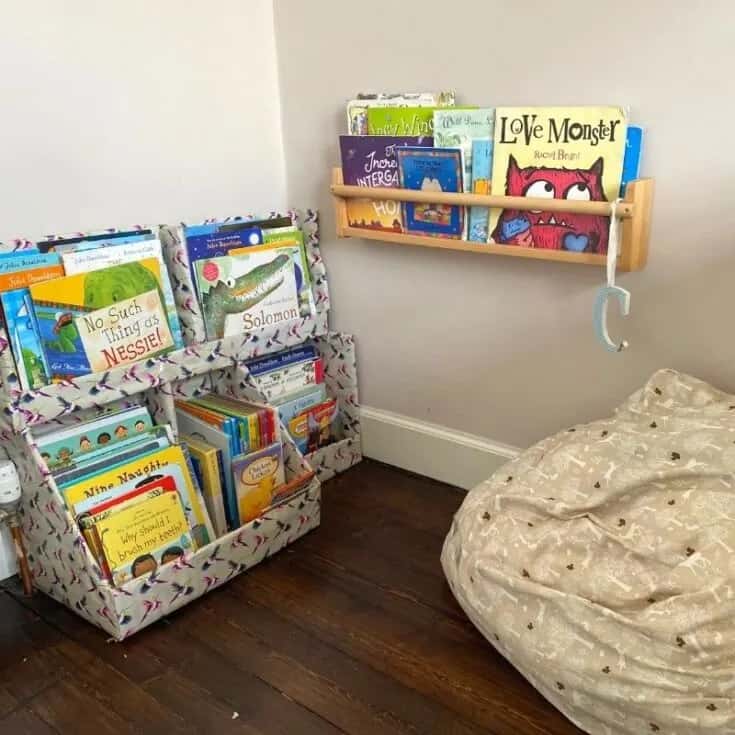
One of the easiest ways to create a DIY bookshelf for kids is to repurpose some cardboard boxes. You’ll also need some heavy-duty scissors or a box cutter, duct tape, and fabric or contact paper (optional).
Once you have your supplies, use the scissors or box cutter to cut the top and bottom flaps off of the cardboard box. Next, cut the sides of the box down to create two shelves. If you want to add a bit of decoration, line the shelves with fabric or contact paper. Finally, use duct tape to secure the shelves to the wall.
14. Hanging Rope Bookshelves
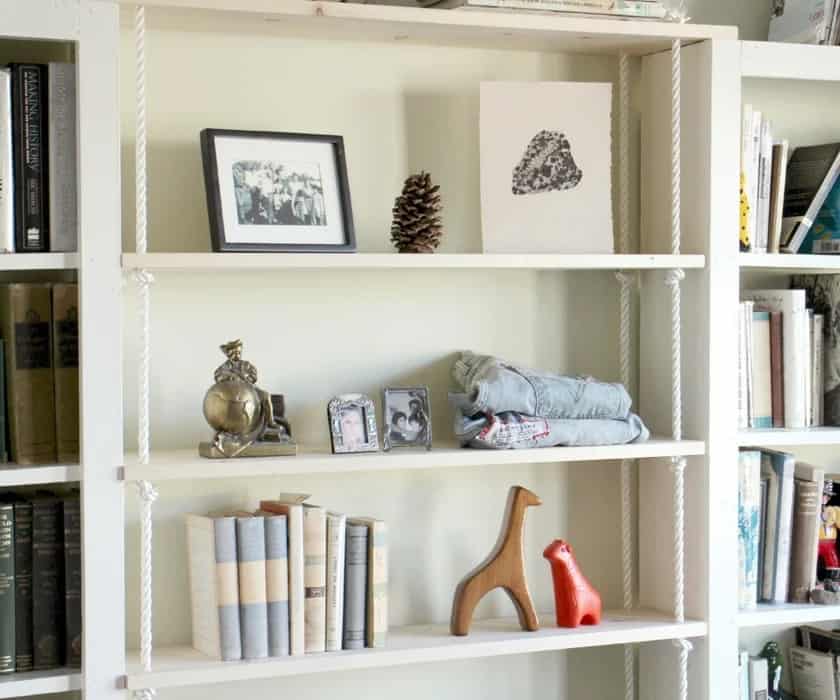
This DIY amazing project is surprisingly easy, and it can be tailored to fit any space. For a hanging rope bookshelf, all you need is a length of rope, a few dowels, and some eye-catching fabric. Cut the fabric into strips, knot the strips around the dowels, and then thread the rope through the loops.
Hang the rope from hooks or nails in the wall, and then start filling up your child’s new bookshelf with their favorite stories and some decorative pieces to complement the look of the playroom as well.
15. Chalkboard Paint Bookshelf
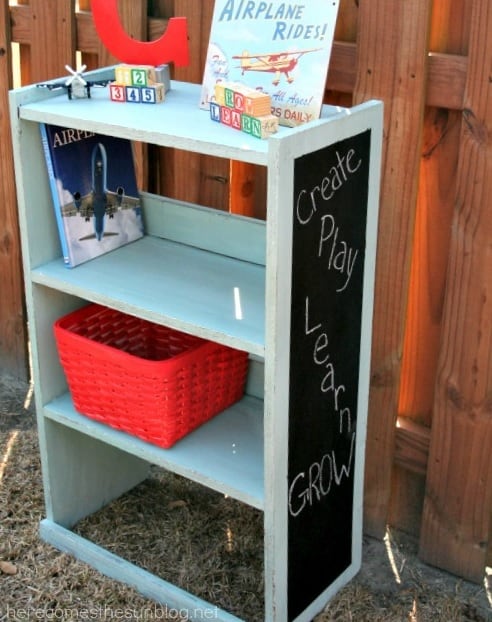
Coating the bookshelf with the chalkboard paint will be such a smart hack to complement the look of the room while being functional at the same time.
This shelf is easy to make and can be customized to match any decor. Plus, it’s a great way to get your child involved in the organization of their own space.
Here’s what you’ll need:
- Chalkboard paint
- Paintbrush
- Screws
- Drill
- 1×4 board (cut to size)
- 2 L-brackets
First, paint your 1×4 board with chalkboard paint. Allow the paint to dry completely before moving on to the next step. Next, use screws to attach the L-brackets to the back of the board. Make sure that the brackets are level before tightening them into place. Finally, hang your new chalkboard bookshelf on the wall and start organizing.
16. Wall Bookshelf Plans
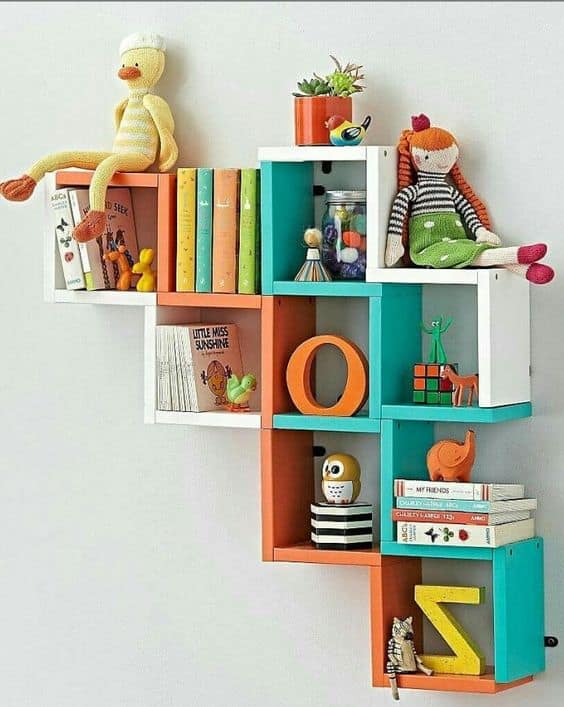
Mounting the bookshelf to a wall will give your playroom an instant and lasting feeling of space. Wall mounted bookshelves are a great space saving solution and can be built at any height to accommodate your child’s needs.
For an easy to build bookshelf, start with a 2×4 frame and use plywood for the shelves. Be sure to sand all the edges smooth before painting or staining. Decorate the shelves with bookends, baskets, or other items that your child will love.
17. Toy Storage and Bookshelf Combo
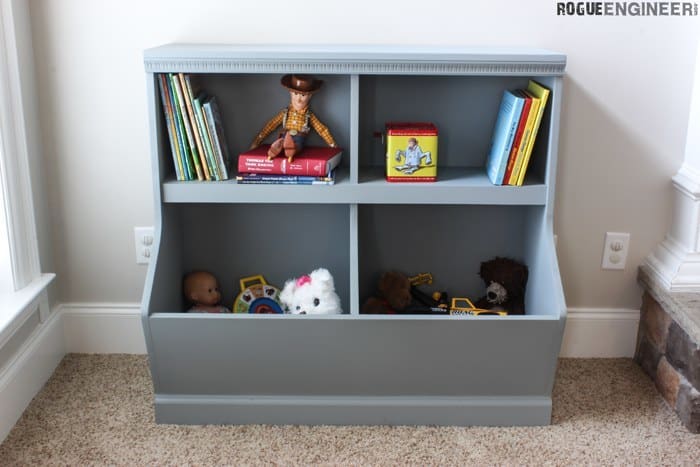
This bookshelf combo is both functional and stylish, and can be customized to match your child’s specific needs.
The lower shelves are perfect for storing toys, while the top shelves can be used for books or displaying favorite items. The unit also features a built-in ladder, making it easy for kids to access their belongings. Plus, the colorful design is sure to brighten up any room.
Shopping list you will need:
- MDF or durable plywood
- Dowels
- Screws
- Paint or stain
- Sandpaper
18. Bench and Bookshelf Combo
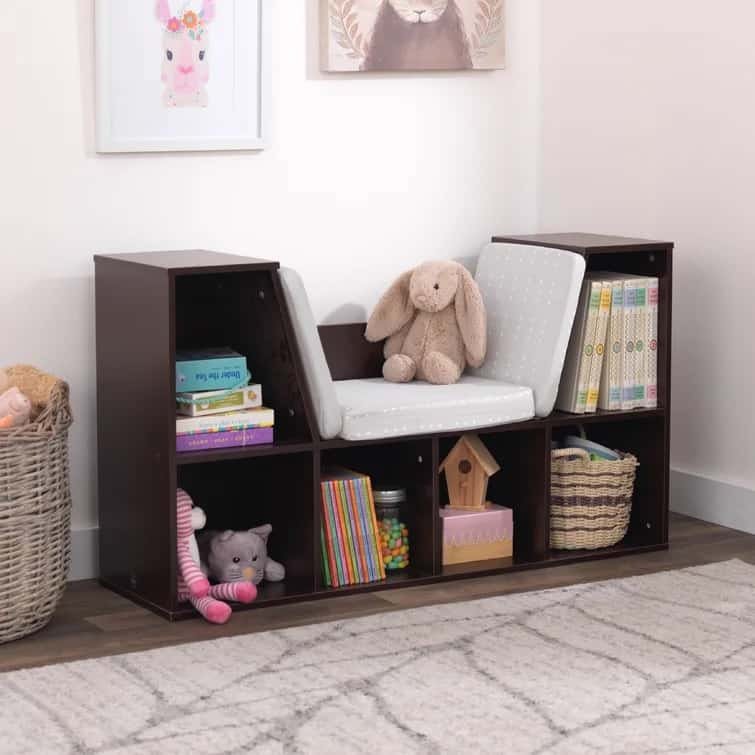
This kind of bookshelf is functional that allow you to have a place to sit comfortably and read your favorite books.
The deep shelves offer you a space to store some of the toys, clothes, or other things you want to keep close by but out of sight.
To start, you’ll need two 8-foot long 2x4s, two 1x4s, and one sheet of 3/4-inch plywood. Cut the plywood into two pieces measuring 24 inches by 16 inches. Then, cut the 2x4s into four lengths measuring 24 inches each. Next, cut the 1x4s into eight lengths measuring 12 inches each.
Assemble the frame of the bookshelf by attaching the 2x4s together with wood screws. Then, attach the plywood shelves to the frame using wood screws or nails. Finally, attach the 1x4s to the front of the shelves to create a lip that will keep books from falling off.
19. Rolling Cart Makeover into a Kids Bookshelf
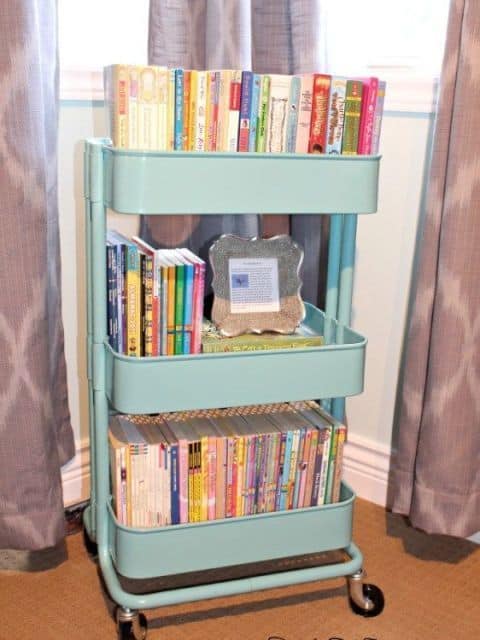
This rolling cart makeover is the perfect solution. With just a few supplies, you can turn an old cart into a beautiful and functional bookshelf. The best part is that your child can help with the project, making it a fun bonding experience and you can easily move to the other place.
To get started, gather your supplies. You will need an old cart, some paint, decals, and hooks. Once you have everything, remove the shelves from the cart and sand them down. Next, paint the shelves in your child’s favorite color or colors.
Once the paint is dry, add some fun decals. You can use stickers or cut out shapes from paper. Finally, add hooks to the bottom of the shelves so that your child can easily reach their books.
20. Pegboard Bookshelves
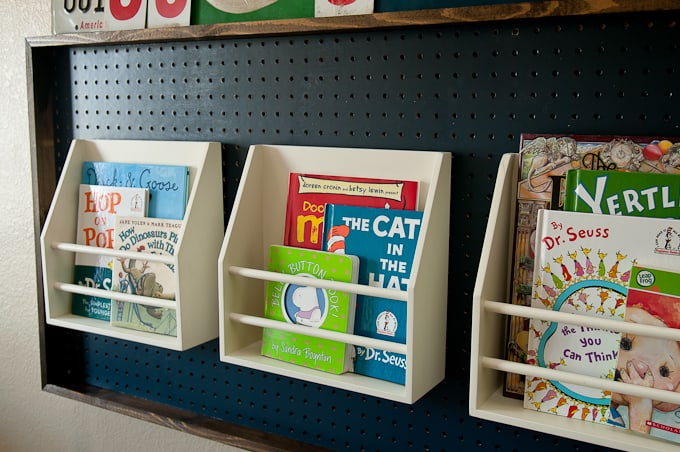
Display your book collections on this aesthetically pleasing bookshelf, which can be the best option to deal with the limited area in the playing room.
It would be a great idea if you could create some DIY storage by yourself.
The supplies you need are four sheets of pegboard, two pieces of lumber for the sides, L-brackets, and screws.
After that, follow these steps. First, cut the pegboard into four equal pieces using a power saw. Next, use L-brackets to attach the pegboard to the lumber. Make sure that the L-brackets are evenly spaced. Finally, use screws to secure the L-brackets in place.
21. DIY Kids Bookshelf Plans Pallet Material
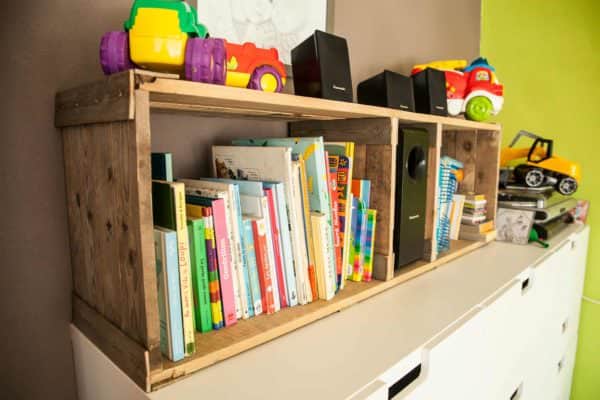
There is nothing to worry about if you are on a budget while planning to get the bookshelves for your kids’ room as you can easily make them on your own. With the help of some simple construction techniques, you can make your very own pallet wooden bookshelf in no time.
Materials list:
- Pallets
- Saw
- Nails
- Paint or varnish (optional)
Step Instruction:
Start by taking apart the pallets. You will need the wood boards for this project. Cut the boards to size, making sure to account for any gaps you want between the shelves. Nail the boards together and then paint or varnish them, if desired.
Allow the shelves to dry completely before attaching them to the wall. Space the shelves evenly and screw them into place.
22. Bathroom Cabinet Makeover into a Kids Bookshelf
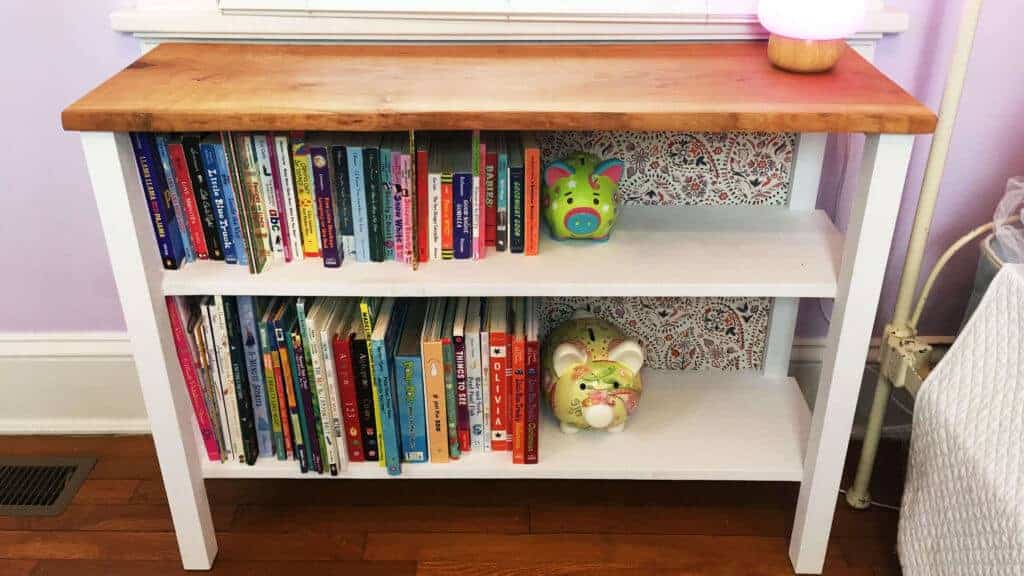
This bookshelf is designed to look like a cabinet, but it has plenty of shelf space to hold all of your child’s favorite books. On the other side, it’s easily customizable to fit any bathroom décor.
To get started, simply remove the doors from an old cabinet and sand down the edges. Then, paint the cabinet with your child’s favorite colors. Once the paint is dry, attach some decorative trim around the edges of the shelves. Finally, add some fun knobs or handles to really give the shelves a personal touch.
23. DIY Window Seat and Built-In Bookshelves Combo
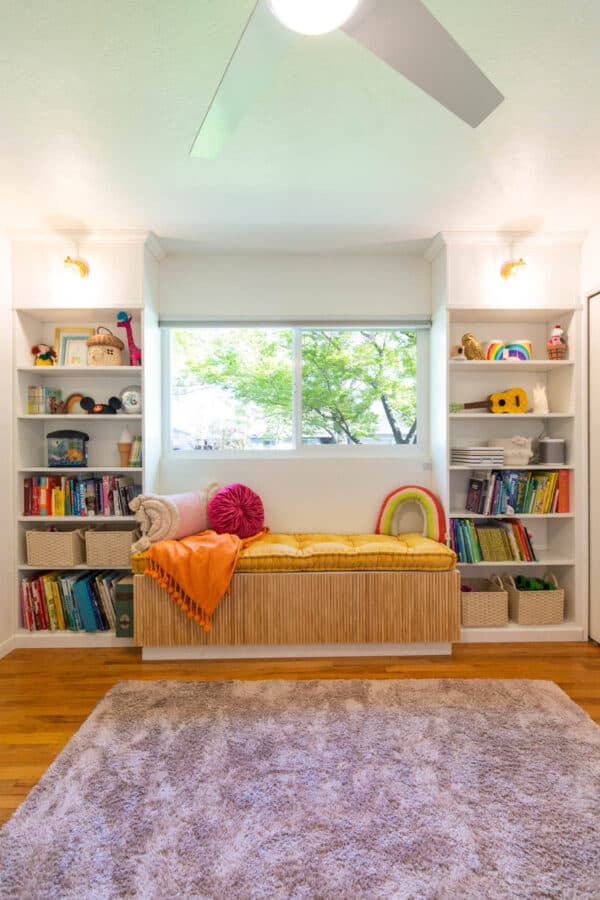
A cozy reading nook is the perfect place to curl up with a good book, and this DIY bookshelf plan makes it easy to build one right into your home.
The shelves are designed to fit around a window, creating a cozy spot for reading or relaxing. And, by incorporating built-in bookshelves into the design, you can create a custom look without having to buy expensive furniture.
This bookshelf plan is perfect for families with small children, as it provides a safe and sturdy place to store all of their favorite books. And, when it’s time to redecorate, the shelves can easily be repainted or stained to match your new décor.
24. Dresser Drawer Repurposed into a Toddler Bookshelf
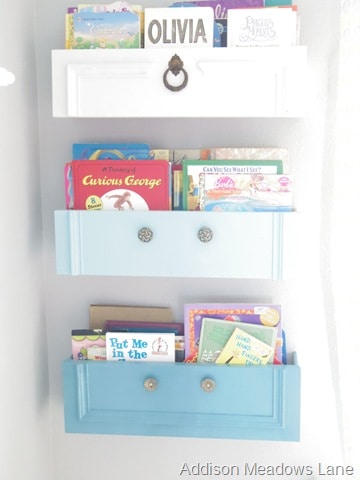
You can easily repurpose an old dresser drawer into a cozy and functional bookshelf. This bookshelf is the perfect size for toddlers and young children. Plus, it’s easy to make and you can customize it to match your child’s room decor.
All you need is an old dresser drawer, some paint, and some imagination. Create an aesthetically pleasing bookshelves by painting them in different colors. On the other side, complement it with the different knobs.
25. Crate Children Bookshelf
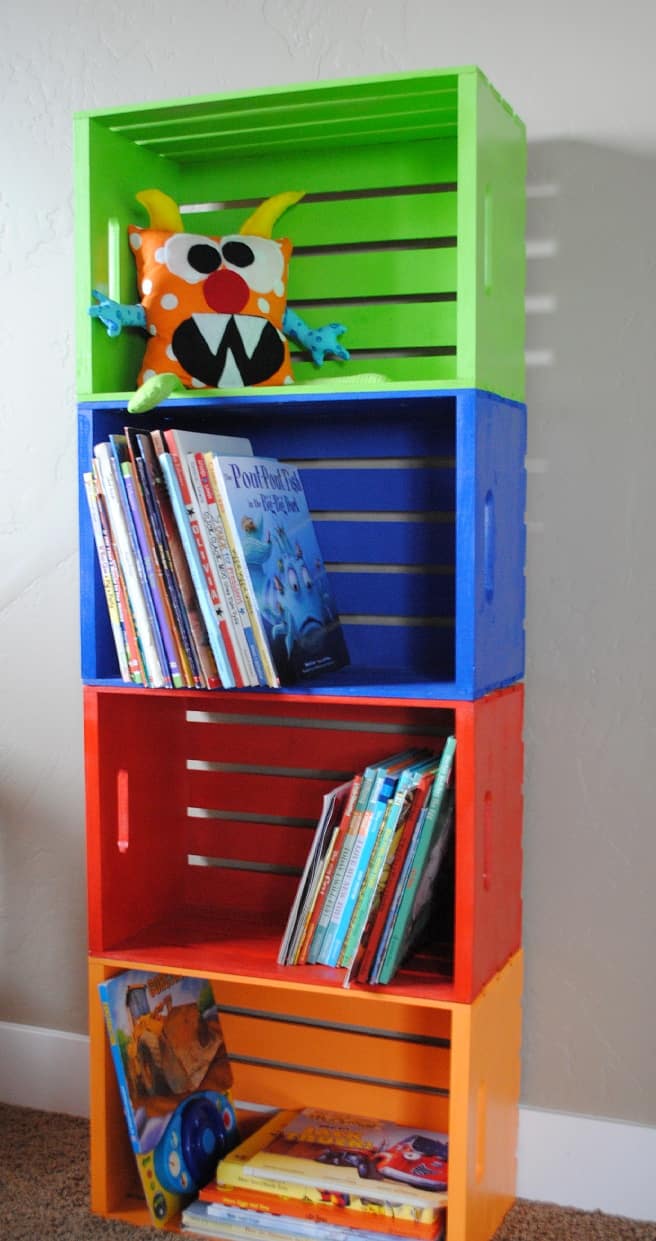
These upcycled crate bookshelves are the perfect storage solution for a child’s bedroom or playroom. Made from upcycled materials, they are both eco-friendly and budget-friendly.
To make your own upcycled crate bookshelves, simply stack crates of various sizes and shapes to create a custom storage for kids that is both functional and stylish.
For an added touch of personality, paint the crates in a variety of colors or patterns. Then fill them with books, toys, or other treasures and enjoy.
26. Fireplace Bookshelves
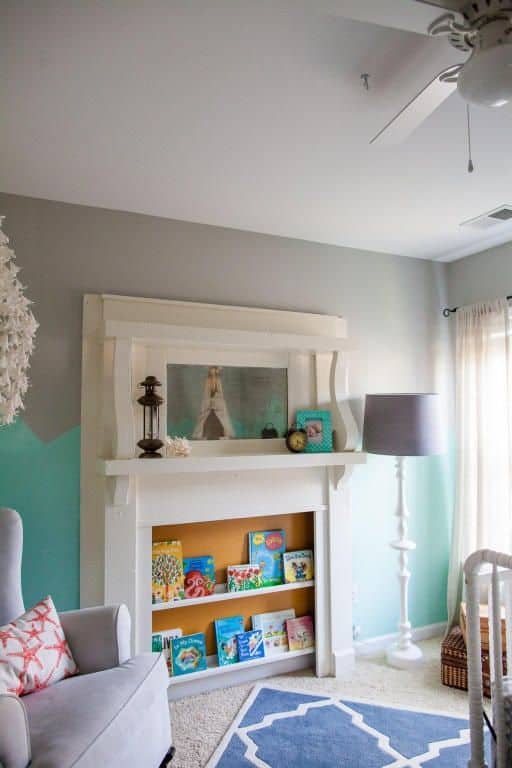
A fireplace bookshelf is a warm and inviting addition to any room. And what could be more charming than a DIY kids bookshelf that looks like a miniature fireplace?
This easy-to-build bookshelf features two shelves for storing books, games, and other treasures. The mantel is the perfect spot for displaying photographs or artwork.
What you will need to make it work:
- An old fireplace mantel
- Two wooden shelves
- Paint or stain
- Nails or screws
Bookshelf plans can be fun and easy to follow, as our list of 26 DIY kids bookshelf plans demonstrates. These plans are perfect for organizing your child’s bedroom and helping them develop a love of reading and books. Plus, many of these projects can be completed in just one day.
