Cats need a place to play and scratch, but they can get into trouble if there isn’t one around. That’s where the cat tree comes in! A sanctuary for your furry friend with many benefits, including providing mental stimulation as well psychological exercise (playtime!).
A DIY cat tree is a great way to keep your cats occupied and out of trouble! In this blog post, we will share 20 different DIY cat tree ideas that are sure to keep your cats entertained for hours on end. From simple structures made from cardboard boxes, to elaborate trees with multiple levels and hiding spots, we have something for everyone!
So get ready to roll up your sleeves and get crafting. Your cats will be thanking you later.
Table of Contents
1. A Simple Design of Cat Tree
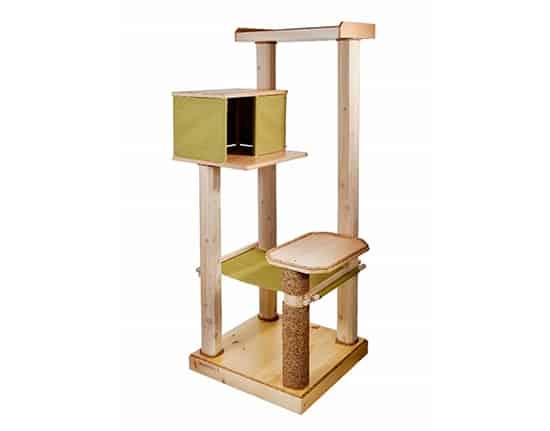
Opt for the DIY cat tree that will keep your cat entertained while also upgrading your skill level in one. And the best part is that you can make one yourself with just a few simple materials.
- Start by cutting a piece of plywood into a rectangle that is about two feet wide and four feet long.
- Then, use screws or nails to attach four posts to the corners of the plywood.
- Next, take some rope and wrap it around each post, starting at the bottom and working your way up. Once you reach the top, tie the rope off to create a platform.
- Finally, add some toys or scratching pads to the rope for your cat to enjoy.
2. Use A Wooden Ladder With Some Shelves Attached
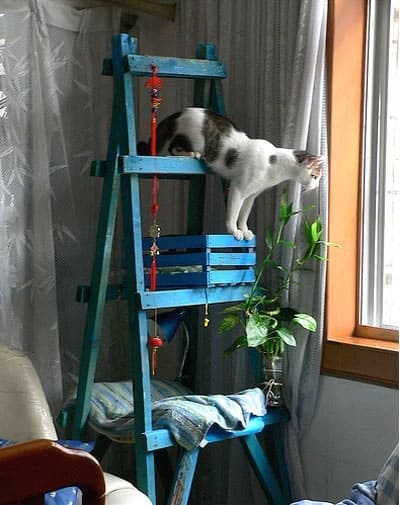
This easy project can be completed in just a few hours, and it’s a great way to upcycle an old ladder that you might otherwise get rid of. Plus, your cat will love having plenty of new places to explore and lounging spots.
Simply attach some shelves to the rungs of the ladder, and your cat will have a new place to play and lounge. You can also add a few toys or scratching posts to the shelves to really make it kitty heaven.
3. Make A Cat Tree Out Of PVC Pipe
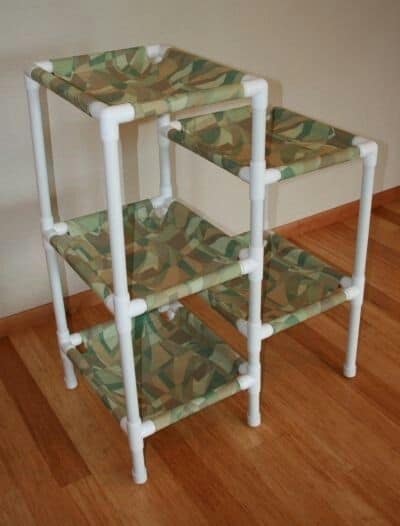
Making a cat tree out of PVC pipes is a great DIY project for any cat lover. It may sound daunting, but it’s actually not that difficult- and it will be much cheaper than buying a ready-made tree. To start, you’ll need a few supplies. For the base of the tree, you’ll need four PVC pipes, each about two feet long.
You’ll also need several T-shaped PVC connectors and elbow connectors. For the scratching posts, you’ll need two more PVC pipes, each about four feet long. Finally, you’ll need some rope or fabric to wrap around the posts, and some carpet or AstroTurf to cover the base and posts.
Related project: DIY Cat Bed
4. Make Sure The Cat Tree Has Plenty Of Places For Your Cats To Play
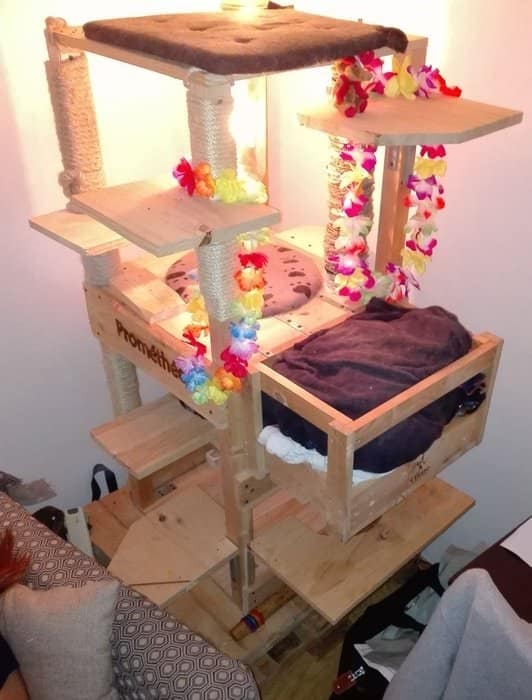
If you’re handy with a saw and a drill, you can easily build your own cat tree and provide some spaces to play.
Start by choosing a sturdy base, such as a piece of plywood or a wooden board. Then, wrap the posts with the rope. Finally, add some cushions to make it way cozier. Be sure to use heavy-duty hardware so that your cats can safely play on their new tree.
5. Add Some Fun Accessories
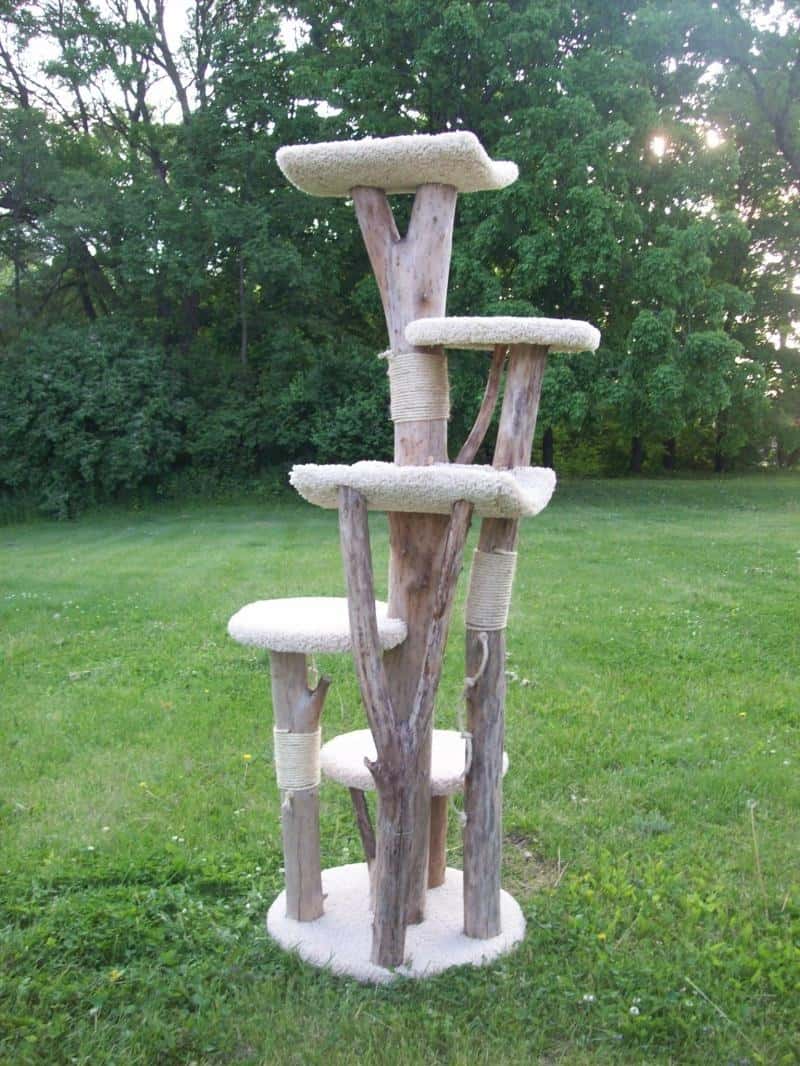
By adding a few fun accessories, you can create a unique tree that your cat will love. One great idea is to add a dangling toy or two. Cats love to swat at things that are dangling just unreachable, so this is sure to be a hit.
You can also add some climbing ropes or sisal mats for your cat to scratch. Another idea is to add a perch near the top of the tree where your cat can lounge and survey its kingdom.
6. Repurposed Old Furniture
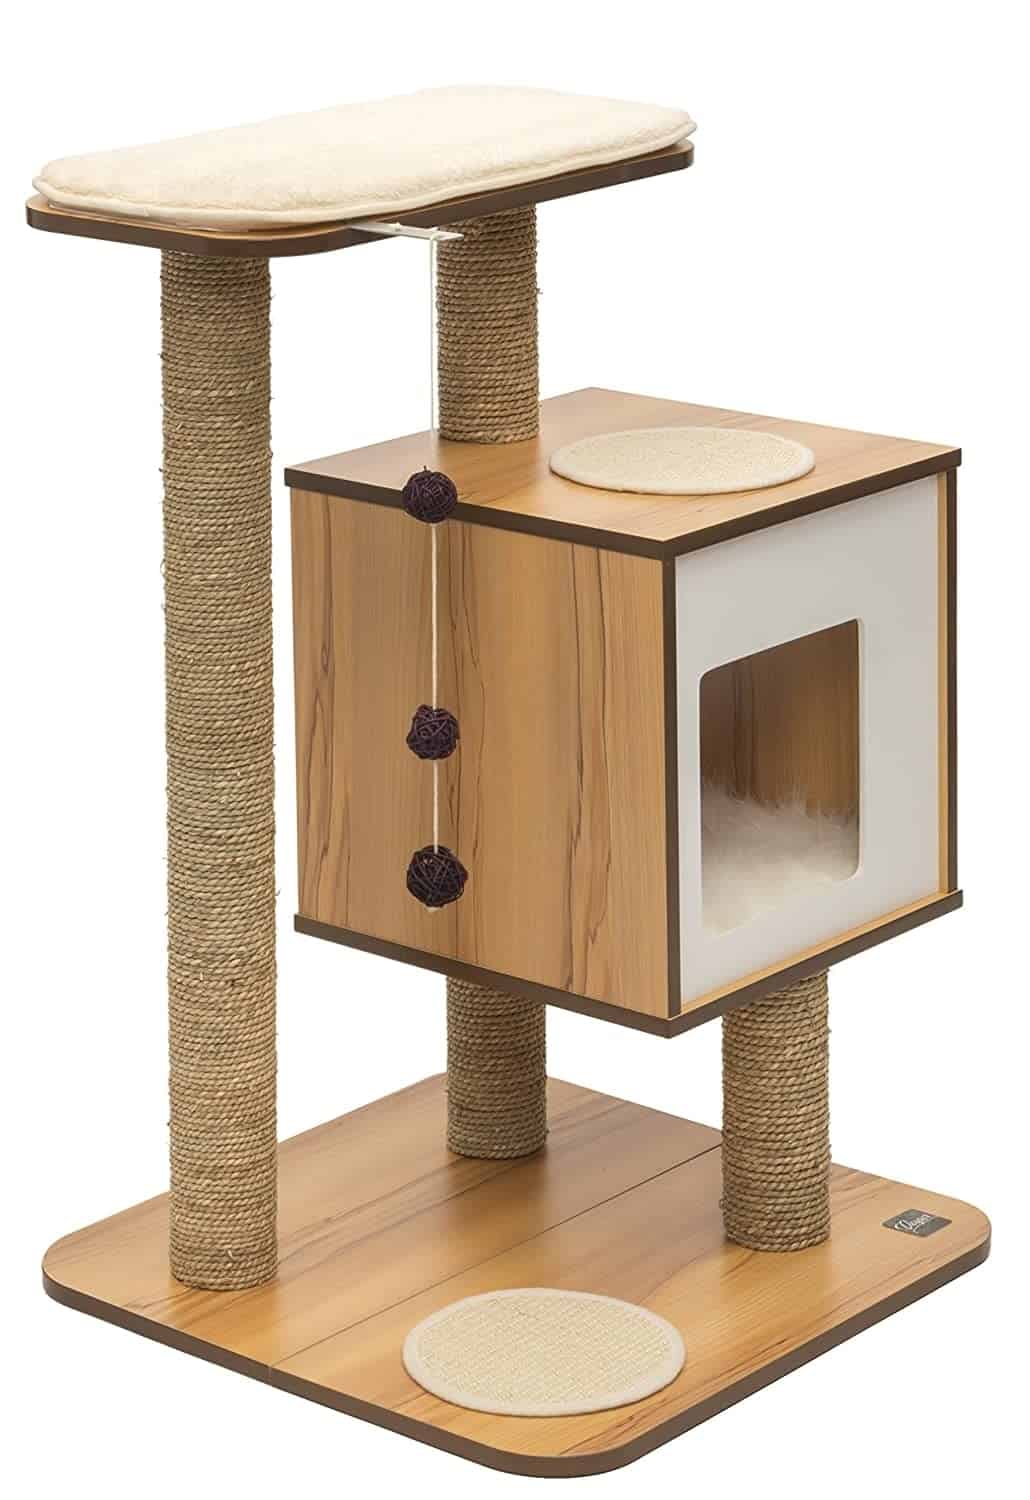
If you have an old dresser or nightstand that you’re no longer using, consider repurposing it into a cat tree. With a few simple modifications, you can create a cozy spot for your feline friend to climb, scratch, and nap.
Start by removing the drawer pulls and sanding down any rough edges. Then, cut a hole in the center of the dresser top large enough for your cat to fit through. You can also add a little sisal rope scratching posts to the sides of the dresser for extra scratching surface. Finally, finish the tree by covering the top with a soft blanket or pillow. Your cat is sure to love their new climbing perch.
7. DIY Cardboard Basic Cat Tree
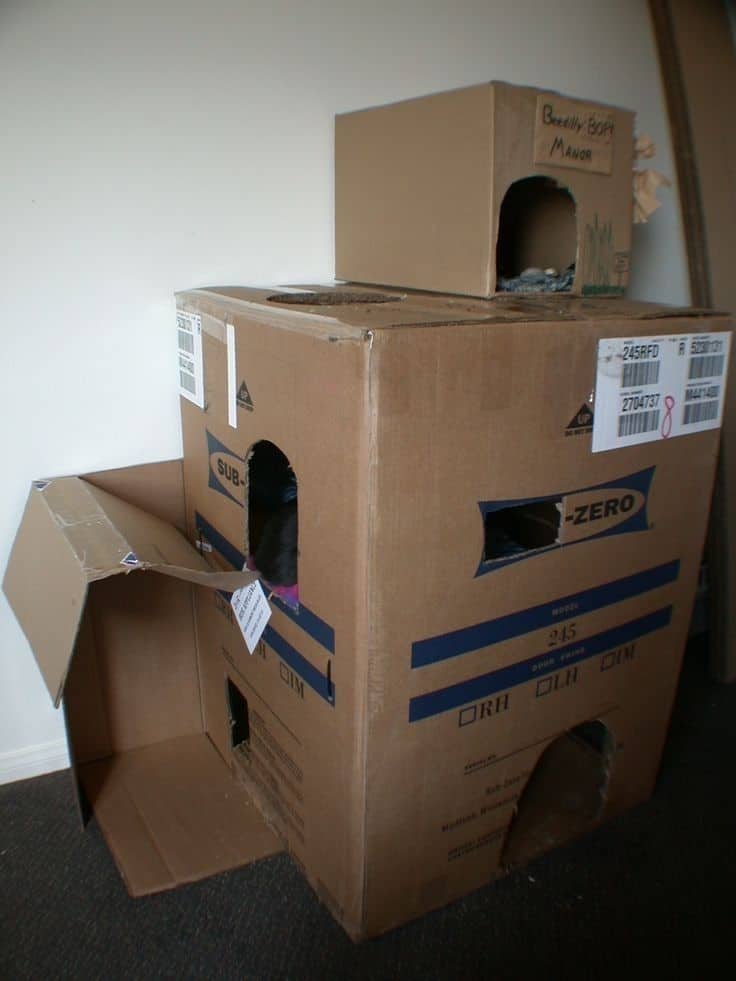
A cat tree made from sturdy cardboard boxes are the perfect solution. It’s sturdy enough to support your cat’s weight, and you can easily customize it to suit your needs. Plus, it’s an eco-friendly option since you’re reusing an old box. Just grab an old cardboard box, some scissors, and some cat-safe glue or tape. Then cut out some openings for your cat to enter and exit, and create some levels by stacking boxes on top of each other. You can even add some fun embellishments like feathers, string, or pom-poms to make it look extra cozy.
8. Carpet-Covered Homemade Cat Tree
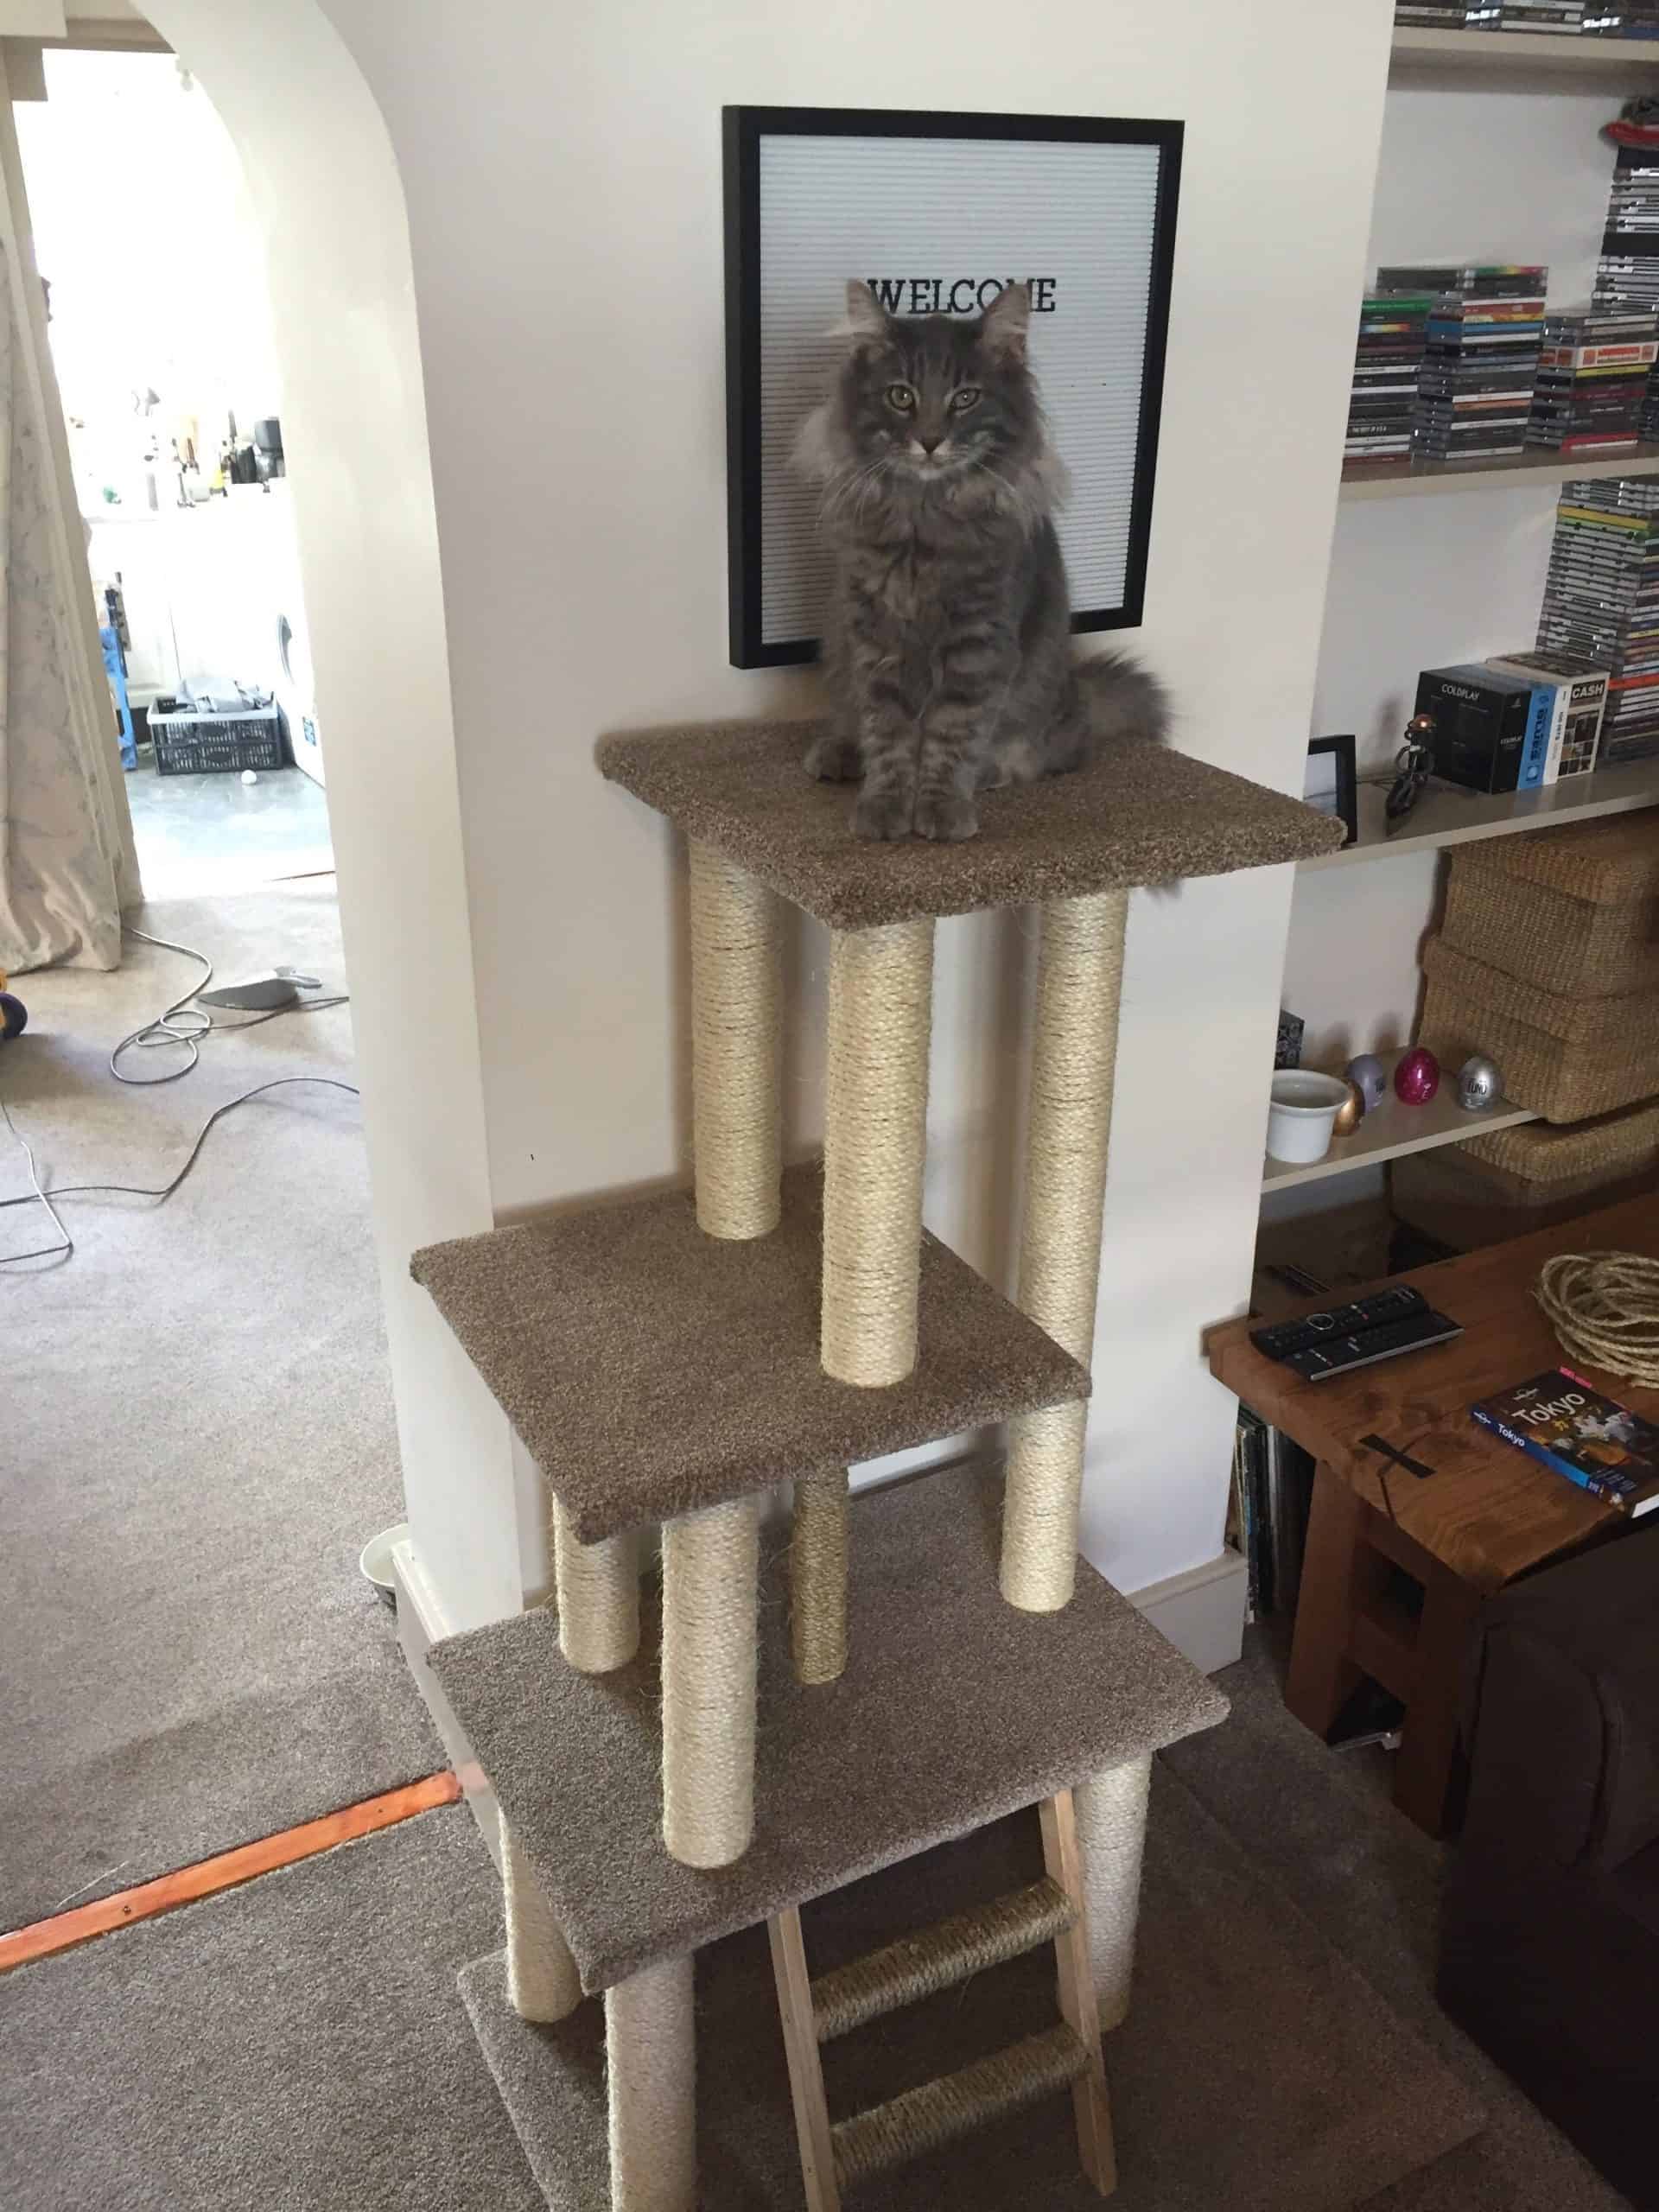
Carpet-covered cat trees are a popular option, as they’re relatively easy to make and provide a soft surface for your cat to lounge on. To make a carpet-covered cat tree, you’ll need some basic supplies, including chemical-free carpet, plywood, screws, and brackets.
Once you have all of your materials gathered, cut the plywood into the desired shape and size for your tree. Then, cover the plywood with carpet, securing it in place with staples or glue. Finally, attach the plywood piece to the brackets using screws.
9. Wall-Mounted Cat Tree
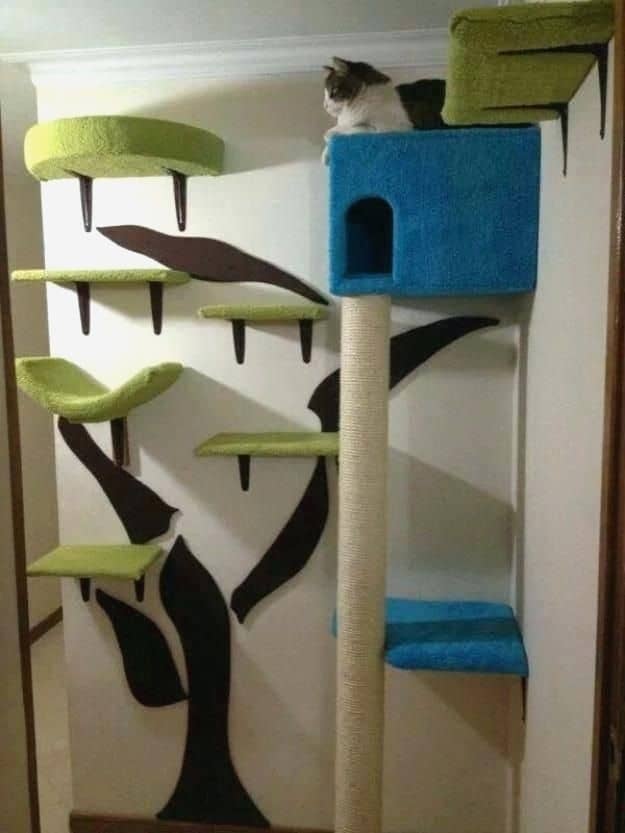
A wall-mounted cat tree is a great way to save space in your home while still giving your cat a place to play and relax. To make a wall-mounted cat tree, start with a basic sketch of what you want. Then, measure and cut your lumber to size.
Once the lumber is cut, use a drill to create pilot holes for your screws. Next, attach the brackets to the wall using screw (drill a bit of size should correspond to screw size). Once the frame is up, add sisal rope or carpet for traction and fabric or faux fur for comfort. Finally, add some fun features like dangle toys or a scratching pad.
More cool ideas: DIY Cat Hammock
10. Multi-Level Cat Tree
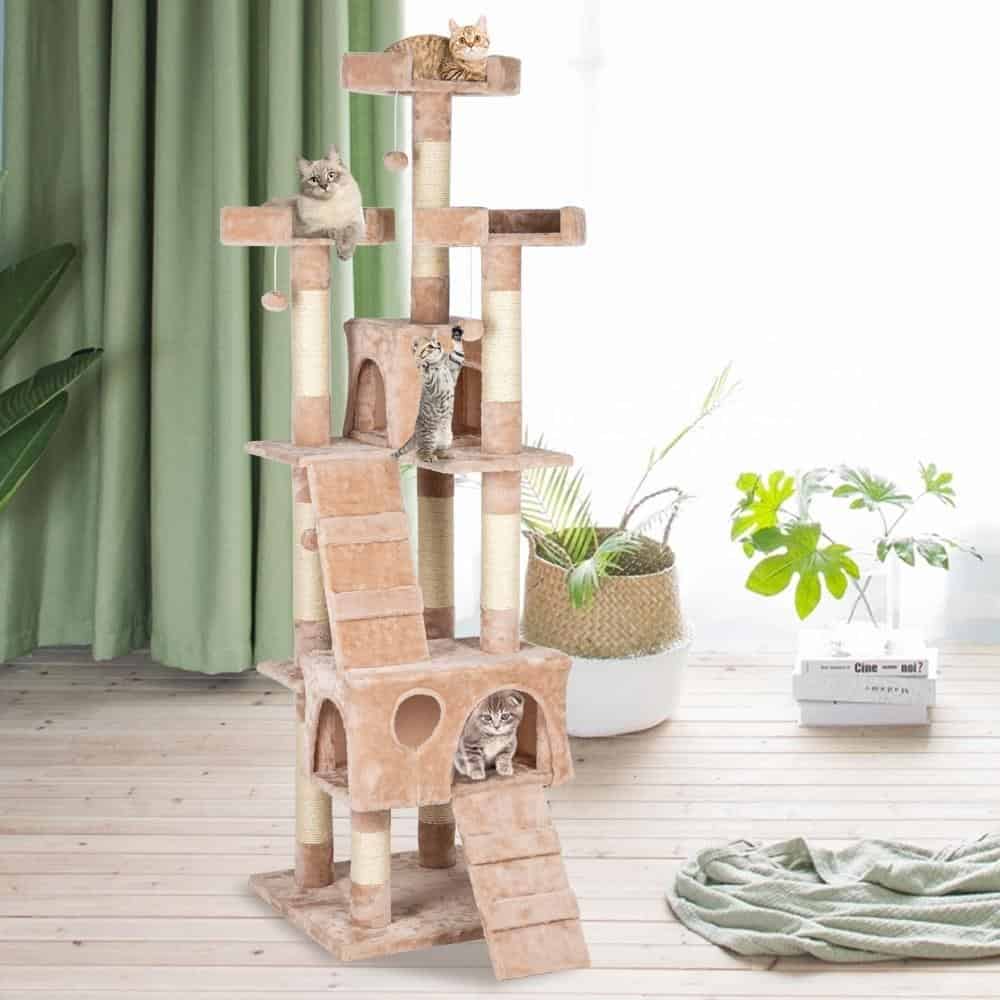
This type of tree typically includes a series of platforms of different heights, giving your cat plenty of places to climb. You can also add features like tunnels, bridges, and scratching posts to create a truly unique play space for your cat.
Start by cutting two pieces of plywood into the shapes you wish. Next, attach some carpet or fabric to the pyramid to create a comfy surface for your cat to lounge on. Finally, add some toys and scratching posts to the top of the pyramid, so your cat can really enjoy its new perch.
11. DIY Tall Tree
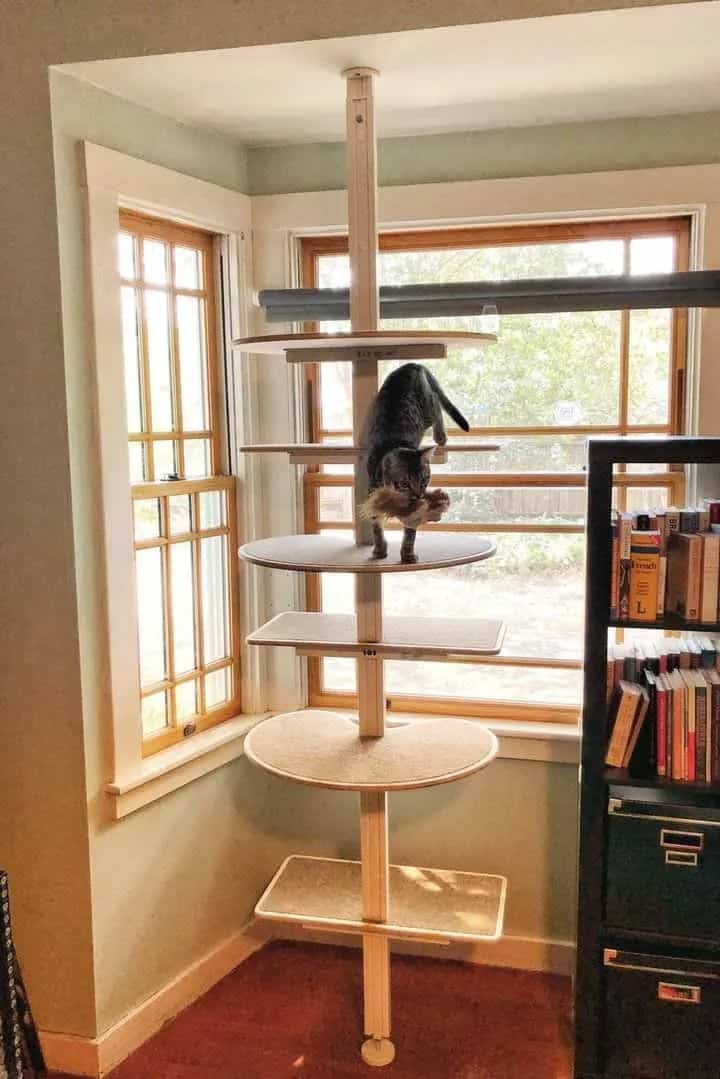
A tall cat tree is perfect for giving your kitty a bird’s-eye view of their kingdom, as well as a place to perch when they’re feeling lazy. To make your own, start with a sturdy base- an old stool or end table will work perfectly. Then add a few layers of carpet or fabric, starting with the bottom and working your way up.
Secure each layer with heavy-duty staples or glue, and be sure to cover the edges, so your kitty doesn’t get scratched. Finally, add a few toy birds or other dangle things for them to swat at.
12. Small Cat Tree
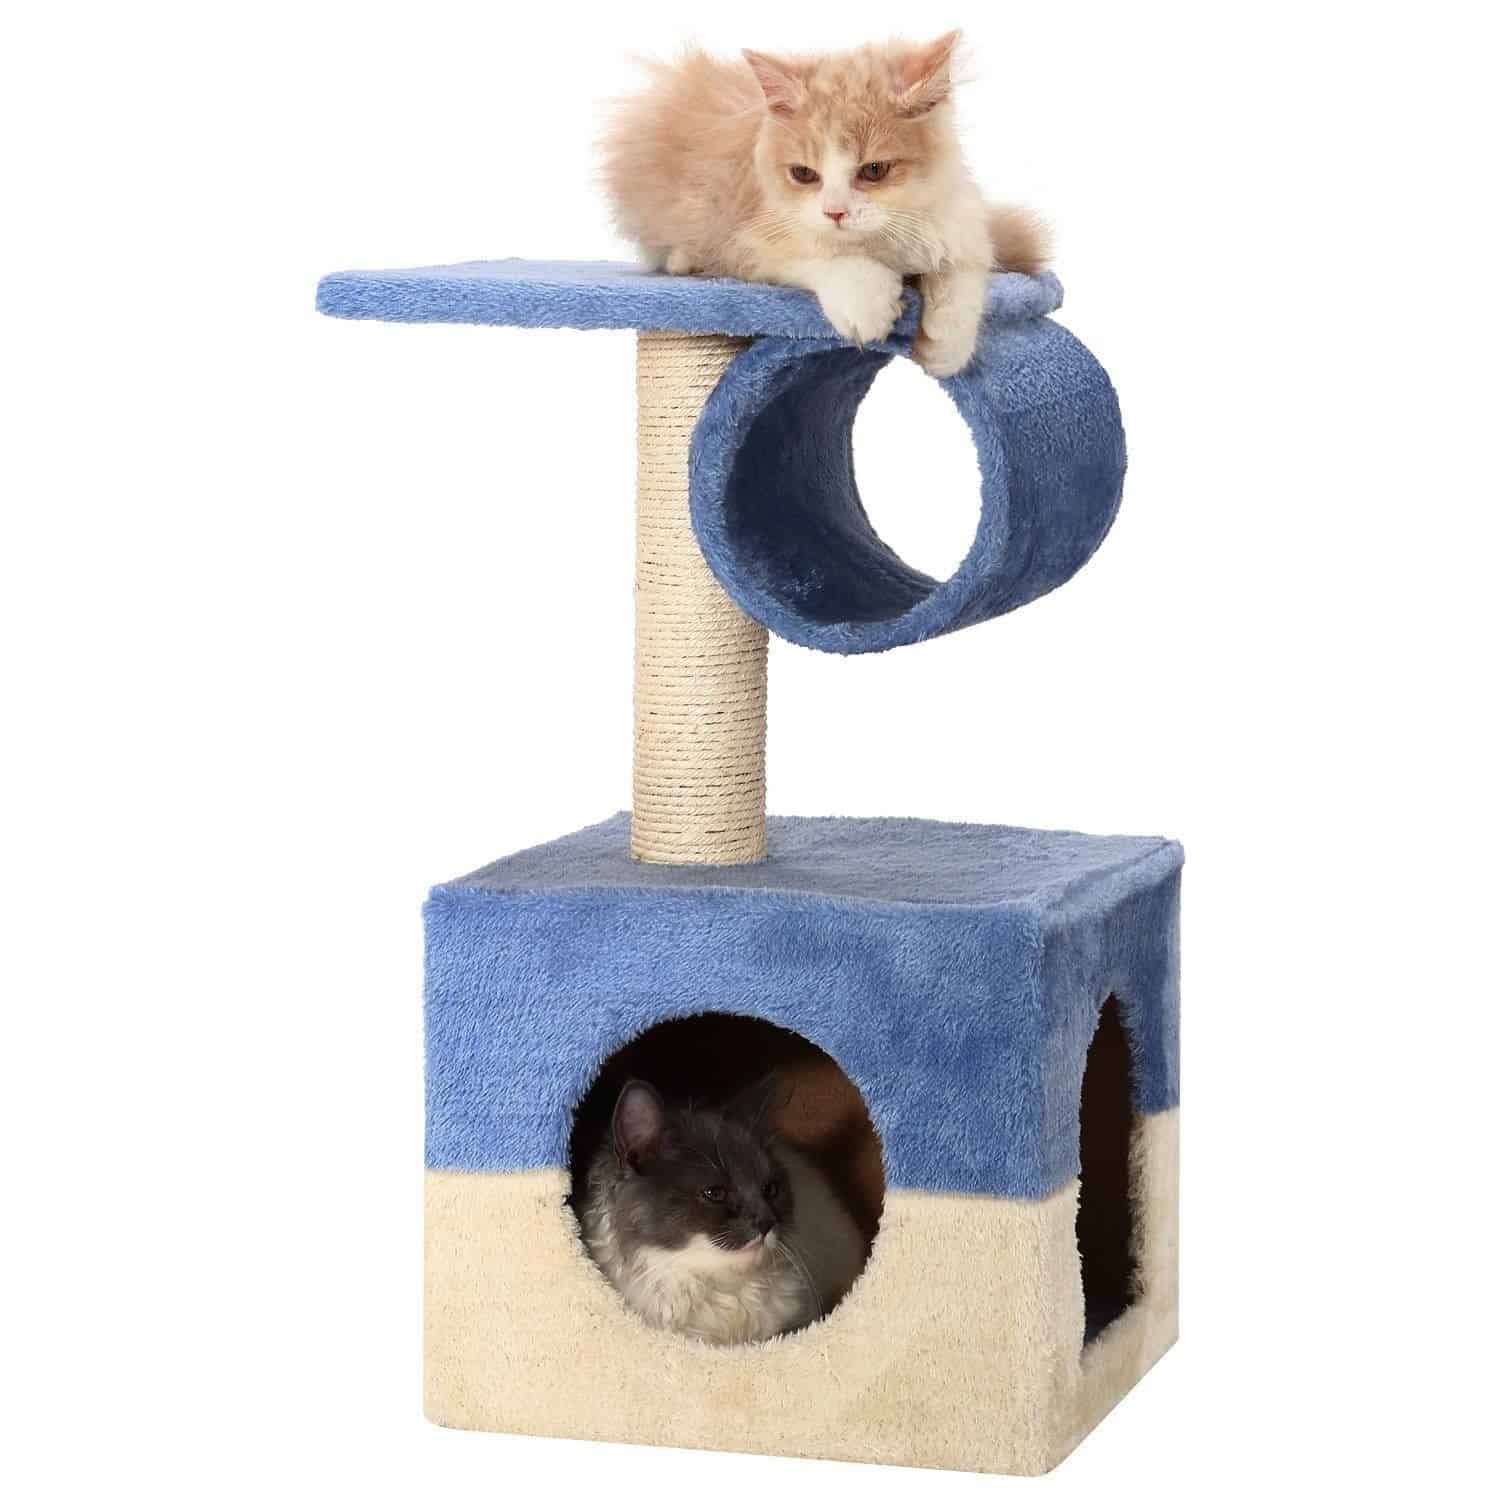
This small cat tree is made from a few simple materials, and it can be completed in just a few hours. Plus, it’s a great way to recycle an old piece of furniture or wooden crate.
To get started, simply paint or cover your wooden base with fabric. Then, add some shelves or perches made from recycled cardboard or wood. Finally, finish off your cat tree with some fun toys and climbing ropes.
13. DIY Natural-Looking Cat Tree
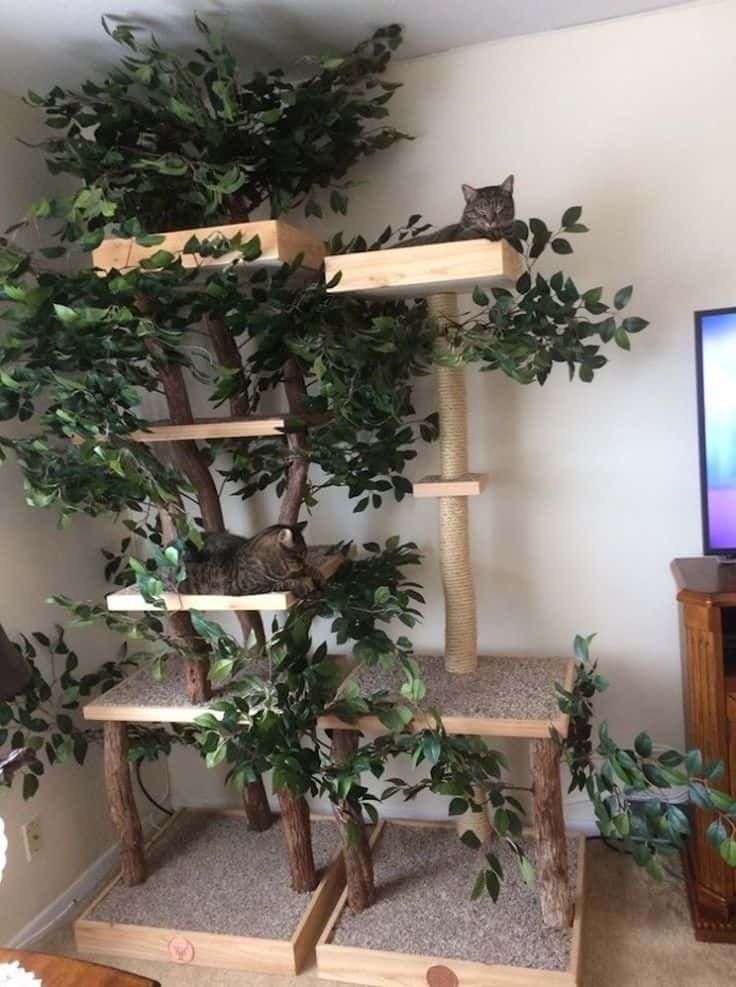
A DIY cat tree can be made from a variety of materials, but one of the most popular options is to use real branches. When selecting branches for your cat tree, it’s important to choose ones that are strong and stable. Once you’ve selected your branches, you’ll need to attach them to a base.
This can be done by drilling holes and using screws, or by tying the branches together with wire or rope. Once the branches are in place, you can add some final touches like carpeting or sisal rope to create a comfortable and stylish climbing spot for your feline friend. Adding some faux plants would be great that will make it look great.
14. DIY Basket Cat Tree
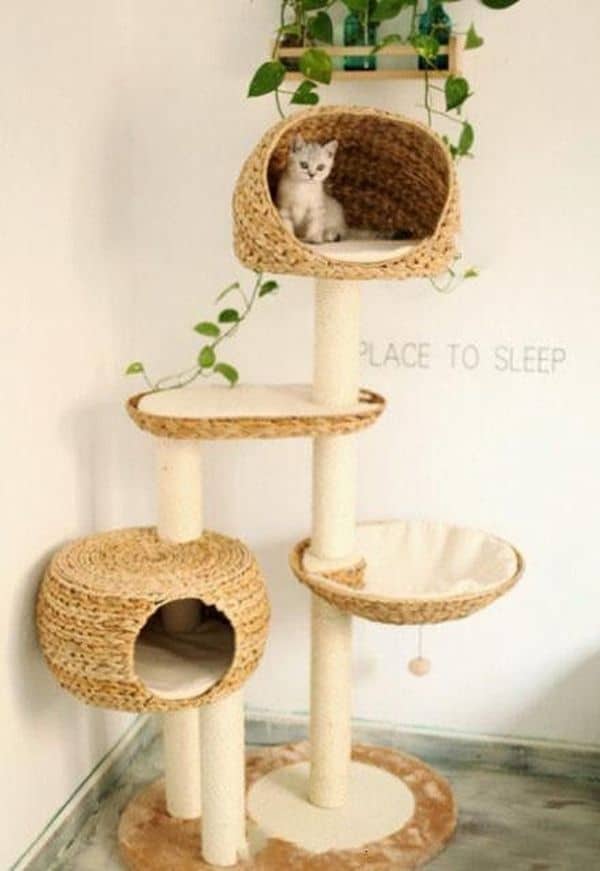
This was simple, yet stylish cat tree can be easily made at home with just a few supplies. First, find a large basket that will be sturdy enough to support your cat’s weight. Next, cut two pieces of jute rope to the desired length and tie them securely around the top of the basket. Then, use hot glue to attach a piece of carpet or fabric to the bottom of the basket. Be sure to use a strong adhesive so that your cat will be able to claw and scratch without damaging the fabric.
15. DIY Cat Tree IKEA Hack
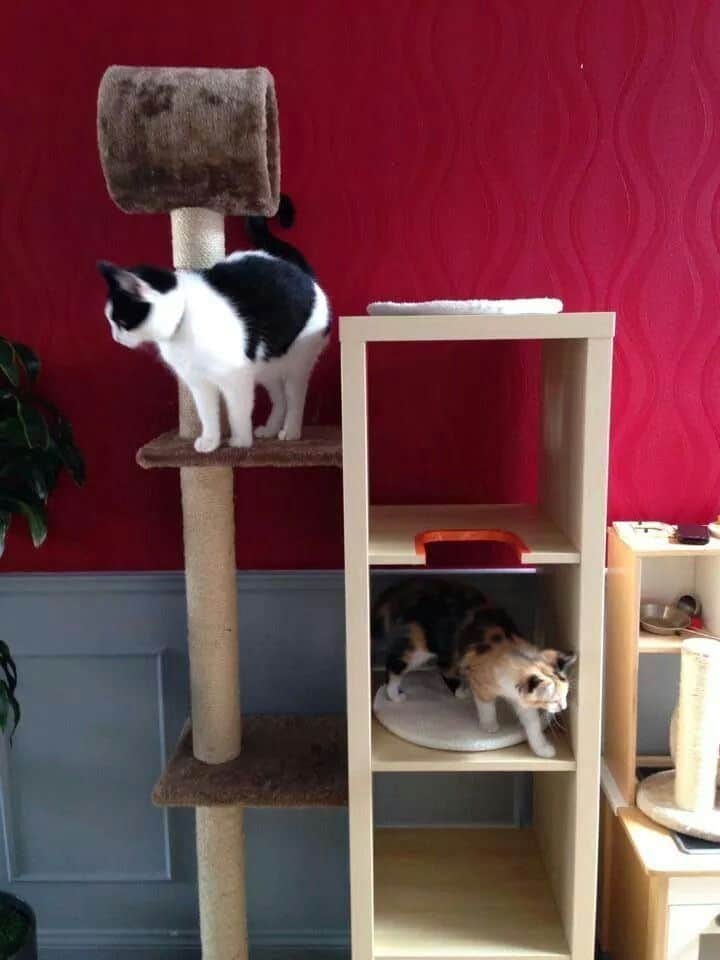
To start creating this DIY project, remove the shelves from the bookshelf and sand down any rough edges. Then, cut pieces of carpet to fit the shelves and glue them in place. Once the glue has dried, reattach the shelves to the bookcase and add some fun accessories like rope or fabric for your cat to climb and scratch on.
You can also add a perch or two for your cat to lounge on.
16. DIY Cat Tower Plan
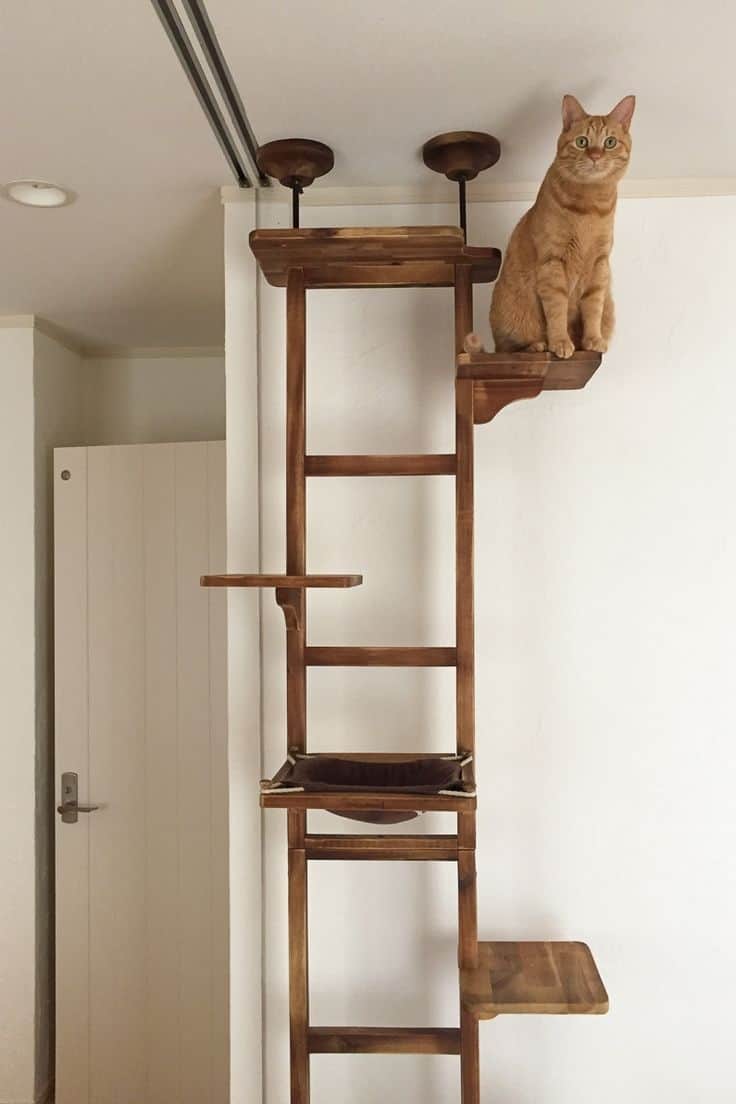
This project requires some basic carpentry skills, but the finished product is definitely worth the effort. The tower features several platforms for your cat to climb on, as well as a cozy napping spot at the top. You can customize the height and number of platforms to suit your cat’s needs, and add some toys or scratching pads to keep them entertained.
17. DIY Cat Tree House
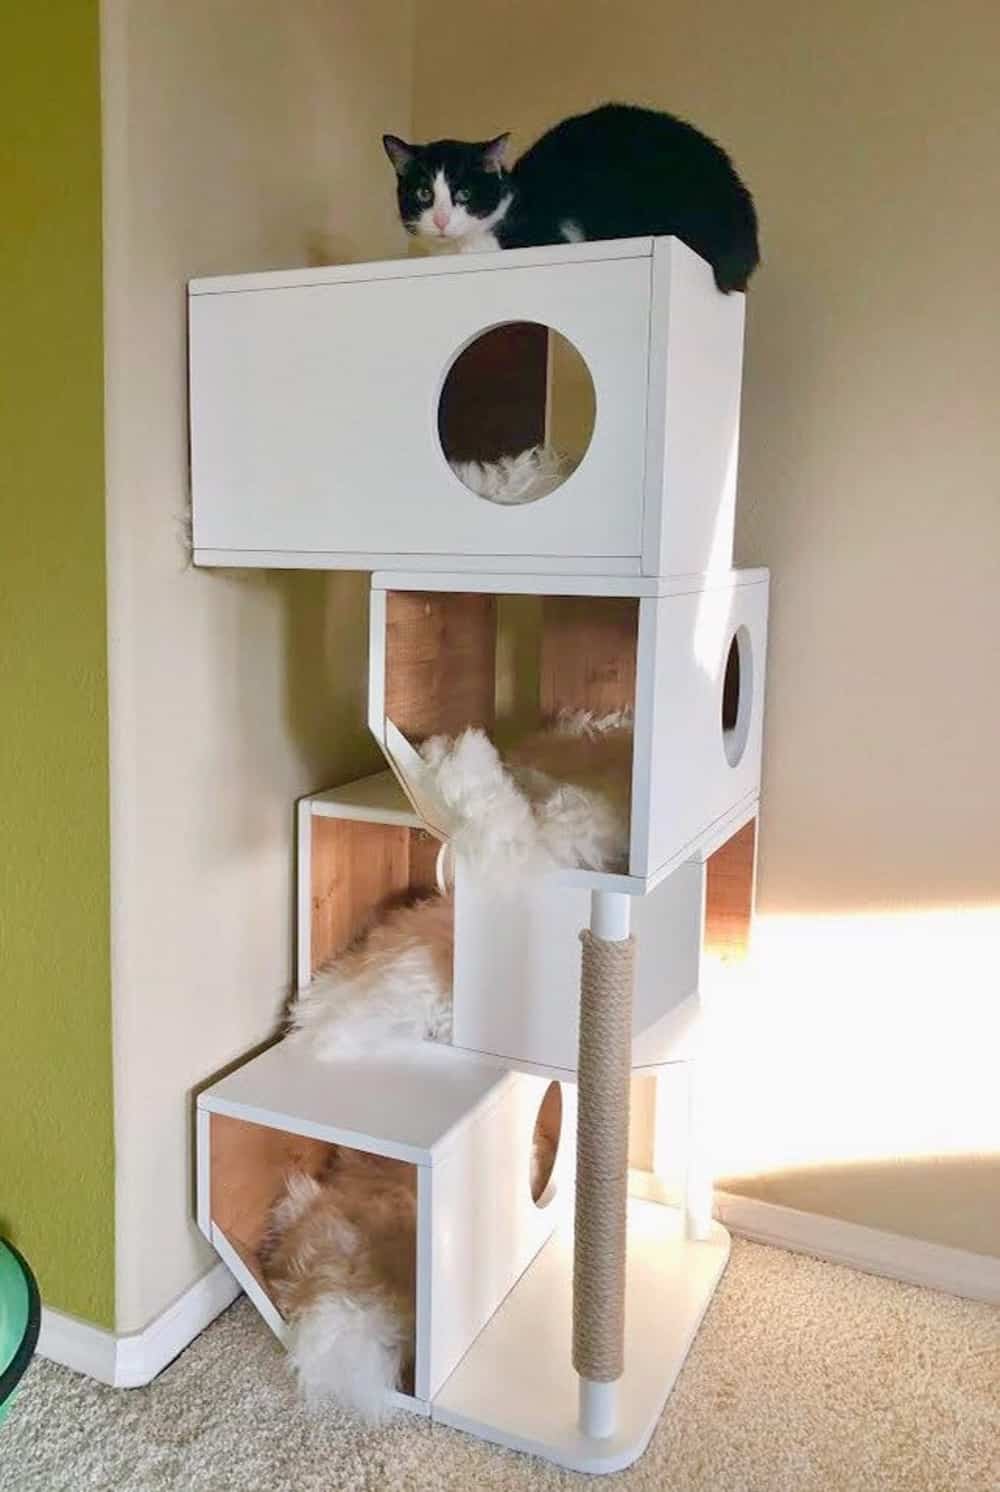
A DIY cat tree house should be tall enough to allow your cat to stretch and scratch to their heart’s content. They should also be sturdy enough to support your cat’s weight, as well as any enthusiastic scratching and clawing. Finally, they should include some form of hiding place or enclosed space where your cat can retreat when they need a break from all the action.
18. Inexpensive DIY Cat Tree
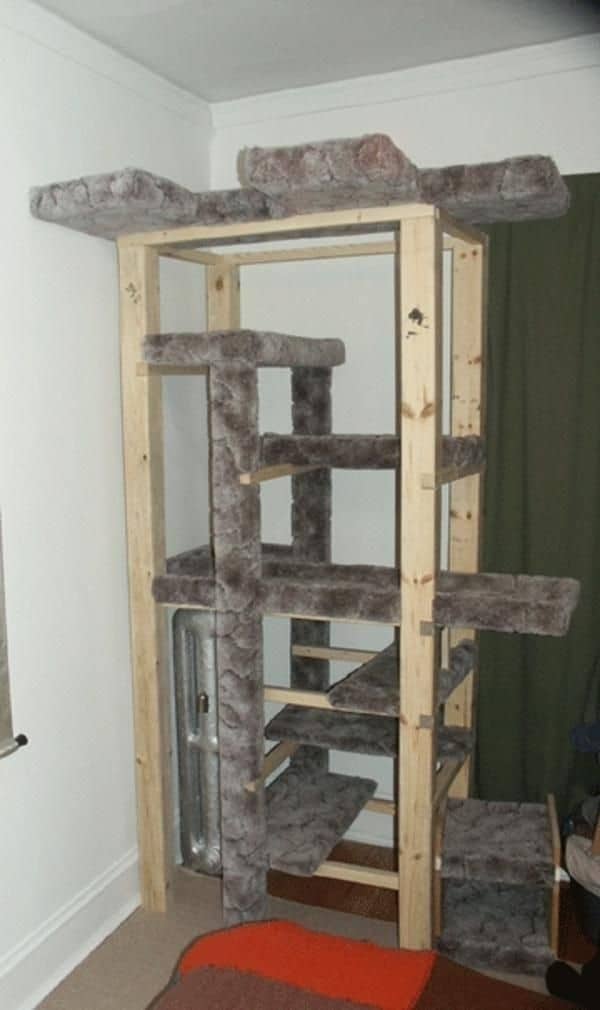
One of the simplest and most affordable option is to repurpose an old bookshelf or entertainment center. Just remove the doors, arrange some cushions or pillows on the shelves, then you are all set. Your cat will love having a new place to explore, and you’ll love not having to spend a lot of money.
19. Ultimate DIY Cat Tree
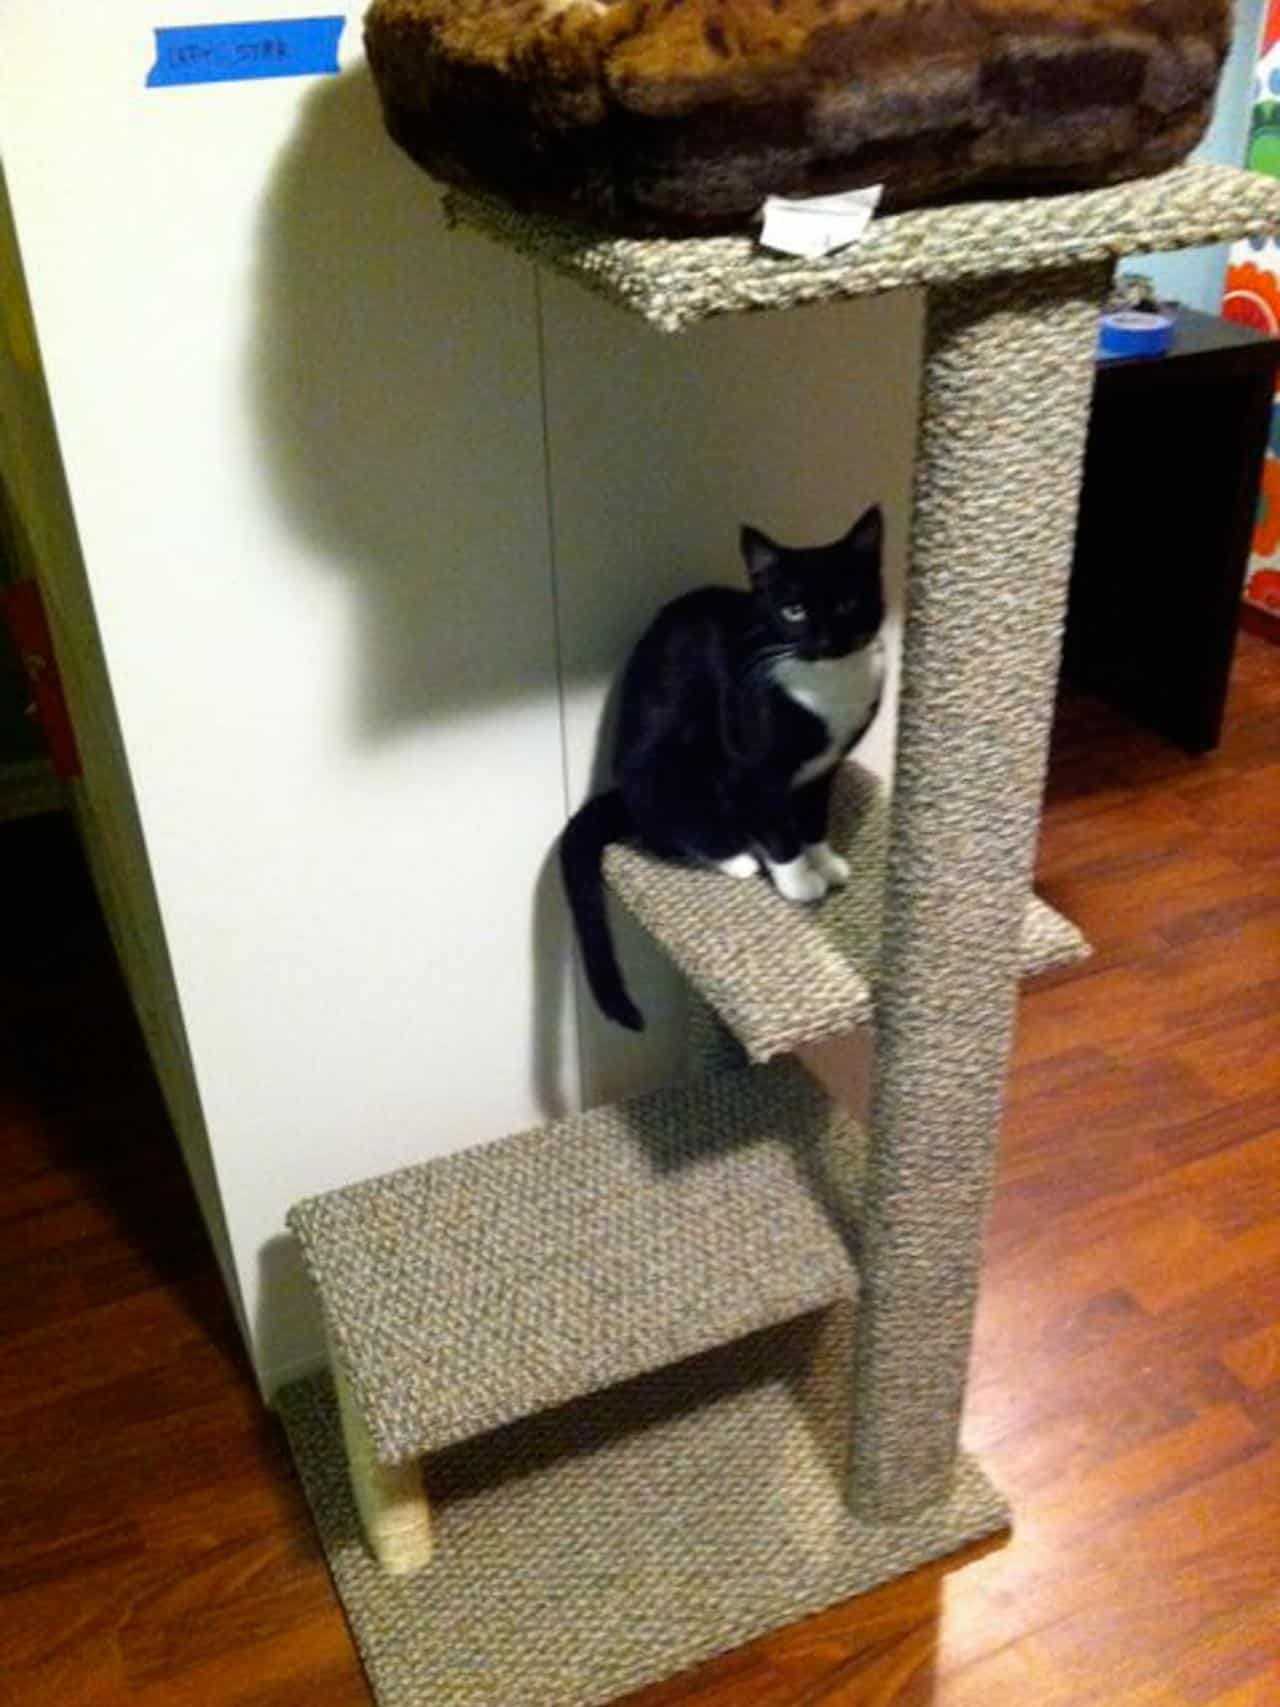
This project is easy to follow, and the result is a sturdy, stylish cat tree that your feline friends will love.
The first step is to cut four pieces of plywood boards into 18″x18″ squares. Next, grab some carpet and wrap it around each piece of plywood, stapling the carpet in place.
Once all four pieces are covered, stack them on top of each other and screw them together. Then, measure and cut four 24″ long 2x4s. These will be used as the support beams for the platforms. Screw the 2x4s into the plywood, attaching them at each corner. Now you’re ready to add the platforms.
Cut three more pieces of plywood into 18″x18″ squares, and cover them with carpet in the same way that you did for the base. Screw them into place on top of the 2x4s, spacing them evenly apart.
20. Upcycle The Wooden Crates
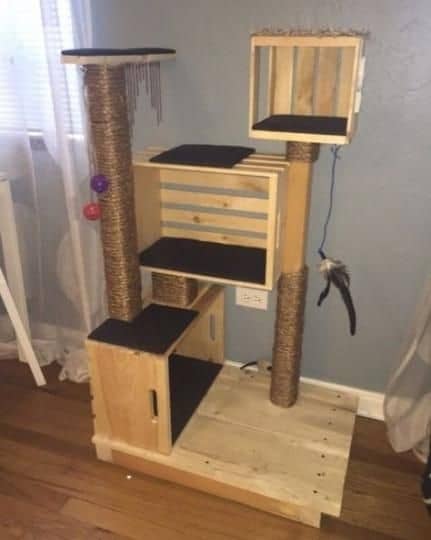
Consider upcycling some wooden crates into a fun and interactive tree that will keep your feline friend entertained for hours?
Here’s what you’ll need:
- 3 wooden crates (preferably of different sizes)
- 1 piece of plywood or MDF (measure to fit the top of your crates)
- Sandpaper
- Paint or Stain (optional)
- Cat Toys
- 4 Casters (optional)
First, sand down the crates and plywood to prep them for painting or staining. If you choose to paint them, now is the time to do so. Once the paint or stain is dry, it’s time to start assembling the tree.
Stack the crates on top of each other, with the largest crate at the bottom and the smallest crate at the top. Secure them together by screwing them into each other or nailing them in place. Then, attach the plywood to the top of the crates. Again, you can use screws or nails for this.
Building a DIY cat tree is the beautiful option to keep your furry friends entertained and satisfy their instincts as hunters. We’ve rounded up 20 of some fun ideas that you can try out today!
