Do you have a table that needs a top? Or, are you looking for a new and unique way to update your furniture? If so, then you’re in luck! In this blog post, we will be sharing 25 ideas for DIY table tops.
From simple to adorable, we’ve got something for everyone. Get started with these easy steps and you’ll be ready to create your own masterpiece in no time at all.
What’s more satisfying than turning an old table into something new and fabulous? With just a few tools, you can make your very own customized furniture-grade piece.
Table of Contents
1. Tile Simple Table Top
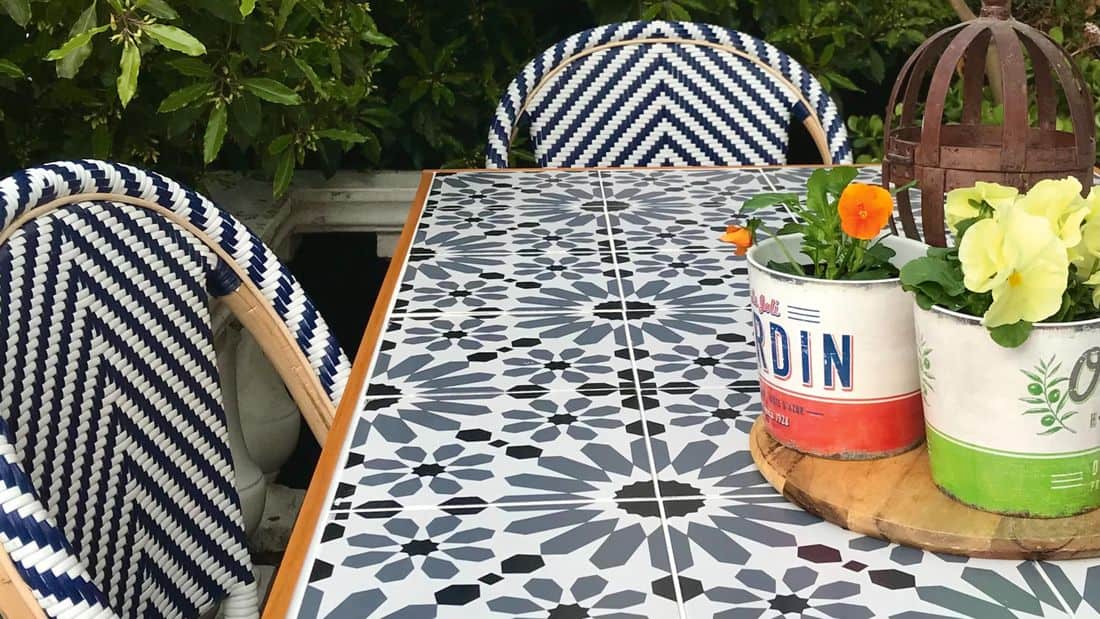
A tile table top is a great way to add a durable, easy-to-clean surface to any table. While you can purchase tile table tops ready-made, it’s also relatively easy to create your own.
Start by measuring the surface of the table and cutting a piece of plywood to fit. Then, lay out your tiles on the plywood, making sure to leave space for grout between each one.
Once you’re happy with the layout, use tile adhesive to attach the tiles to the plywood. After the adhesive has set, mix up some grout and spread it into the gaps between the tiles. After the grout has dried, your tile table top is complete.
2. DIY Resin Tabletop
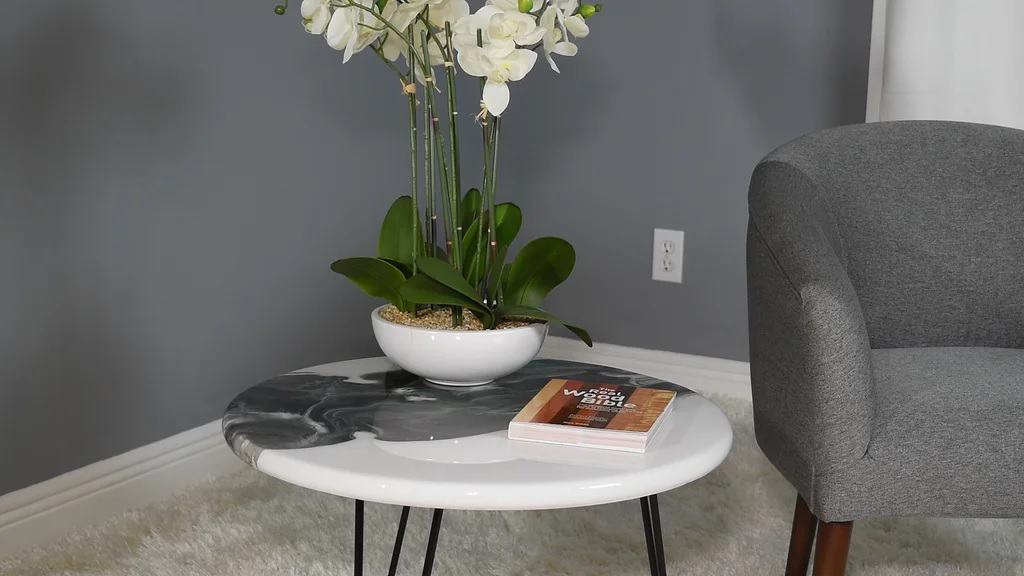
Resin table tops are both artistic and functional, providing a beautiful and durable surface that can be used for both indoor and outdoor dining. Best of all, they are relatively easy to make yourself with a few supplies from your local craft store.
You will need:
- Pine edge glued panel round board
- 16 in hairpin legs
- White (prime coat), Aged Brown, Turquoise, Light Brown, Silver, Black
- Countertop epoxy
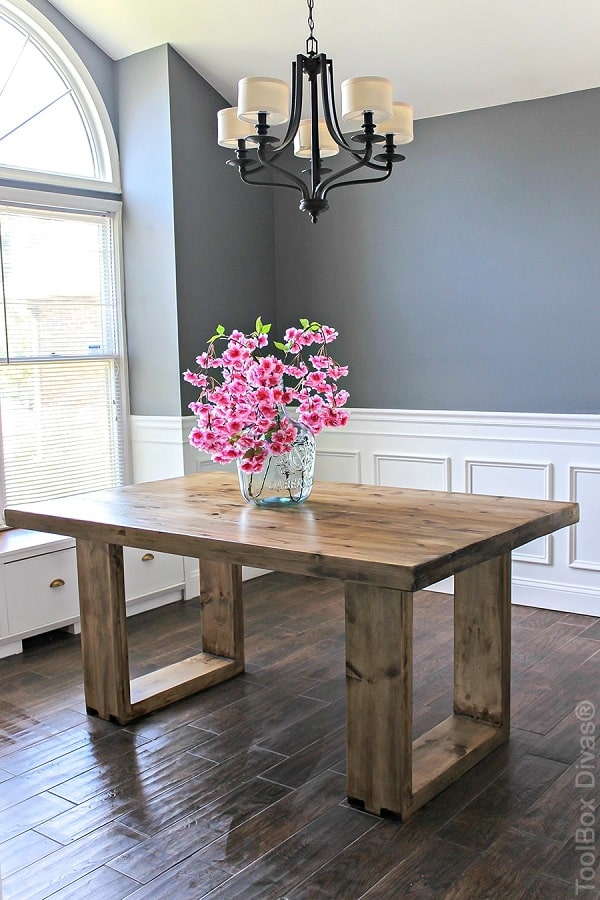
3. Wooden Slab Table Top
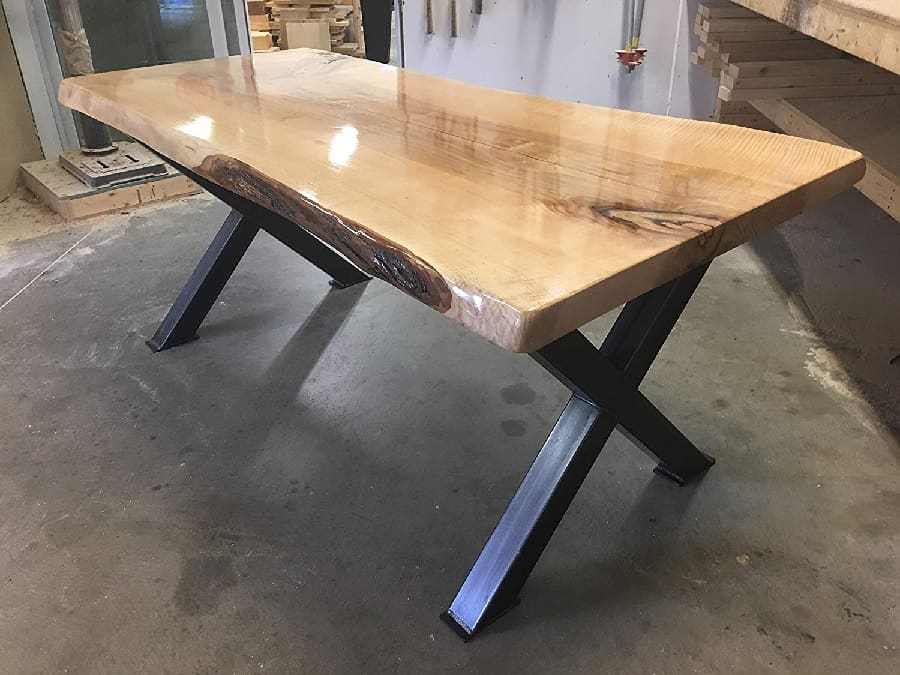
If you want to bring in the natural hint to your living space, install the wooden slab as the top table. You only need to find the natural wood slab that is the right size for your needs. Ensure you sand it down to smooth any rough edges.
When it’s perfectly smooth, stain the wood to get the desired look. After all, apply a sealant to protect wood and give it a glossy finish to make it looks more elegant.
4. Rounded Plywood Table Top
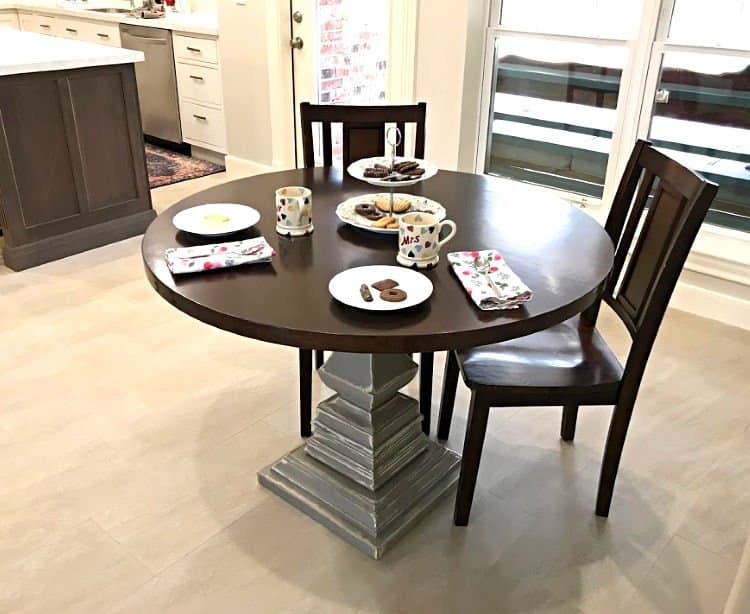
A rounded table top is a great way to achieve this modern look without having to spend a lot of money. To make it work, you’ll need a piece of plywood or MDF that’s at least 1 inch thick. Cut the plywood into a circle using a jigsaw or a circular saw. Sand the edges smooth and then paint or stain the wood to your desired finish.
If you want to add interest to the table top, you can attach different pieces of wood around the edge using construction adhesive. Once the adhesive has dried, sand the edges smooth and then finish as desired. You can also inlay different colors of wood or create patterns for a truly one-of-a-kind table top.
5. Copper Table Top
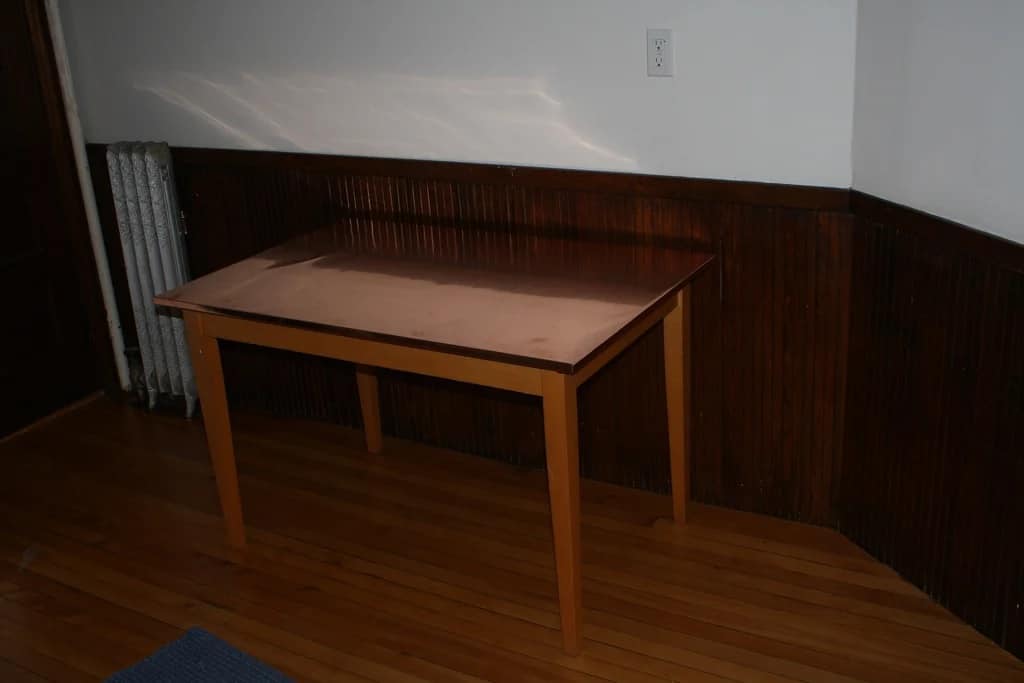
A copper table top is a classy and elegant addition to any home. The warm hue of the copper pairs well with a variety of different furniture styles and color schemes. Plus, the metal is easy to care for and maintain. To start, you’ll need a copper sheet, a measuring tape, a sharp knife, and a surface protector (such as paper or cardboard).
First, measure and mark the dimensions of your desired table top on the copper. Next, use the knife to cut along the marked lines. Once the table top is cut to size, apply the surface protector to one side. This will help to prevent scratches when you’re working with the copper. Finally, use a hammer to gently shape the metal into your desired shape.
6. Concrete Table Top
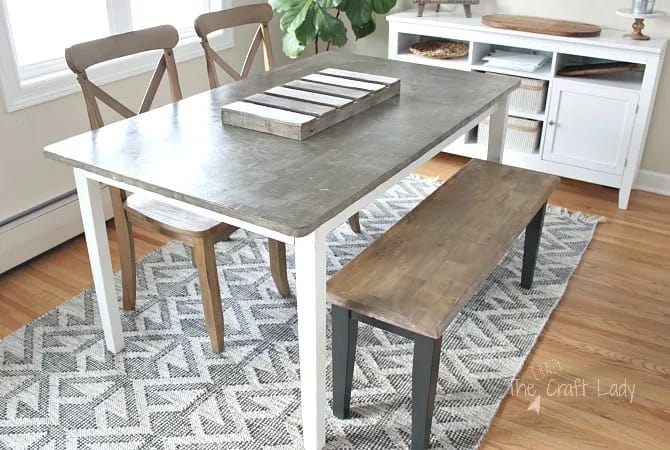
For an industrial-chic look in your home, consider making your own concrete table top. This project is surprisingly easy to do, and the results are stunning. You’ll need to gather a few supplies before you get started, including concrete mix, a mold or form, and some reinforcing wire or rebar.
When you have everything you need, simply mix the concrete and pour it into the mold. Be sure to vibrate the mold to help eliminate air bubbles. Then, add the reinforcement material and allow the concrete to cure for at least 24 hours. When it’s fully cured, you can remove the mold.
7. Upcycle the Bottle Cap

This DIY project is fun and creative, and it’s a great way to repurpose materials that would otherwise end up in the trash. Plus, bottle cap table tops are surprisingly sturdy and durable.
To get started, simply collect a bunch of bottle caps. When you have enough caps, clean them thoroughly and then arrange them into your desired pattern on a flat surface. When you’re happy with the arrangement, glue the caps in place. Allow the glue to dry completely and then finish off the table top with a layer of clear sealant.
8. Glazed Penny Coffee Table
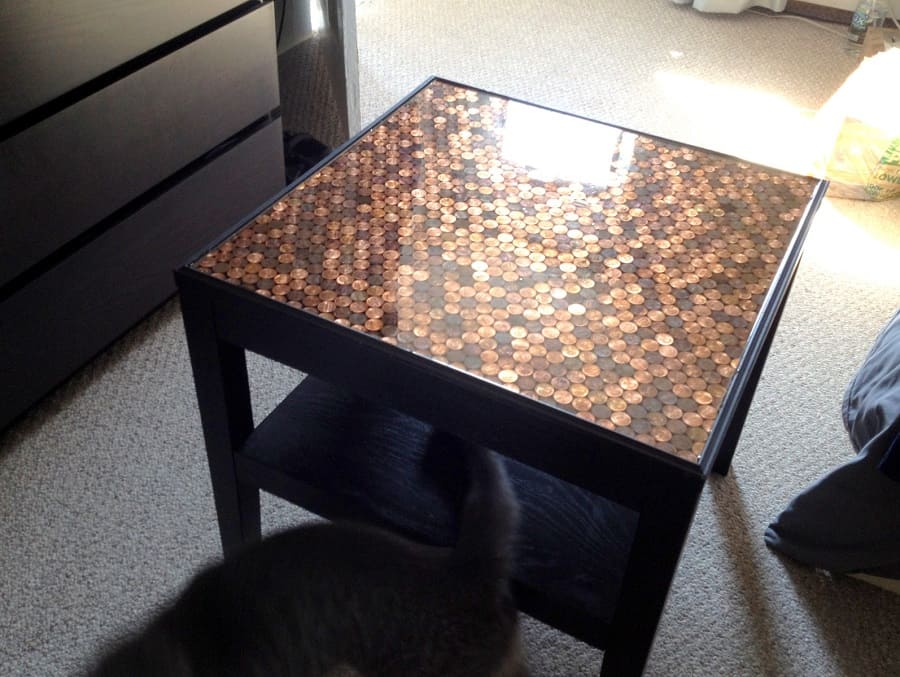
A square table top is one of the most versatile shapes for a table. It can be used as a coffee table, an end table, or even a dining table. A glazed penny table top is a square table top that is covered in glaze. The glaze creates a smooth, glossy surface that is easy to clean and maintain. Penny table tops are a simple solution for DIYers who want a durable and low-maintenance table top.
Penny table tops are also heat resistant, making them ideal for use in the kitchen or dining room. To create a glazed penny table top, you will need: square table top, glaze, paintbrush, and optional protective sealer. First, apply a layer of glaze to the table top with a paintbrush. Next, allow the glaze to dry completely. Finally, apply a protective sealer to the table top if desired.
9. Mosaic Table Top
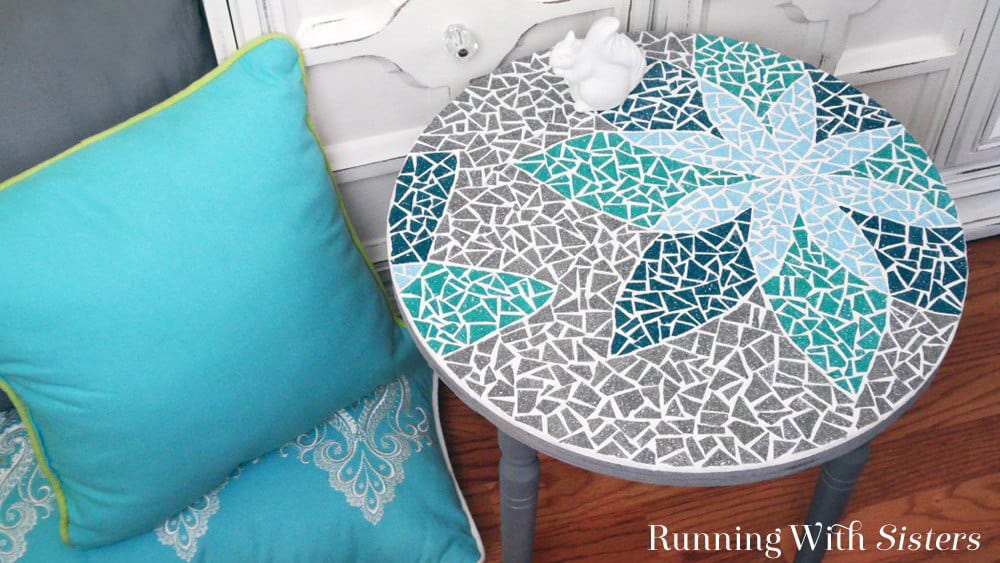
A mosaic table top is a beautiful and unique way to personalize your furniture. This can be as simple as a geometric pattern or a more complex design that incorporates images and colors.
The best part about a mosaic table top is that it doesn’t require any special skills or materials to create. You can use anything from broken dishes to old jewelry to create your design.
10. DIY Glasstop Dining Table
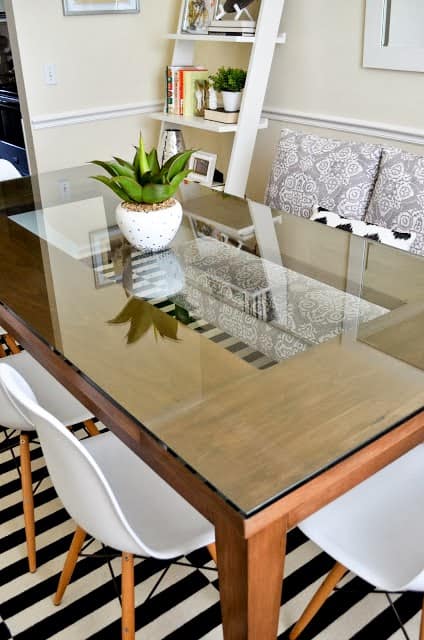
A contemporary home is not complete without a stylish and modern glass tabletop. Ensure you measure the size and the shape as you wish. After that, you need to decide the thickness that will be both durable and stylish. Attach it to the table, which can be done with adhesive or clamps, depending on the material of your table top.
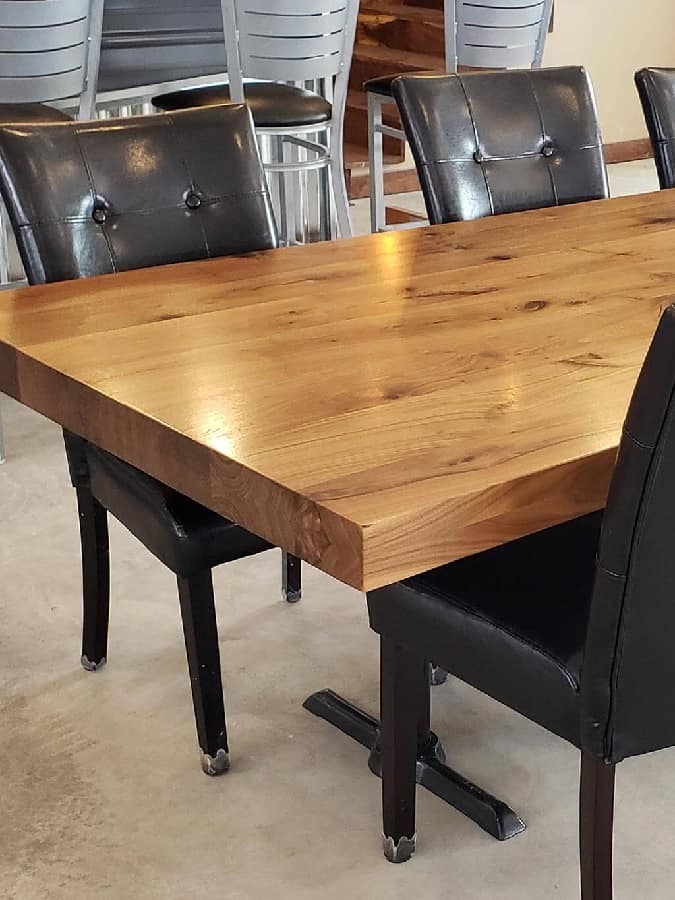
11. Oak Wood Table Top
Oak is a popular choice for DIY table tops due to its durability and classic appearance. Despite being a strong wood, it is also relatively easy to work with, making it an ideal option for beginners in woodworking.
To create an oak table top, you will need to start with a solid piece of lumber. When you have your lumber, use a saw to cut it to the desired size and shape. If you want a smooth surface, you can sand down the edges after cutting. For a more rustic look, you can leave the edges rough. Once you have your tabletop cut to size, apply a stain or sealer to protect the wood and give it a finished look.
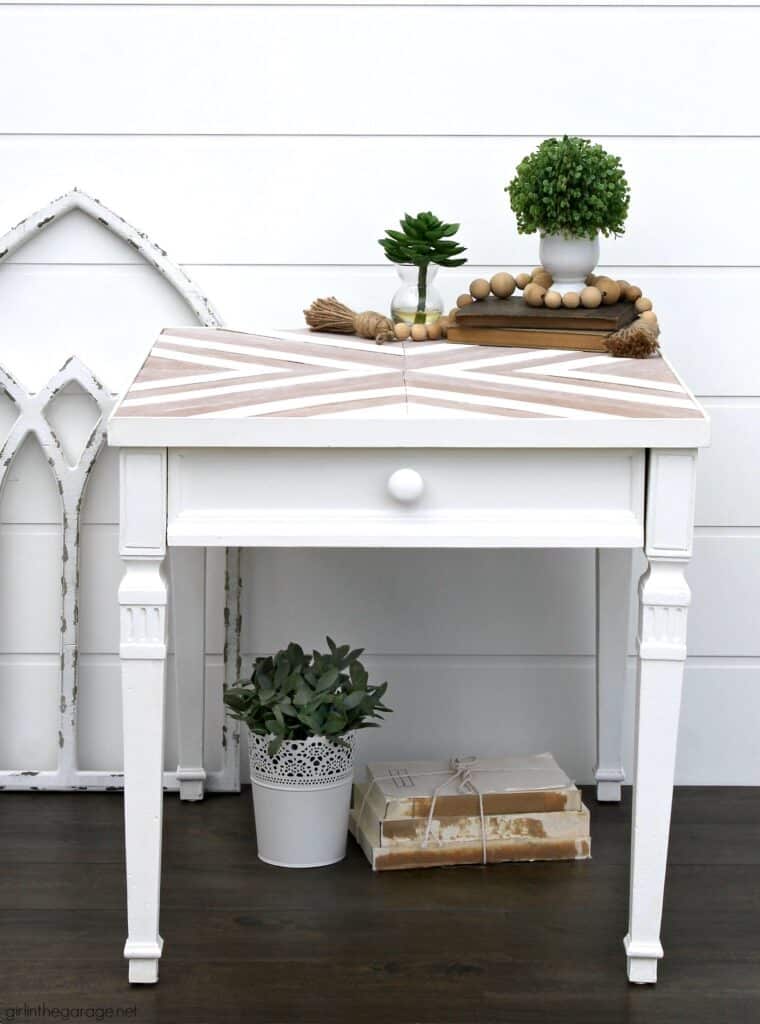
12. The Chevron Pallet

Transform the pallet into a cool table top in your living space without lots of things to do. In addition to being easy on the wallet, pallets are also easy to work with, meaning that even those with limited woodworking experience can put together a beautiful table top.
Pallet table tops can be sanded down and stained or painted to match any desired aesthetic, making them a versatile option for any home. You can also create a chevron pattern, which will update the look of the pallet as well.
13. Metal Table Top
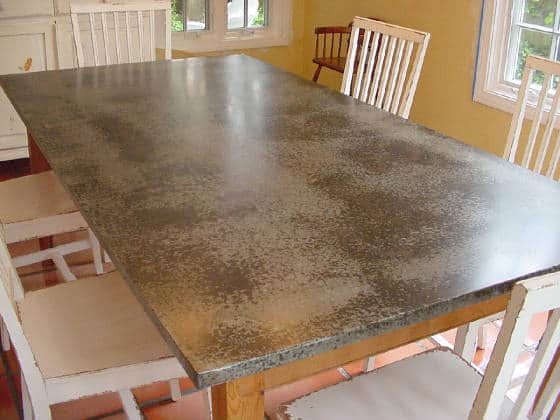
Metal is a very strong material that can withstand a lot of wear and tear, making it an ideal choice for a busy family home. Another advantage of a metal table top is that it is easy to clean and maintain. Spills can be quickly wiped up and fingerprints are less likely to show on a metal surface than on other materials.
In addition, metal is resistant to heat, making it an ideal choice for hotplates or for use near the BBQ. However, one downside of metal is that it can be quite heavy, making it difficult to move around. Overall, a metal table top is a great choice for those who are looking for a durable and easy-to-maintain surface.
14. DIY Butcher Block Table Top
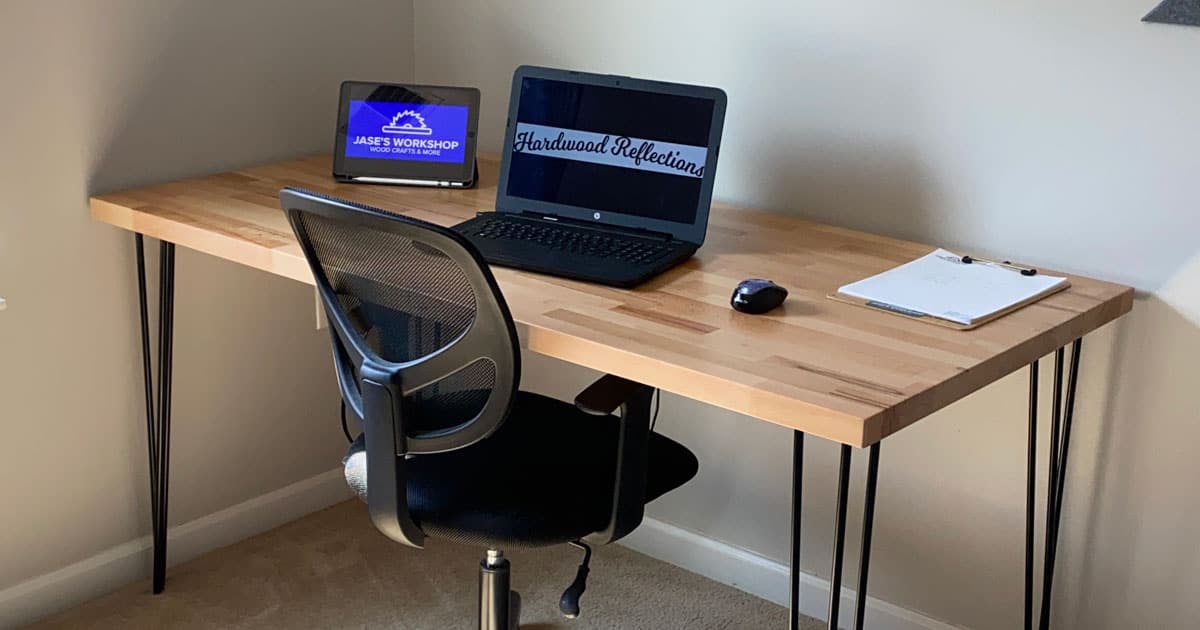
A butcher block top can be the best option if you are looking for a durable, easy-to-clean surface that will withstand the rigors of daily use. The first step is to find a piece of suitable lumber. Get a wide plank of maple at a local home improvement store. Next, you need to cut the lumber into blocks that are the same size. To do this, you will need a table saw and set the blade to the desired thickness.
When all of the blocks were cut, sand them down until they smooth. Then, lay out the blocks in the pattern that you want and glue them together. After the glue perfectly dry, sand the table top again and apply a coat of finish. Finally, attach the table top to the hairpin legs.
15. Wine Cork Table Top
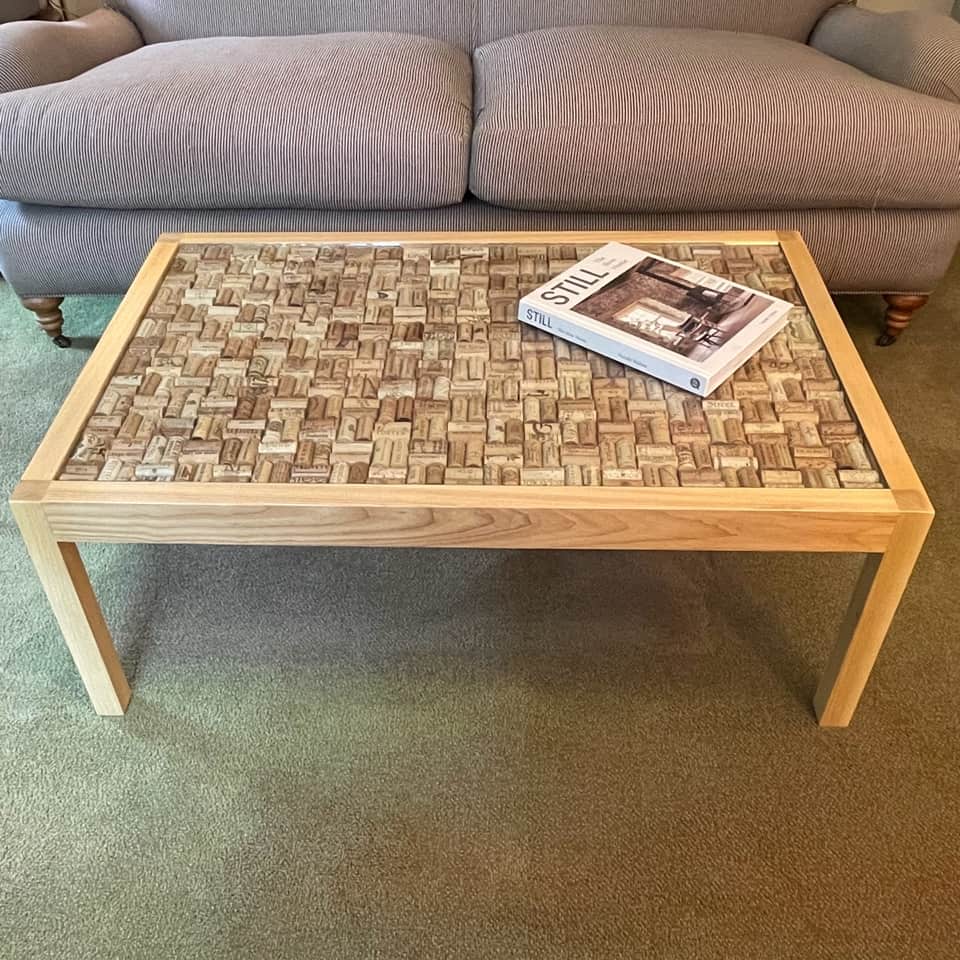
This simple project can add a touch of elegance to any room, and it’s surprisingly easy to do. To get started, you’ll need a clean, flat surface to work on. An old cutting board or piece of plywood would be ideal.
Once you have your surface, simply glue the wine corks in place, working in rows from the outside inward. For best results, use a strong adhesive like Gorilla Glue. Once the glue has dried, you can finish off the table top with a coat of polyurethane or varnish.
16. The Unique Table
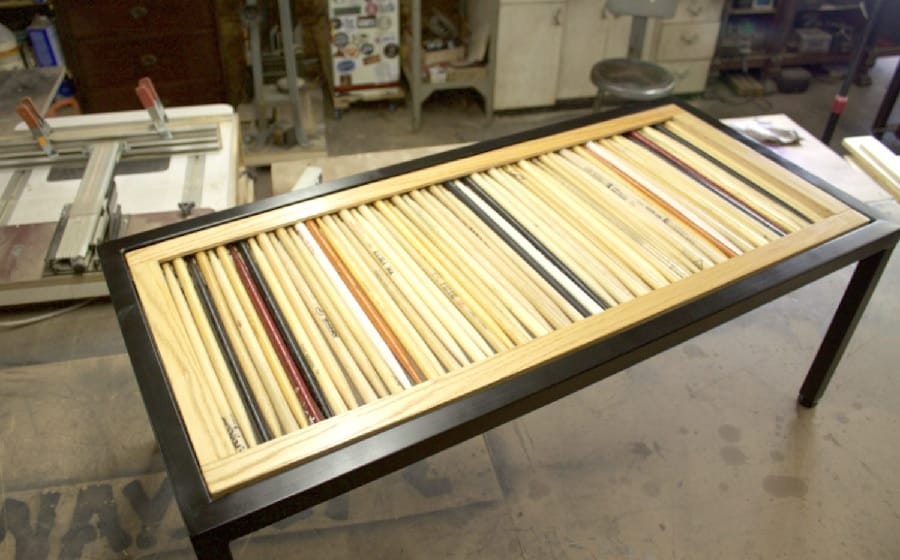
A drum stick table top is a fun and unique way to do just that. Plus, it’s a great conversation starter!
Here’s what you’ll need: an old drum, sandpaper, a saw, paint or stain, and polyurethane.
First, remove the drumhead from the drum and sand down the surface. Next, use the saw to cut the drum in half. When that’s done, it’s time to paint or stain the surface. After the paint or stain is dry, apply a layer of polyurethane to protect the finish.
17. Laminated Vinyl Flooring Table Top
This project is perfect for anyone with basic DIY skills, and it can be completed in just a few hours. Best of all, vinyl flooring is durable and easy to clean, so your new table top will last for years to come. To start, measure the size of your existing table top and cut the vinyl flooring to size. Be sure to leave enough extra material around the edges so that you can fold it over and glue it down.
Next, apply a layer of adhesive to the back of the vinyl flooring and press it into place on the table top. Use a roller or another heavy object to smooth out any bubbles or wrinkles. Finally, trim away any excess material and allow the adhesive to dry completely before using your new table top.
18. Painted Table Top
A good way to make sure that your table top looks good is to paint it. It’s actually not as difficult as you might think, and the results can be truly stunning. For best results, apply two coats of paint, allowing the first coat to dry completely before applying the second.
Here’s what you’ll need to get started:
- A table top (obviously)
- Sandpaper
- Primer
- Paint (acrylic paint works well)
- Painter’s tape
- A foam brush or roller
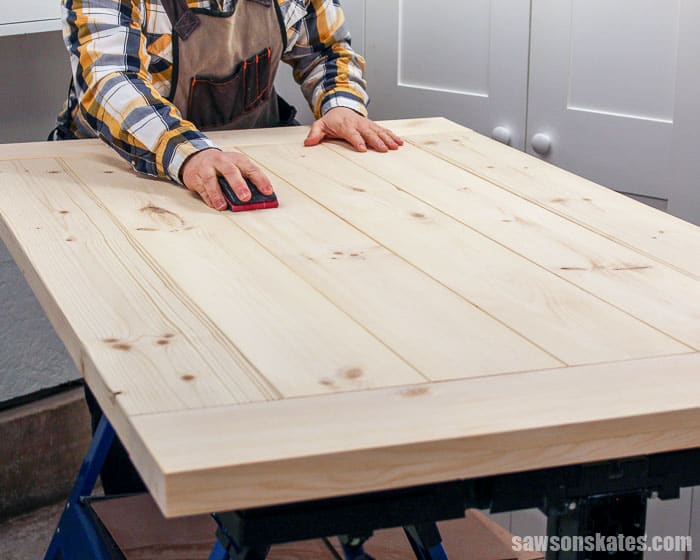
19. Hardwood Table Top
A hardwood table top is a great way to add a touch of class to any room in your home. And if you’re handy with a few tools, it’s not difficult to build one yourself. To start, you’ll need to select the right piece of lumber. Look for hardwood that is free of knots and defects, and make sure it is planed and sanded smooth.
When you have the lumber, cut it to size using a table saw or Circular saw. If you’re using a table saw, be sure to use a push stick to prevent the wood from binding in the blade. Next, lay the boards out on a flat surface and glue them together using a waterproof wood glue. Once the glue has dried, use a hand plane or sandpaper to smooth out any rough spots. Finally, finish the table top with a sealer or varnish of your choice.
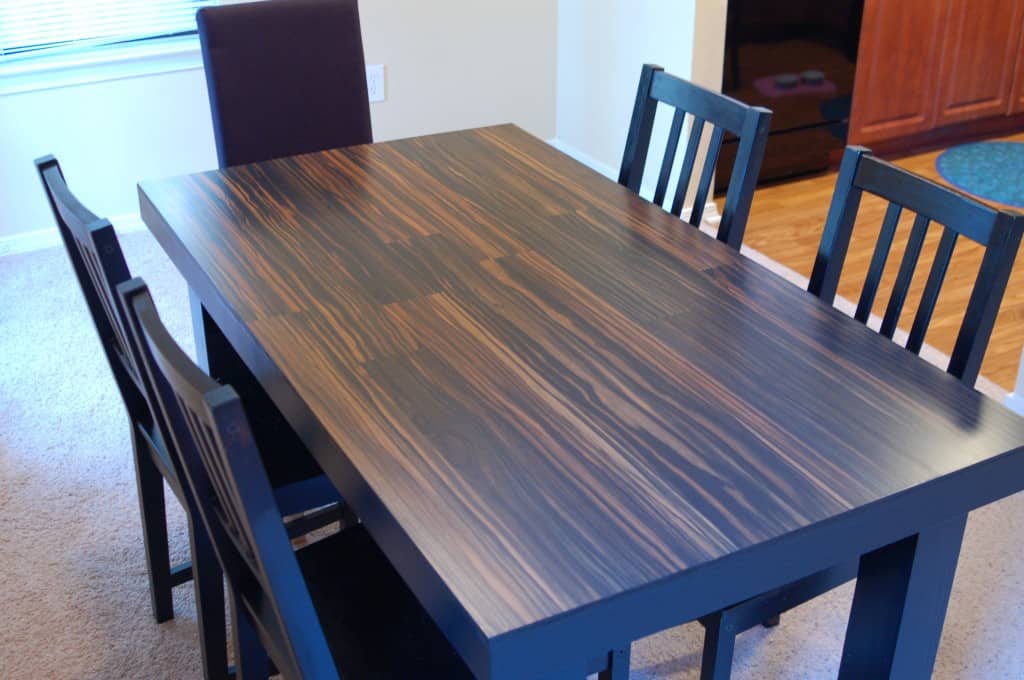
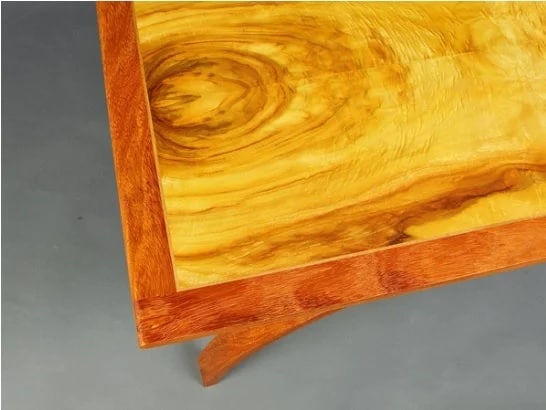
20. Walnut Live Edge Table Top
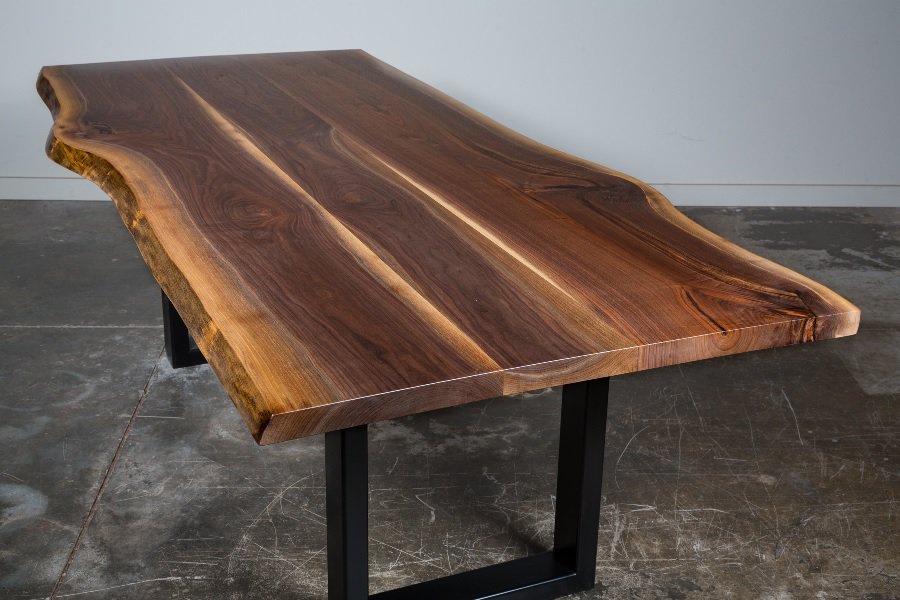
When you want to create a unique touch to your home, a live edge table top can be the great way. A live edge table top is a stylish and rustic option that can be easily created with the right tools and materials.
To get started, you’ll need to purchase a piece of lumber that has been cut from a tree with a live edge. This can typically be found at a local sawmill or woodworking store. Once you have your lumber, you’ll need to sand it down and finish it with a protective sealant. Then, simply attach the tabletop to your desired base using screws or dowels.
21. Thick Table Top
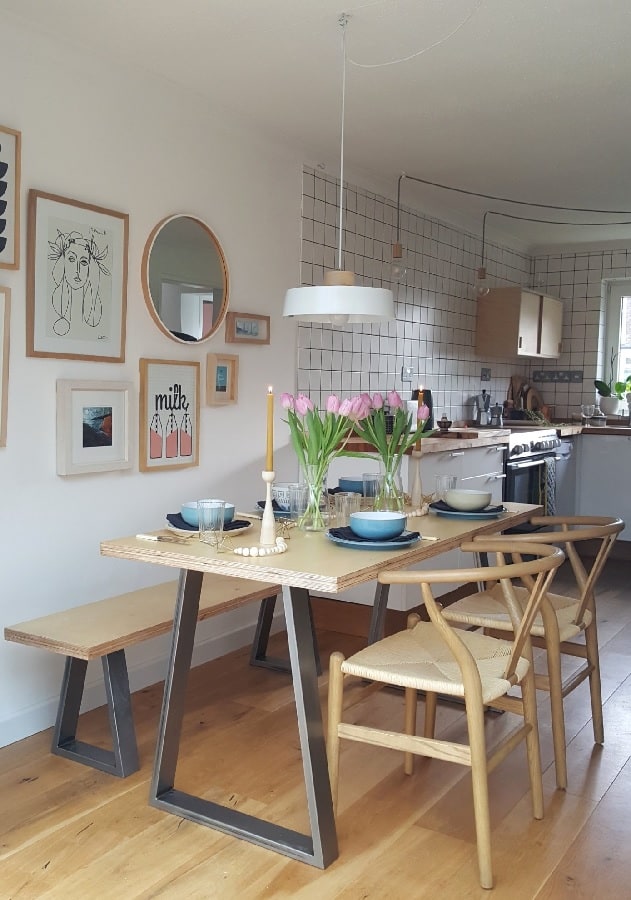
If you have a thick table top, it will last longer and be more durable than a thin one.
Here are some tips for making your own DIY thick table top:
- Use plywood as your base material. Plywood is strong and sturdy, and it can be easily cut to size.
- Cut the plywood into strips, and then glue them together. This will give you a strong, solid piece of wood to work with.
- Once the glue has dried, sand down the surface of the wood so that it is smooth.
- Apply a layer of sealant to the wood to protect it from moisture and wear.
- Apply a layer of finish to the wood so that it looks nice and polished.
- After all, attach the wood to the metal legs
22. Wood Building Block Table Top
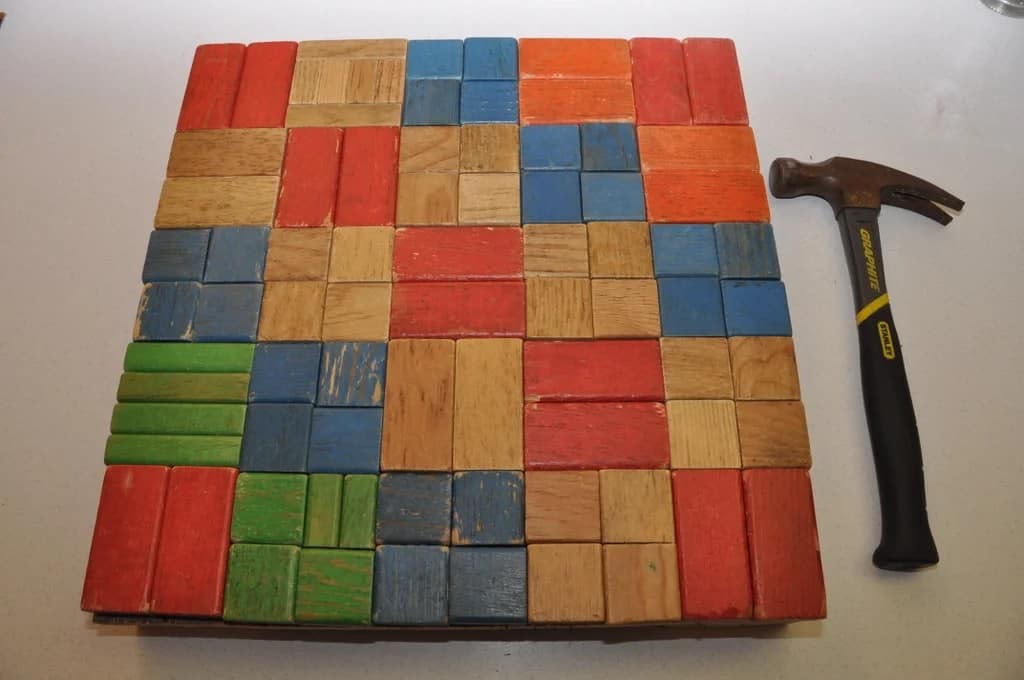
This DIY project is easy to do, and it’s a great way to add some personality to your home. You’ll need to gather some supplies before you get started, including wood blocks, sandpaper, wood glue, and a sealer.
When you have everything you need, the first step is to sand the blocks down so that they’re smooth. Next, apply a generous amount of glue to each block and then stack them on top of each other. Use clamps or heavy books to keep the blocks in place while the glue dries. Once the glue is dry, sand the table top down again and then apply a coat of sealer. Allow the sealer to dry completely before using the table top.
23. Farmhouse Stained Table Top
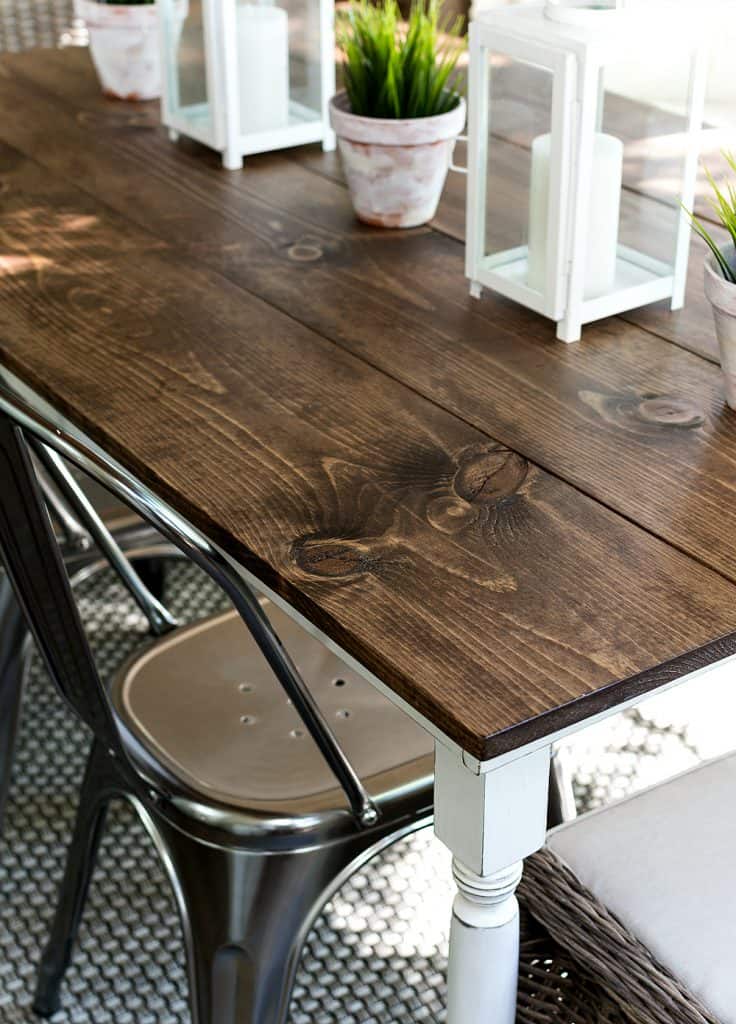
A stained table top is a beautiful and budget-friendly way to update your furniture. To achieve this farmhouse look, start by sanding down the surface of your table top. Once it is smooth, apply a wood conditioner. This will help the stain to evenly soak into the wood. Next, choose your desired stain color and apply it according to the manufacturer’s instructions.
For a natural look, wipe off any excess stain with a clean cloth. Finally, seal the stain with a layer of polyurethane. Allow the sealant to dry completely before using the table top.
24. Cheap and Aesthetic Table Top
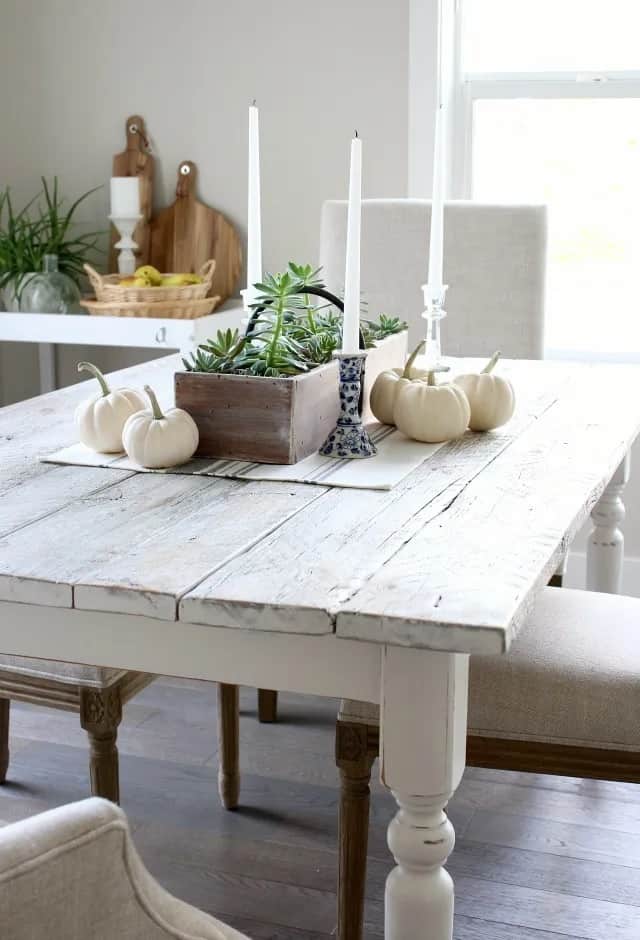
If you’re looking for a cheap and easy way to update your boring table, reclaimed wood is a great option. You can usually find reclaimed wood for free or very inexpensively, and it can be used to create a beautiful and unique table top.
Reclaimed wood is also eco-friendly, since it’s recycled from old buildings or other structures. To create a reclaimed wood table top, simply sand down the wood, stain, or paint it as desired, and then seal it with a clear coat. You can then attach the tabletop to your existing table base using screws or nails.
25. Marble Table Top
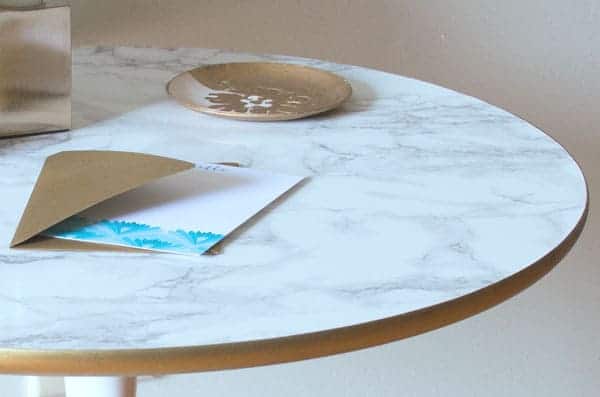
You can now have the marble table top of your dreams without breaking the bank. All you need is some wallpaper and a little bit of patience. Here’s how it’s done:
First, measure the surface of your table and cut the wallpaper to size. Make sure to leave a few inches of extra wallpaper on each side so that you can wrap it around the edges of the table.
Next, apply a layer of mod podge to the surface of the table. Be generous with the glue so that the wallpaper will stick properly. Then, carefully apply the wallpaper to the table, starting in the middle and working your way out to the edges. Once the wallpaper is in place, smooth out any bubbles or wrinkles with your hands. Finally, apply another layer of mod podge over the top of the wallpaper.
26. Veneered Table Top
A veneered table top is a beautiful addition to any home. It’s easy to create your own veneered table top using some basic tools and supplies.
First, you’ll need to choose a wood veneer that matches the finish of your table. Next, use a putty knife to spread a thin layer of wood glue onto the surface of the table. Then, place the wood veneer on top of the glue and use a roller to smooth it out. Once the glue is dry, trim the excess veneer from the edges of the table top. Lastly, apply a coat of polyurethane to protect the finish.
27. Solid Wooden Table Top
This table top is made of 100% solid wood, so you know it will be durable and long lasting. The best part is that it’s easy to take care of- just wipe it down with a damp cloth and you’re good to go. It’s the perfect size for a small kitchen or dining room, and it would make a great addition to your home.
Whether you want to add a rustic touch to your décor or create a fabulous table top that will wow your guests, we’ve got you covered.
With these 27 smart ideas for DIY table tops, the only limit is your imagination. So get creative and have some fun with this project.