Creating a stylish DIY floating desk is the perfect way to save space in a small room. By mounting your desk on the wall, you free up valuable floor space that can be used for other purposes.
And because it hangs from the wall, it gives the illusion of floating, which makes your room appear larger and more open. Best of all, it’s a relatively easy DIY project that can be completed on a weekend. Besides creating a space-saving feature, it would be perfect if you are on a budget and also planning to expand your woodworking skills.
Let’s take a look at the list of DIY floating desk ideas down below and elevate your skills.
Table of Contents
1. Create An Effortless Idea
By mounting this to the wall space, you free up valuable floor space. And, because it is mounted at a comfortable height, you don’t have to worry about stooping or crouching when you’re working. Best of all, a floating desk is easy to build! With just a few inexpensive supplies and some basic DIY skills, you can create a beautiful and functional workspace.
Here’s what you’ll need:
- A piece of plywood (at least 1/2″ thick)
- A length of 2×4 lumber (cut to size)
- Four furniture legs (optional)
- A drill
- Wood screws
- A saw (if you’re using 2×4 lumber)
- Paint or wood stain (optional)
To get started, cut your plywood to size using a saw. If you’re using 2×4 lumber, you’ll also need to cut it to size. Next, drill pilot holes in the plywood and attach the 2x4s using wood screws. If you’re using furniture legs, now is the time to attach them. Once the frame is complete, finish off the desk by painting or staining it to match your style. And that’s it! In just a few easy steps, you’ve created a beautiful and functional floating desk.
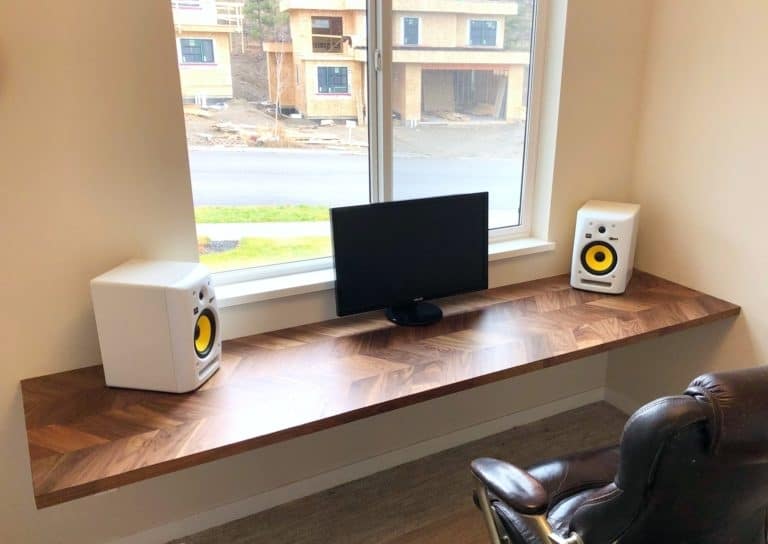
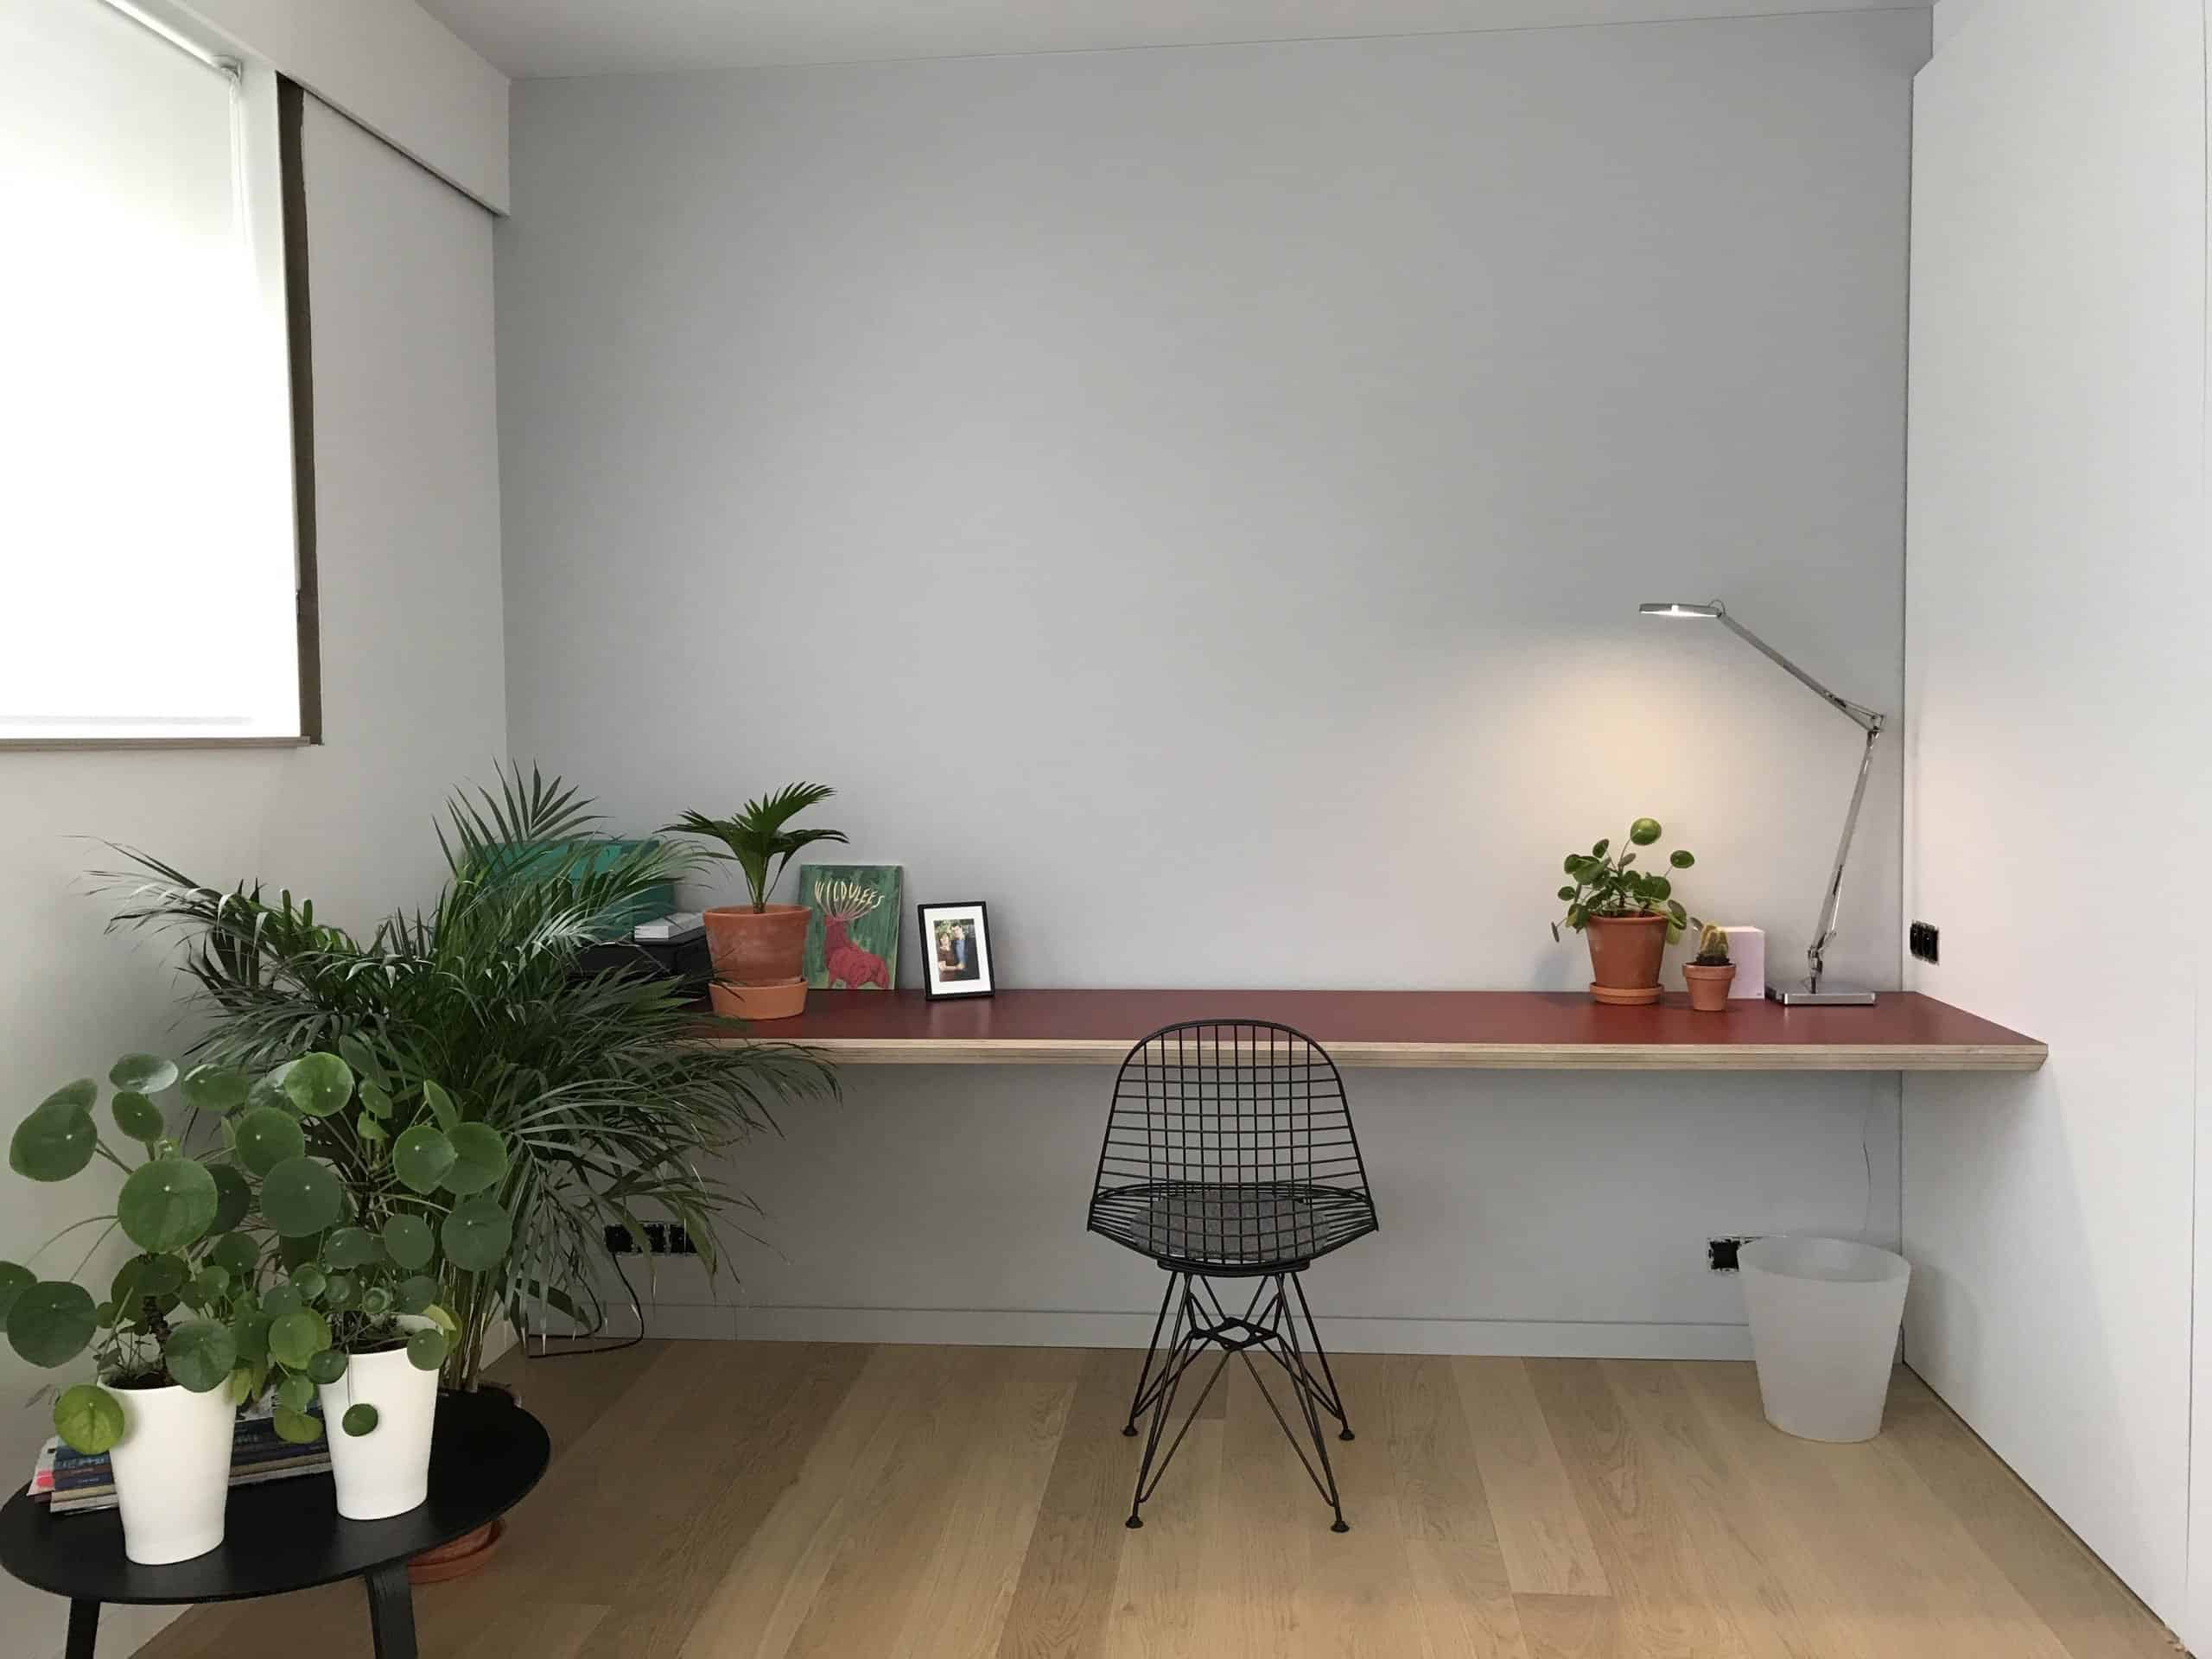
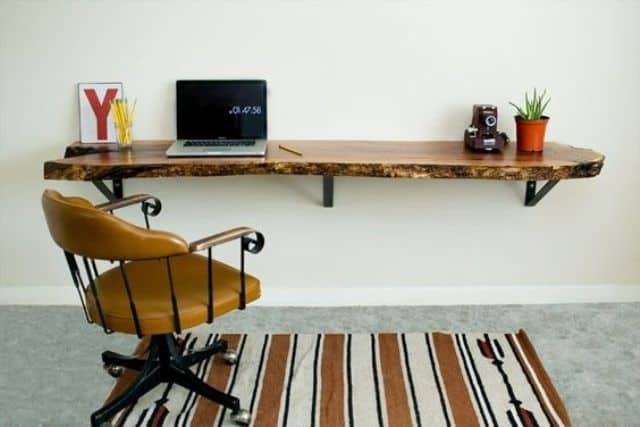
2. The Beauty Of Nature And Warm Hint
And this idea is the perfect solution for a home office or a bedroom. It is easy to build, and it only requires basic carpentry skills. Plus, the rustic look of the desk will add character to any room.
To build, you will need some basic tools and materials. First, you will need to measure and cut the lumber for the desk top and legs. Next, you will have to assemble the desk using screws and nails. Finally, you will have to finish the desk by staining or painting it.
Complement it with the eye-catching cozy chair to make it look gorgeous together.
3. Express Your Painting Skills
With a bit of effort, you can easily add a touch of style to your home with a painted DIY floating desk. This project is not only easy to do, but it will also add a pop of color to your living space. All you need for this project is a piece of plywood, some paint, and a few supplies from your local hardware store. Once you have all of your materials, simply follow the instructions below to create your very own floating desk.
To start, cut the plywood to the desired size and shape. Next, use sandpaper to smooth out any rough edges. Once the plywood is smooth, apply a coat of primer and allow it to dry. Once the primer is dry, paint the plywood in your desired color. Finally, attach the brackets to the underside of the desk using screws or nails.
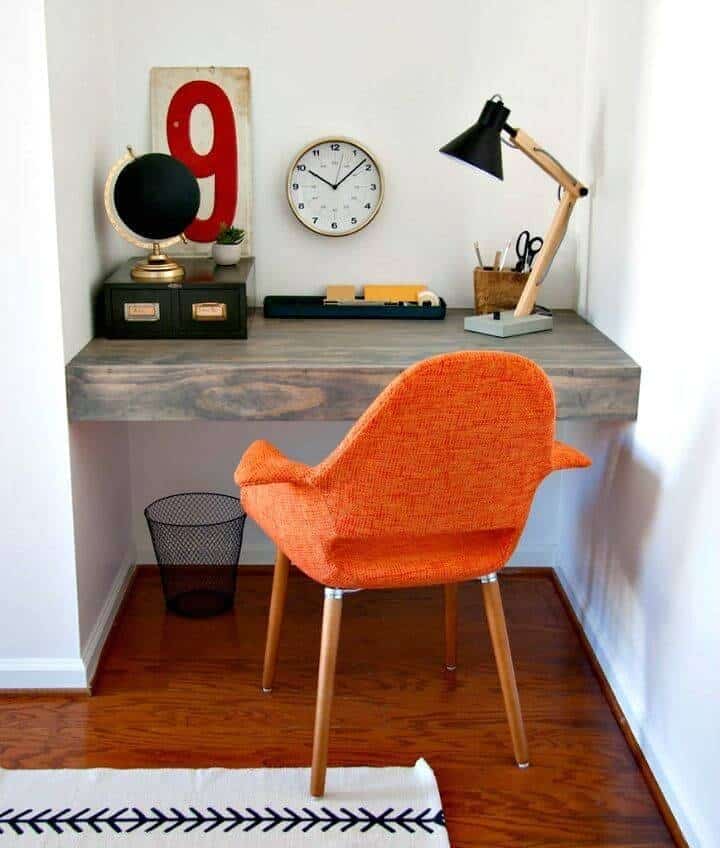
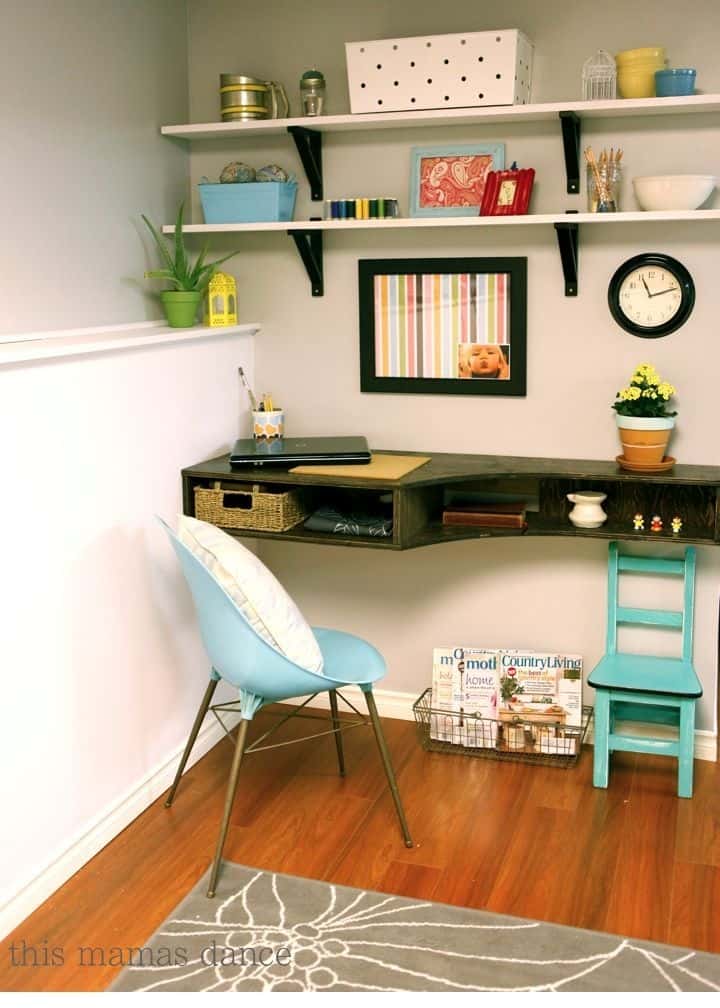
4. Create The Farmhouse Vibe
This project will look great in any room and will bring in a cozy atmosphere. It is also a great way to bring the countryside ambiance into your house. It is easy to make and only takes a few minutes. The first step is to take the measurements of the desk. The next step is sawing the wood to the correct size. Next, you need to pre-drill holes for the screws. After that, you must attach the brackets to the bottom of the desk with screws. Lastly, you must attach the top of the desk to the brackets with screws.
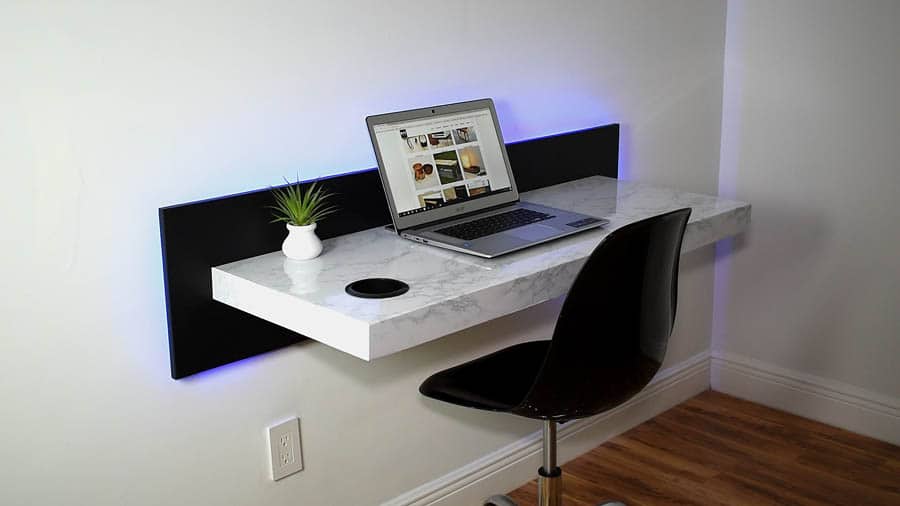
5. A Small Feature With Big Impact
It is perfect for small spaces, and it only takes a few hours to complete. You’ll need some basic woodworking skills and materials, but the result is worth it! This desk is the perfect place to store your laptop, tablet, or even just some extra office supplies. Plus, it looks great and adds a touch of style to any room.
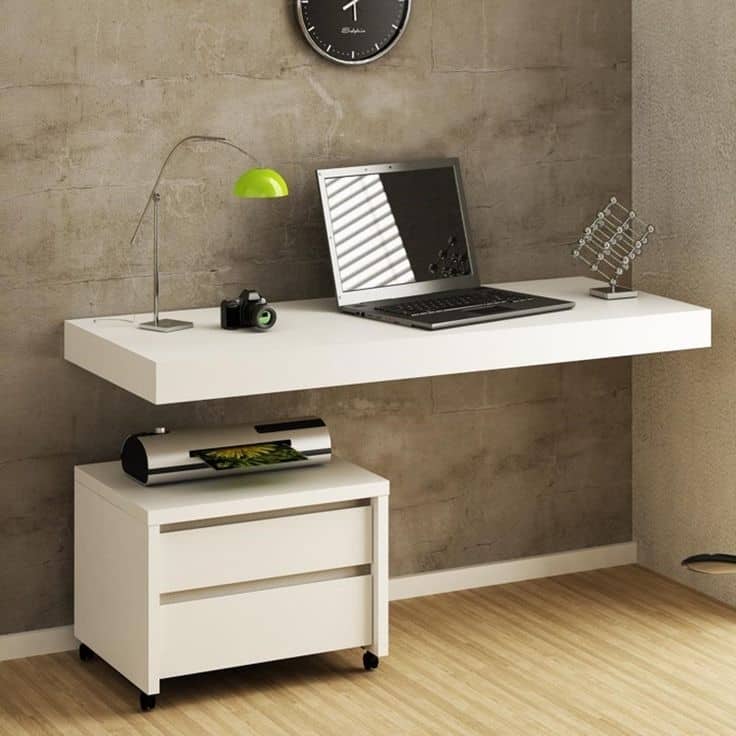
6. Opt For Minimalist Look

You can get this perfect feature in your living space. This not only looks sleek and modern, but it also frees up valuable floor space in your home office, bedroom, or living room. And if you’re feeling handy, you can even build your own floating desk with just a few materials from your local hardware store.
To get started, you’ll need a piece of plywood cut to size, some 2x4s for the frame, and some L-brackets to attach the desk to the wall space. You can also add a shelf underneath for extra storage. Once you have all your materials gathered, simply follow the instructions below to put together your very own floating desk.
7. Upcycle The Unused Pallet

This project is simple, stylish, and perfect for small spaces. Plus, it only takes a few hours to complete. To get started, you’ll need one pallet, saw, screws, drill, sandpaper, and paint or stain.
First, cut the pallet into three pieces: two for the sides and one for the top. Next, sand down any rough edges and paint or stain the wood to your desired finish. Then, attach the side panels to the top panel using screws. Finally, mount the desk to the wall using brackets or hooks.
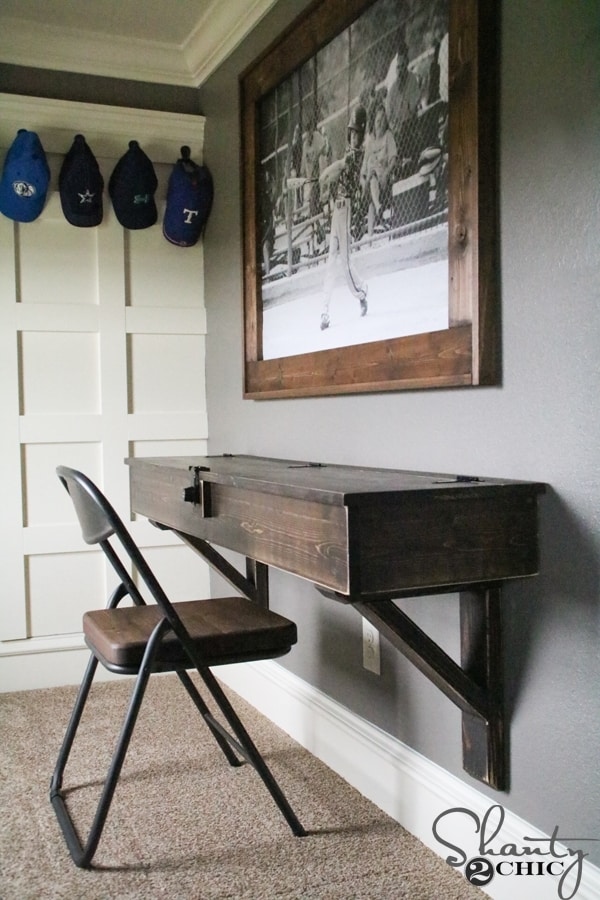
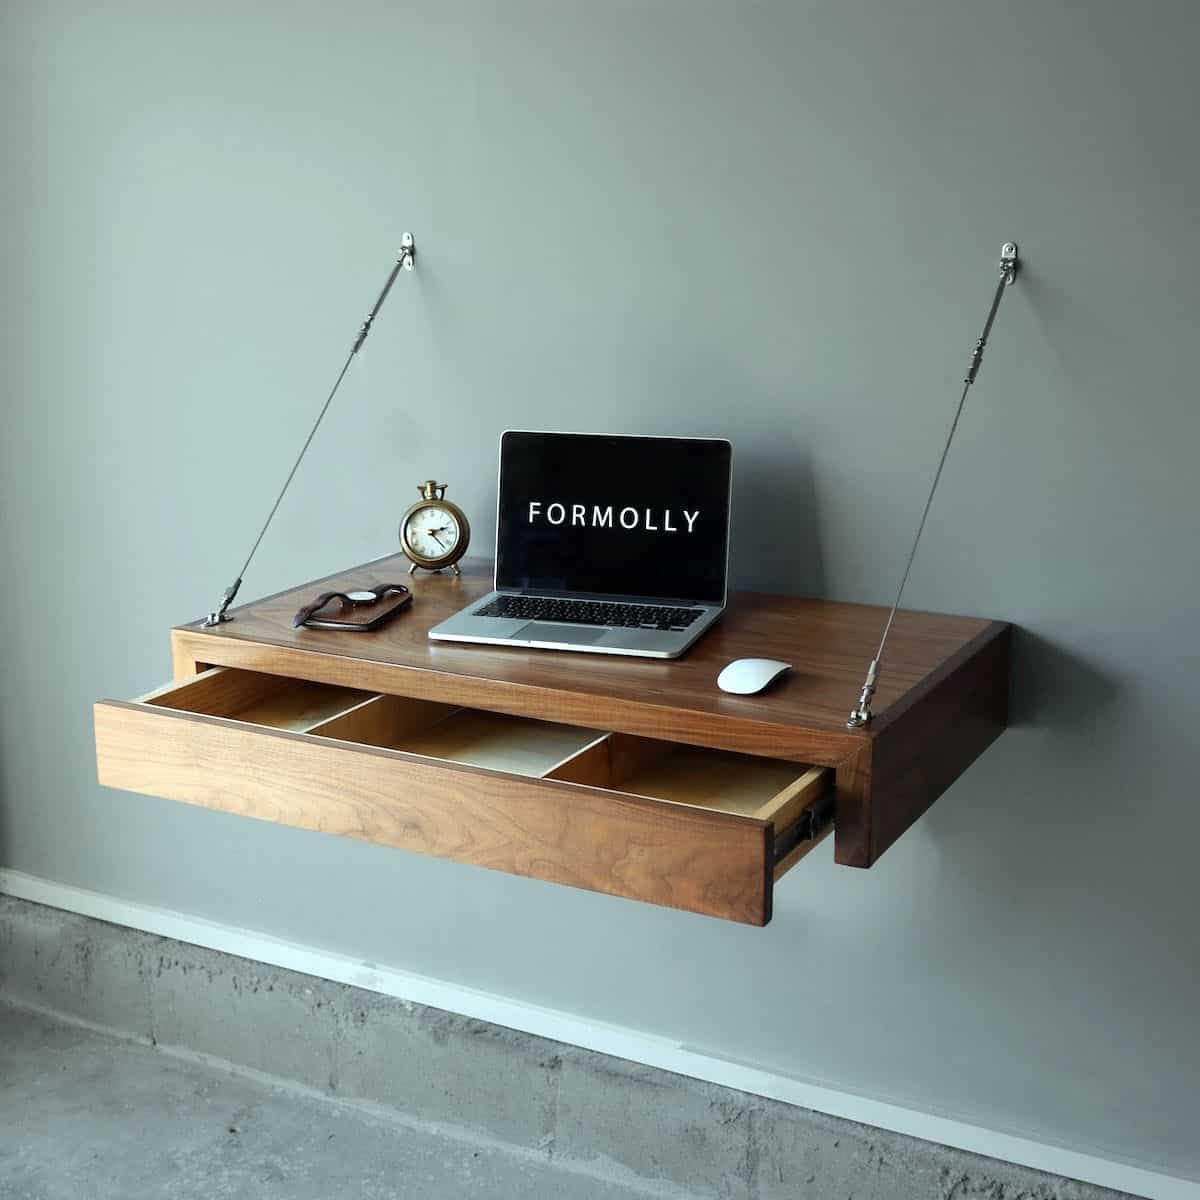
8. Add An Extra Storage
Keep your office supplies close at hand and enjoy easy access to what you need with the floating desk. This sturdy two-shelf unit is great for storing items too, so there’s no more taking up precious floor space.
You can also display decorations or keep books within reach without having them take over an entire wall of shelving in this compact design that fits any size room perfectly.
What you will need:
- 1×8 pine boards (actual dimensions 3/4” x 7-1/4”)
- 1×10 pine boards (actual dimensions 3/4” x 9-1/4”)
- Wood glue
- Clamps
- Paint or wood stain (optional)
- Polyurethane (optional)
- Drill
- 1” hole saw
- Jigsaw
- Sander
- Nail gun and 1” nails
9. Install In Your Bedroom
Attach a functional feature to your bedroom by mounting the desk to the wall. Choose a sturdy piece of wood that will support the weight of your laptop and other materials. Then, use L-brackets to attach the wood to the wall. Be sure to use screws that are long enough to go through the thickness of the wood and into the wall studs.
Once your desk is secure, add a few finishing touches, like a lamp and some decorative items. Then you’re ready to start working on your latest project or get lost in your favorite book.
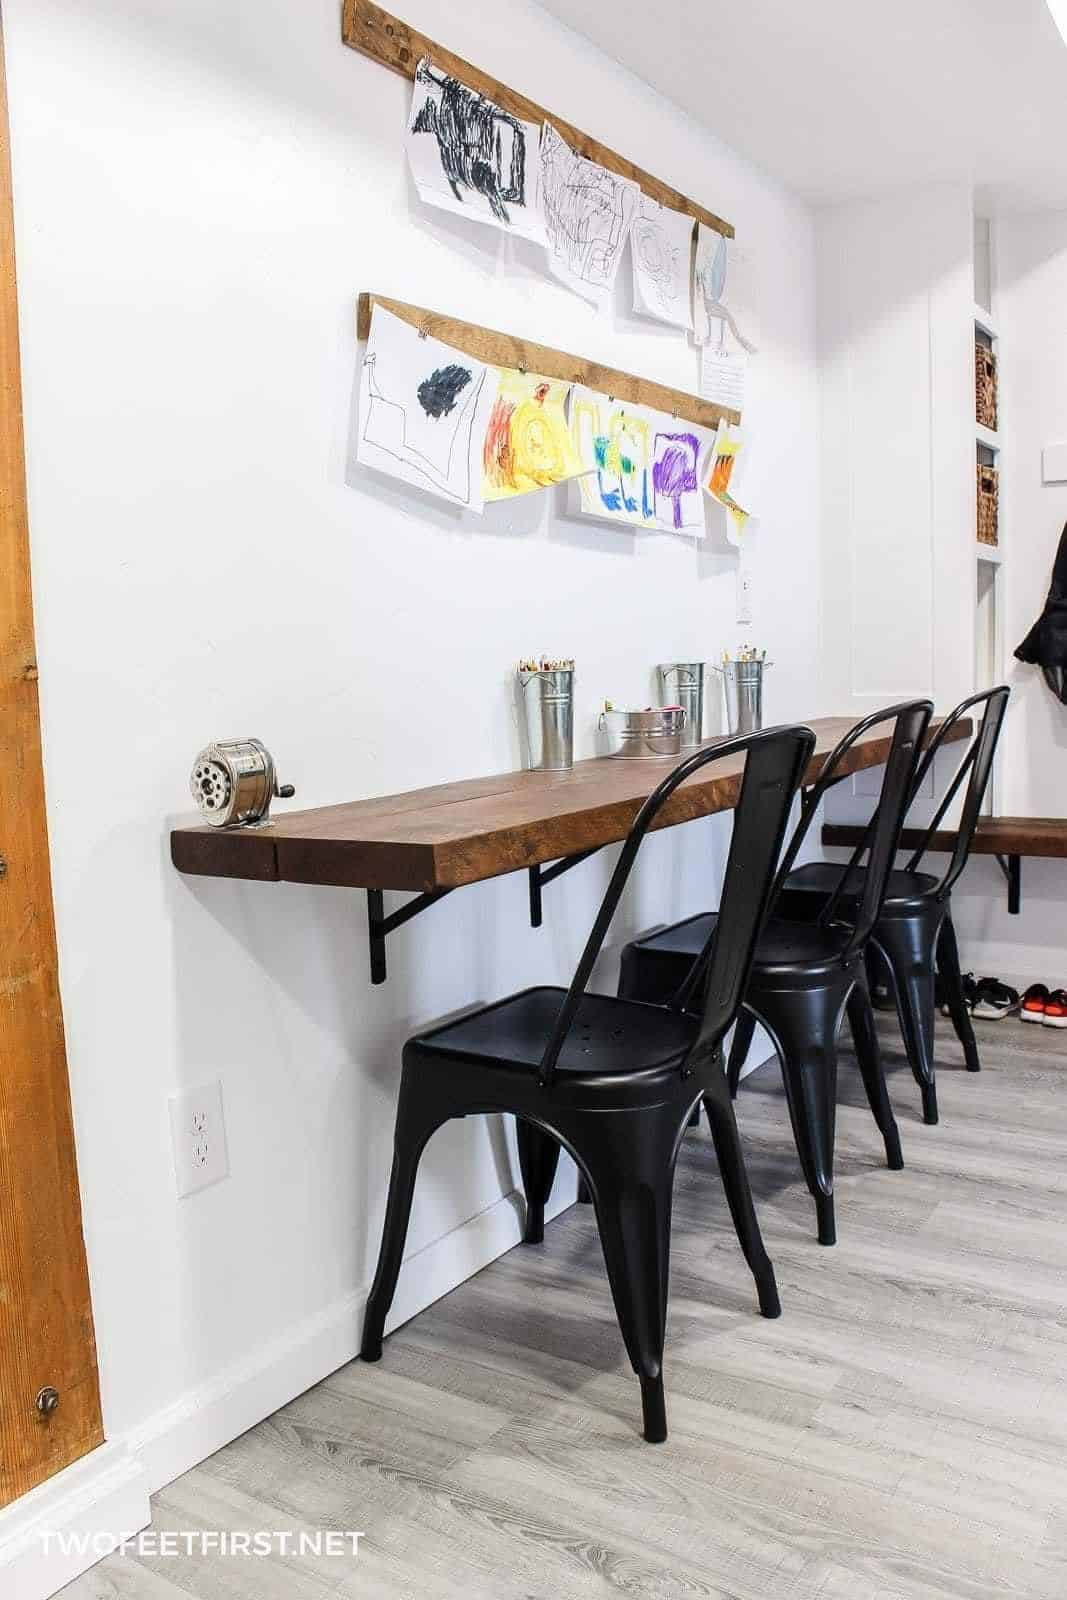
10. DIY Study Floating Desk
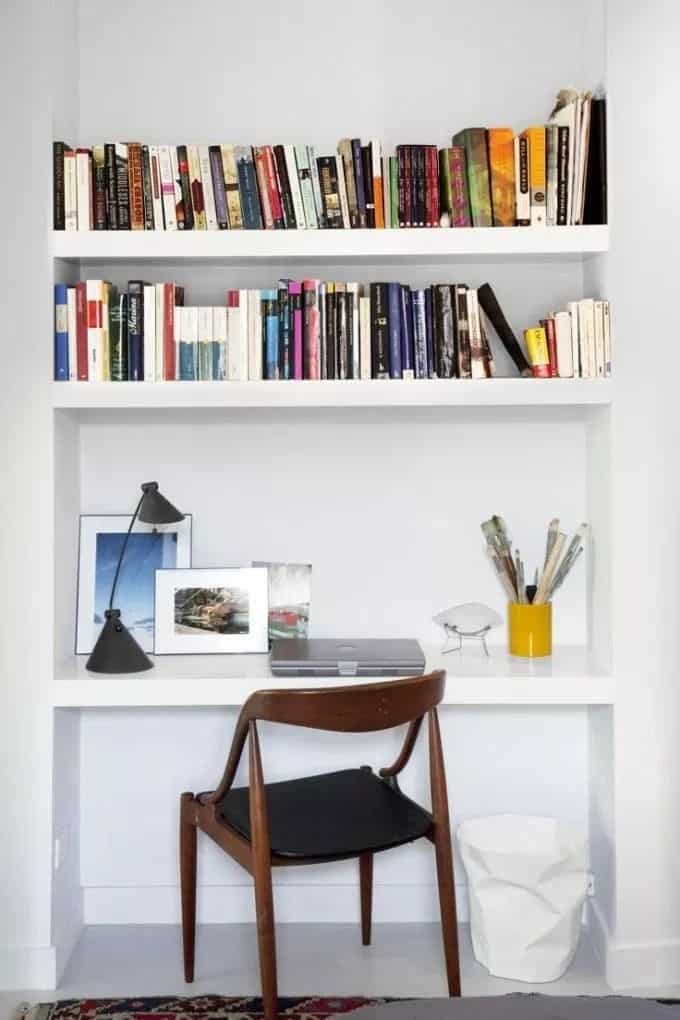
A study desk is a great addition to any student’s room. It gives them a place to focus on their work and helps to keep their belongings organized. However, desks can take up a lot of floor space, and they are not always the most practical choice for small bedrooms.
A floating study desk is a great alternative that can be easily created with a few basic materials. By mounting the desk to the wall, you can free up valuable floor space, and the sleek design will give the room a more modern look. Plus, your child will love having their very own floating desk.
11. Stay Simple, Stay Mingle
With just a few basic tools and some inexpensive materials, you can build a floating desk in just a few hours.
To get started, you’ll need a piece of plywood cut to size, some 2x4s, and a few L-brackets. You’ll also need a drill, screwdriver, saw, and measuring tape. Once you have your materials gathered, simply attach the 2x4s to the underside of the plywood using the L-brackets. If it works for you, you can paint or stain the wood before attaching it to the wall. Then, use screws or nails to secure the desk to the wall.
12. Contemporary DIY Floating Desk Ideas
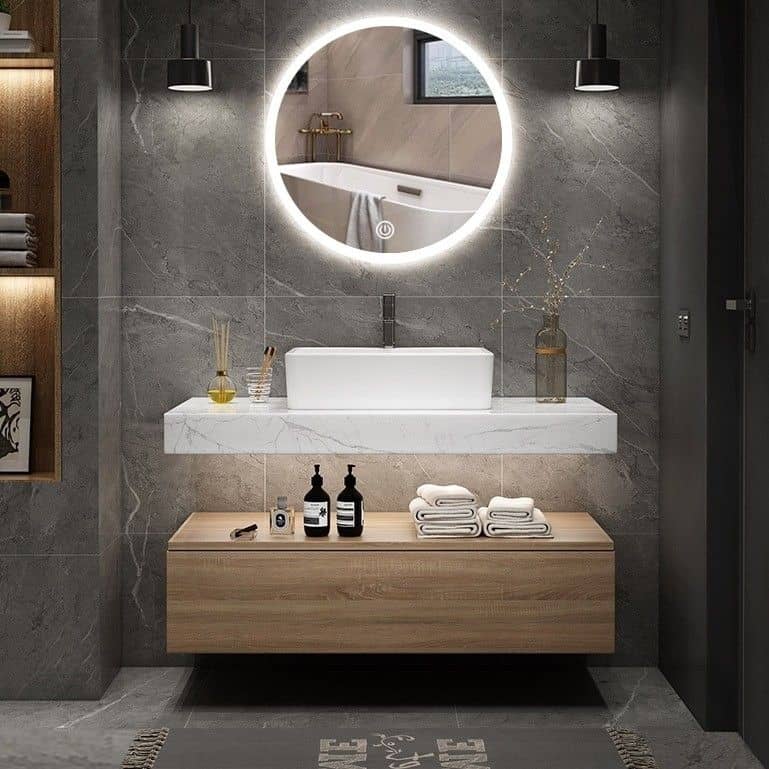
For a sleek and contemporary look, opt for a glass or marble top desk. These materials create a light and airy feel that is perfect for small spaces. If you’re on a budget, however, you can still achieve this look by using clear acrylic material instead of glass.
To add storage to your desk, use floating shelves instead of drawers. This will give the illusion of more space in your room while still providing plenty of storage for items such as books, office supplies, and files.
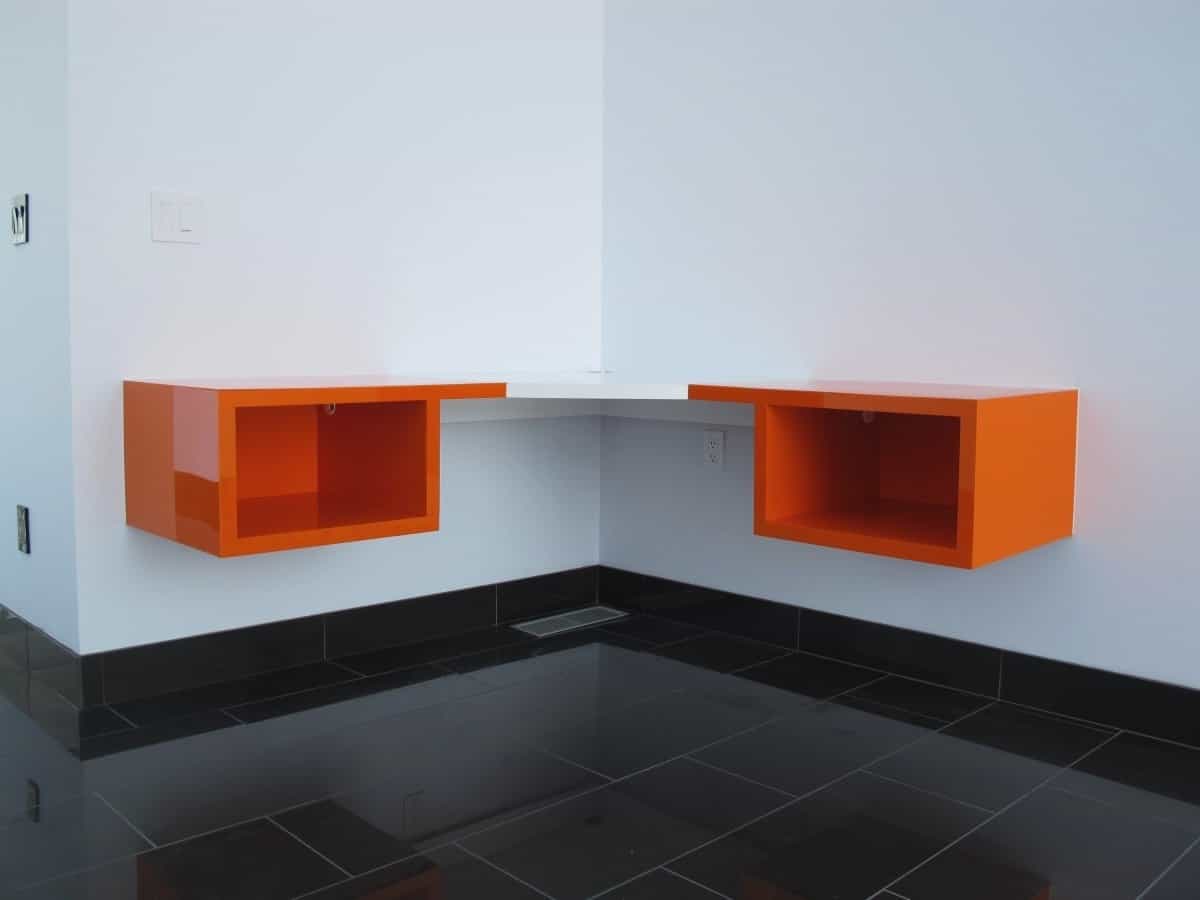
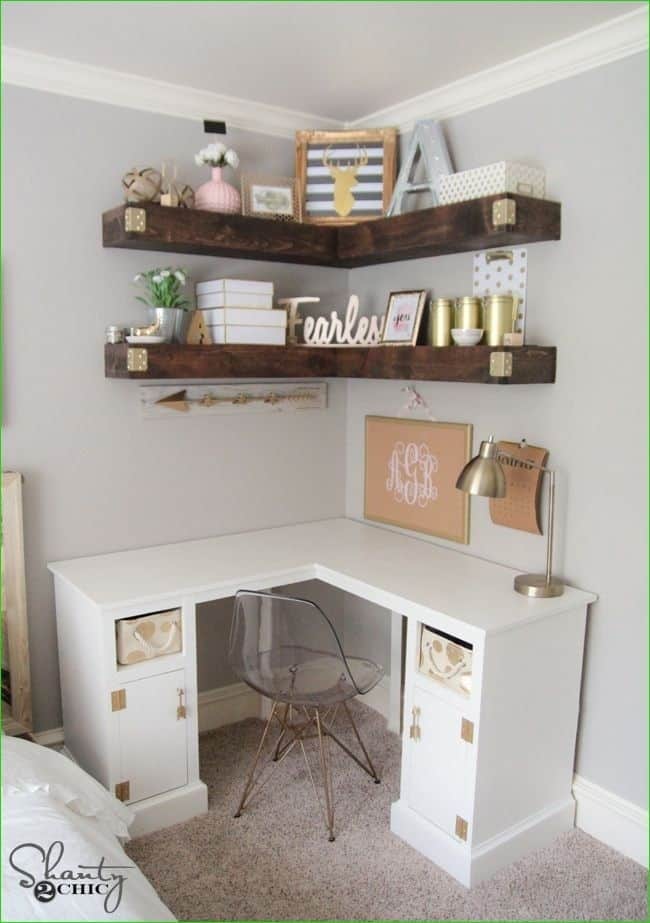
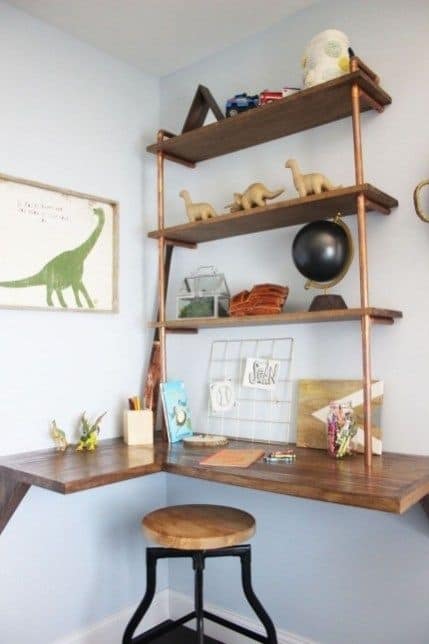
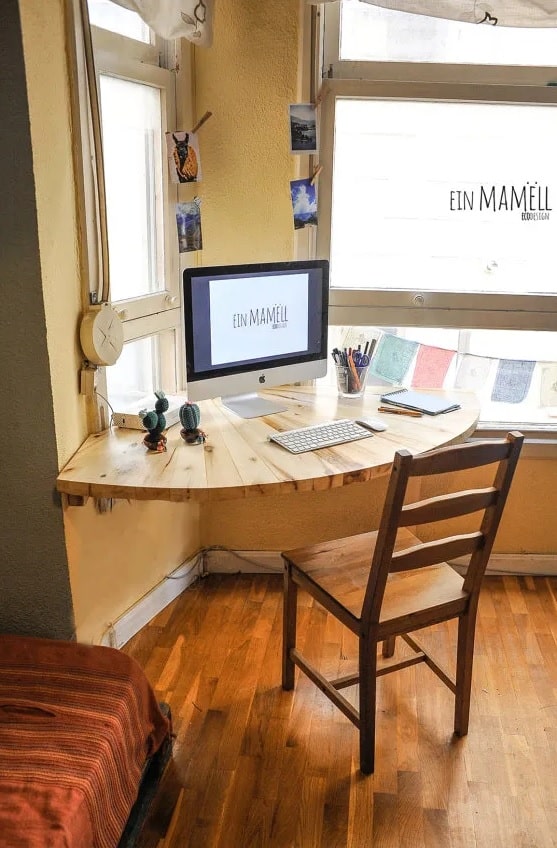
13. Build Your Corner Desk
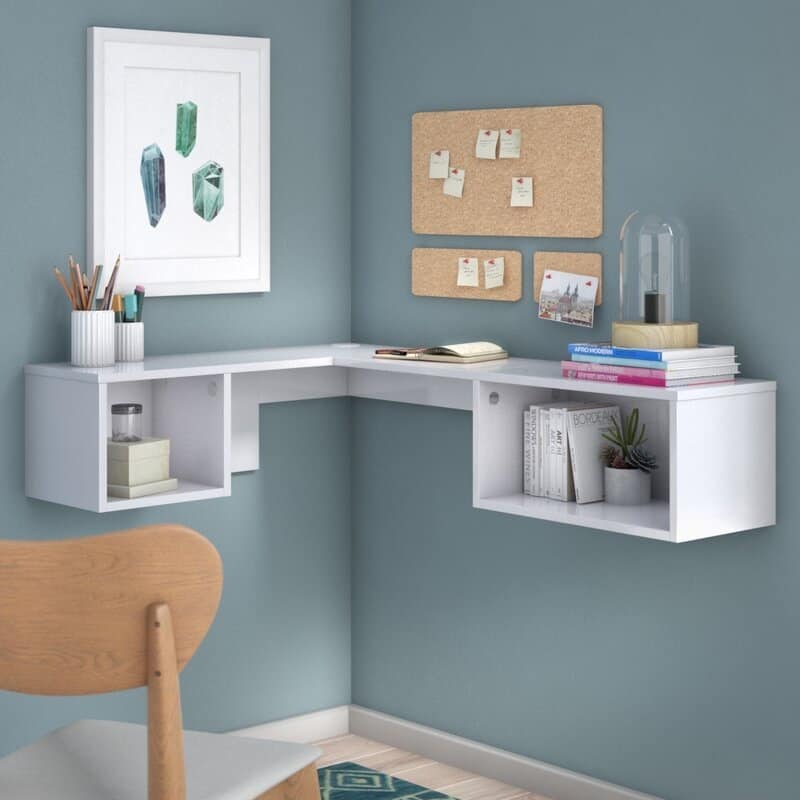
This corner floating desk is perfect for small spaces and can be easily installed in just a few hours. Plus, it has plenty of storage space for all of your office supplies. The first thing you’ll need to do is measure the space where you want to install the desk. Then, cut two pieces of plywood to size and attach them together with screws. Next, cut four pieces of 2×4 lumber to create the frame for the desk.
Attach the frame to the plywood with screws, making sure to leave enough space for the drawer slides. Then, install the shelves underneath. Finally, add any finishing you desire, such as paint or stain. This corner floating desk is a great way to make use of unused space in your home and can be customized to match any decor style.
Tip: we have more corner desk project to start with.
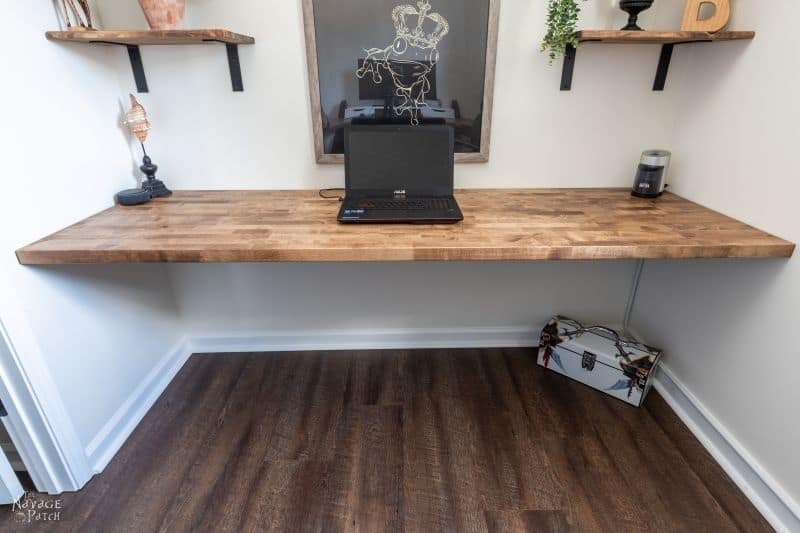
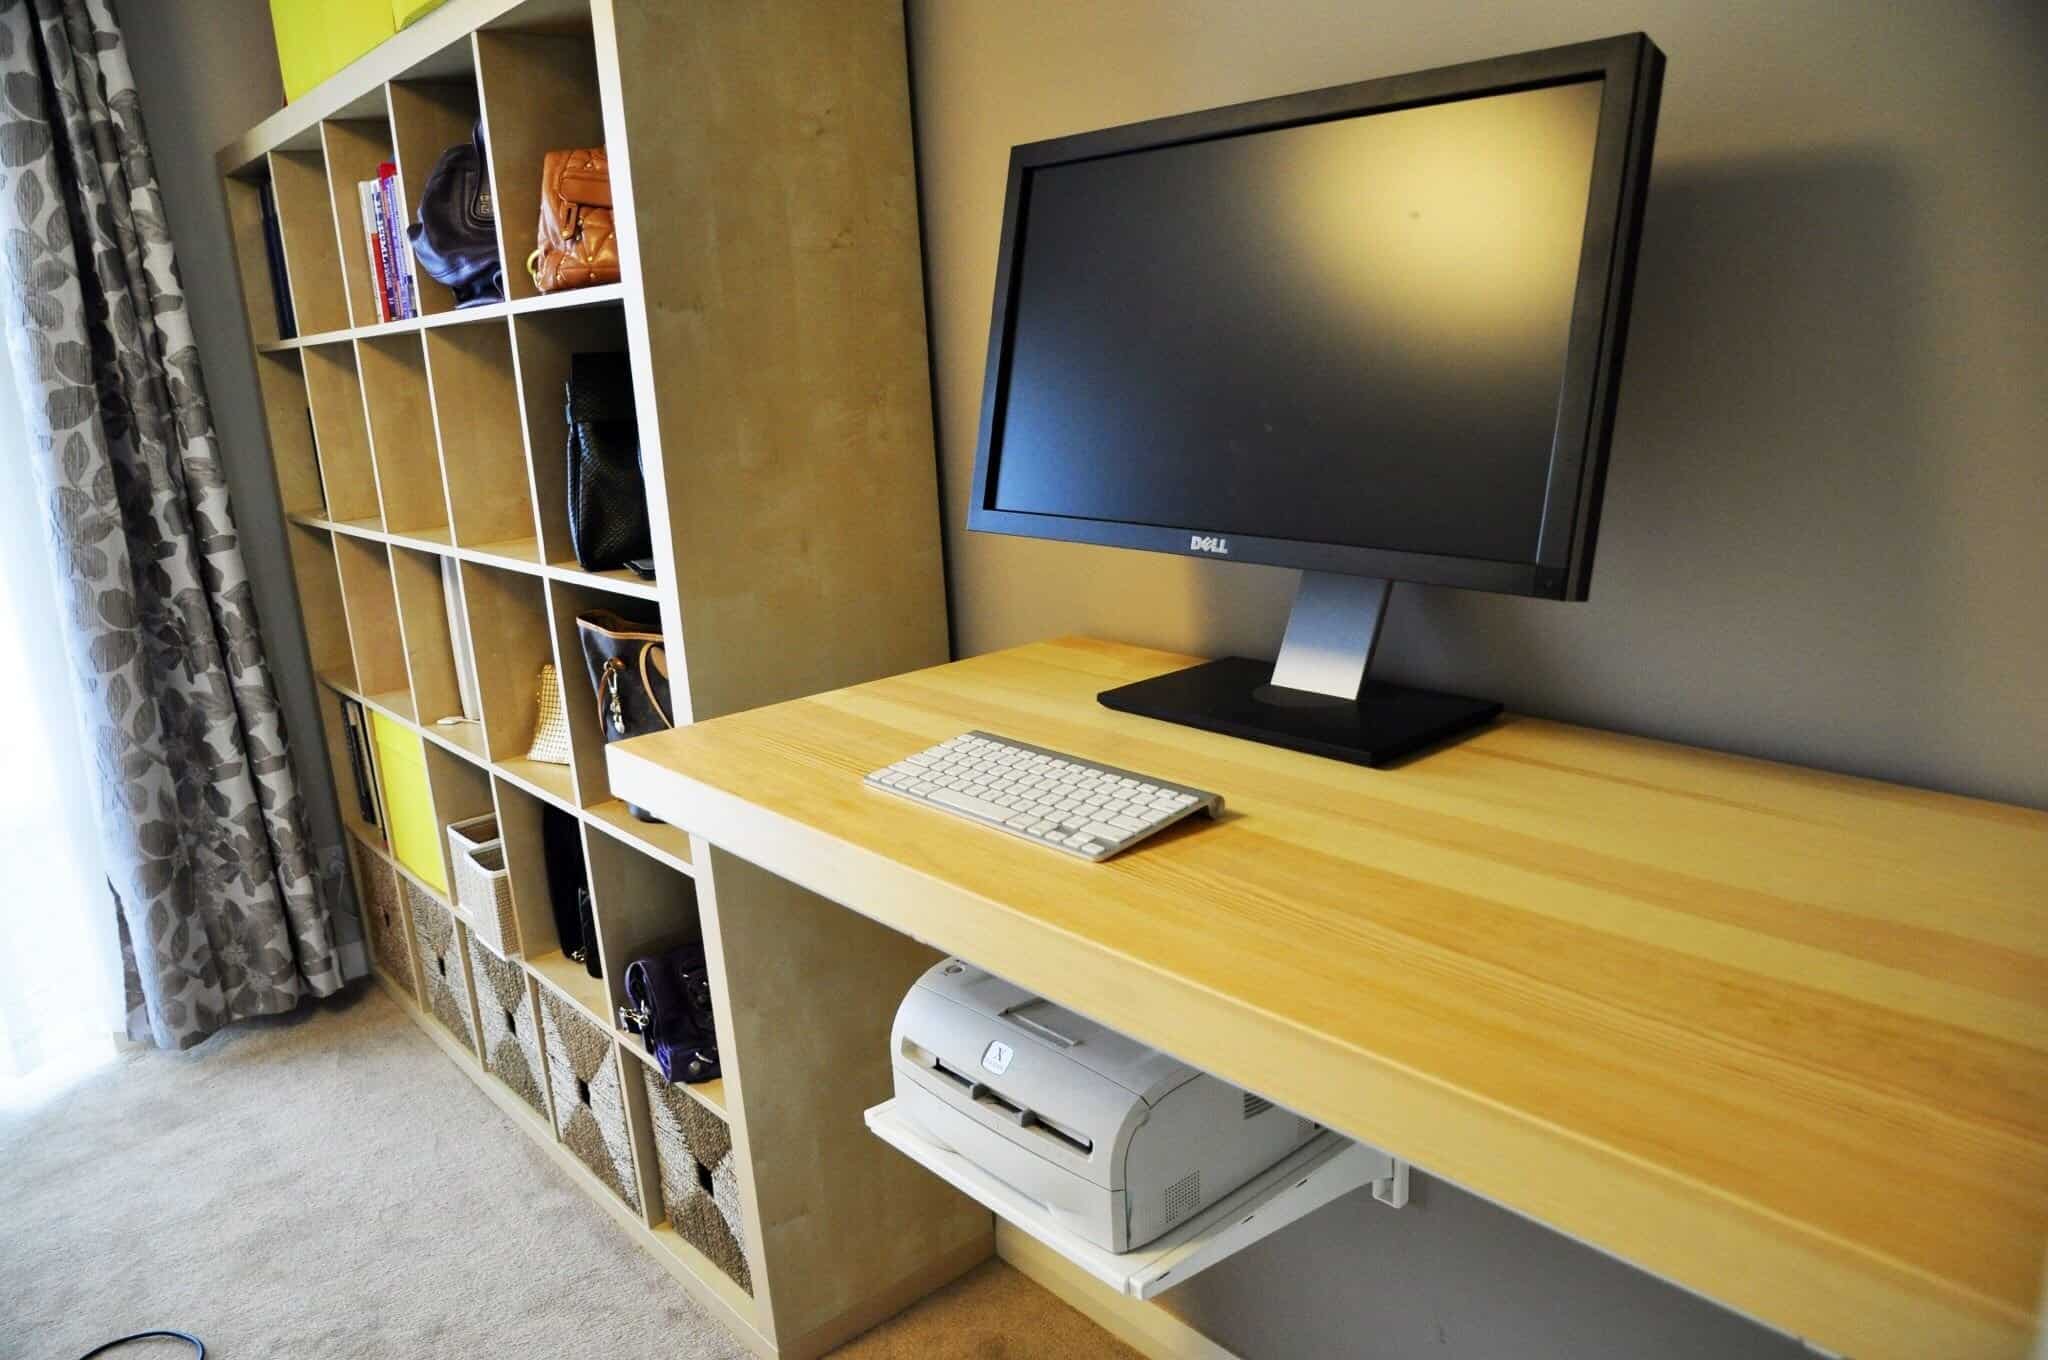
14. Expose The Industrial Flair
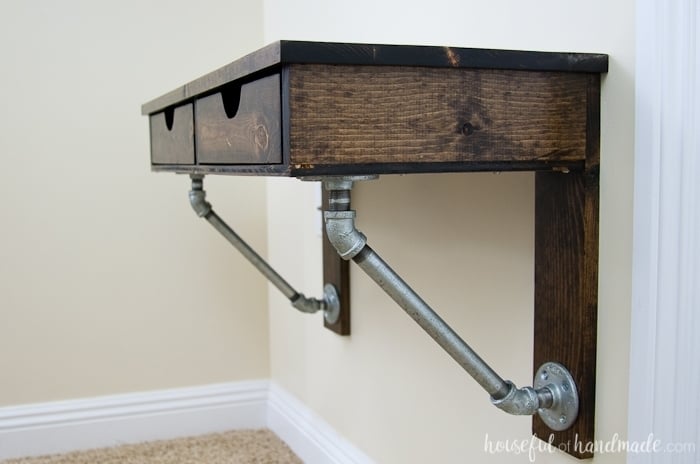
It’s easy to build and only requires a few materials, but the results are amazing. The desk is made up of two industrial-style shelves that are mounted to the wall. A wood plank is then placed across the shelves, giving the illusion that the desk is floating.
The pipe also works as the key element of the industrial style, which is great for exposing the rough and cool ambiance of the industrial style. The desk is also very functional, as it provides plenty of space for a laptop, printer, and other office essentials.
15. Don’t Break Your Piggy Bank
Made from inexpensive lumber and basic hardware, this desk can be assembled in just a few hours. And best of all, it can be customized to fit any space. Simply select the desired width and length, and cut the lumber to size. Then, attach the boards together using L-brackets or corner braces. For a finished look, add trim to the edges of the desk. Finally, mount the desk to the wall using heavy-duty screws or brackets.
16. Add The Shelves
This project is for a floating desk with floating shelves. It is great for small spaces because it does not take up any floor space. The shelves are great for storing books, files, or even decor. It is made out of plywood and 2x4s. The shelves are made out of 2x4s and 1x4s. The worst part of this project is cutting the plywood because it is very hard to get a perfect cut. Other than that, the project is pretty straightforward and easy to follow.
17. Build A Chic Look
This chic DIY floating desk is both stylish and functional, and it’s easy to make. The best part is that it only takes a few hours to put together. You’ll need some basic woodworking skills and supplies, but the end result is worth it. It features two shelves for storage, and the entire unit can be mounted on the wall. This means that you’ll have plenty of room to work, and you won’t have to worry about taking up too much space.
18. Fill In Your Corner With A Versatile Feature
The most important part of the process is creating a stable base for the desk. This can be done by attaching L-shaped brackets to the wall, or by using a heavy-duty shelf that is securely anchored to the studs in the wall. Once the base is complete, all that’s left is to add a desktop. This can be made from any sturdy material, such as plywood or MDF. Just be sure to seal it with a layer of paint or varnish to protect it from moisture damage. For a finishing touch, add some decorative trim around the edge of the desk.
19. DIY Elegant Floating Desk
This simple yet elegant looking floating desk can easily be created at home with just a few supplies. And the best part is that it won’t even cost you an arm and a leg to make it. For the base of the desk, all you need is a piece of plywood cut to size. Then, add some supports (wooden dowels or pipes would work well) to create the “floating” effect. To finish it off, paint or stain the wood to your desired color. Or, if you want something really unique, try covering the entire desk with a marble contact paper.
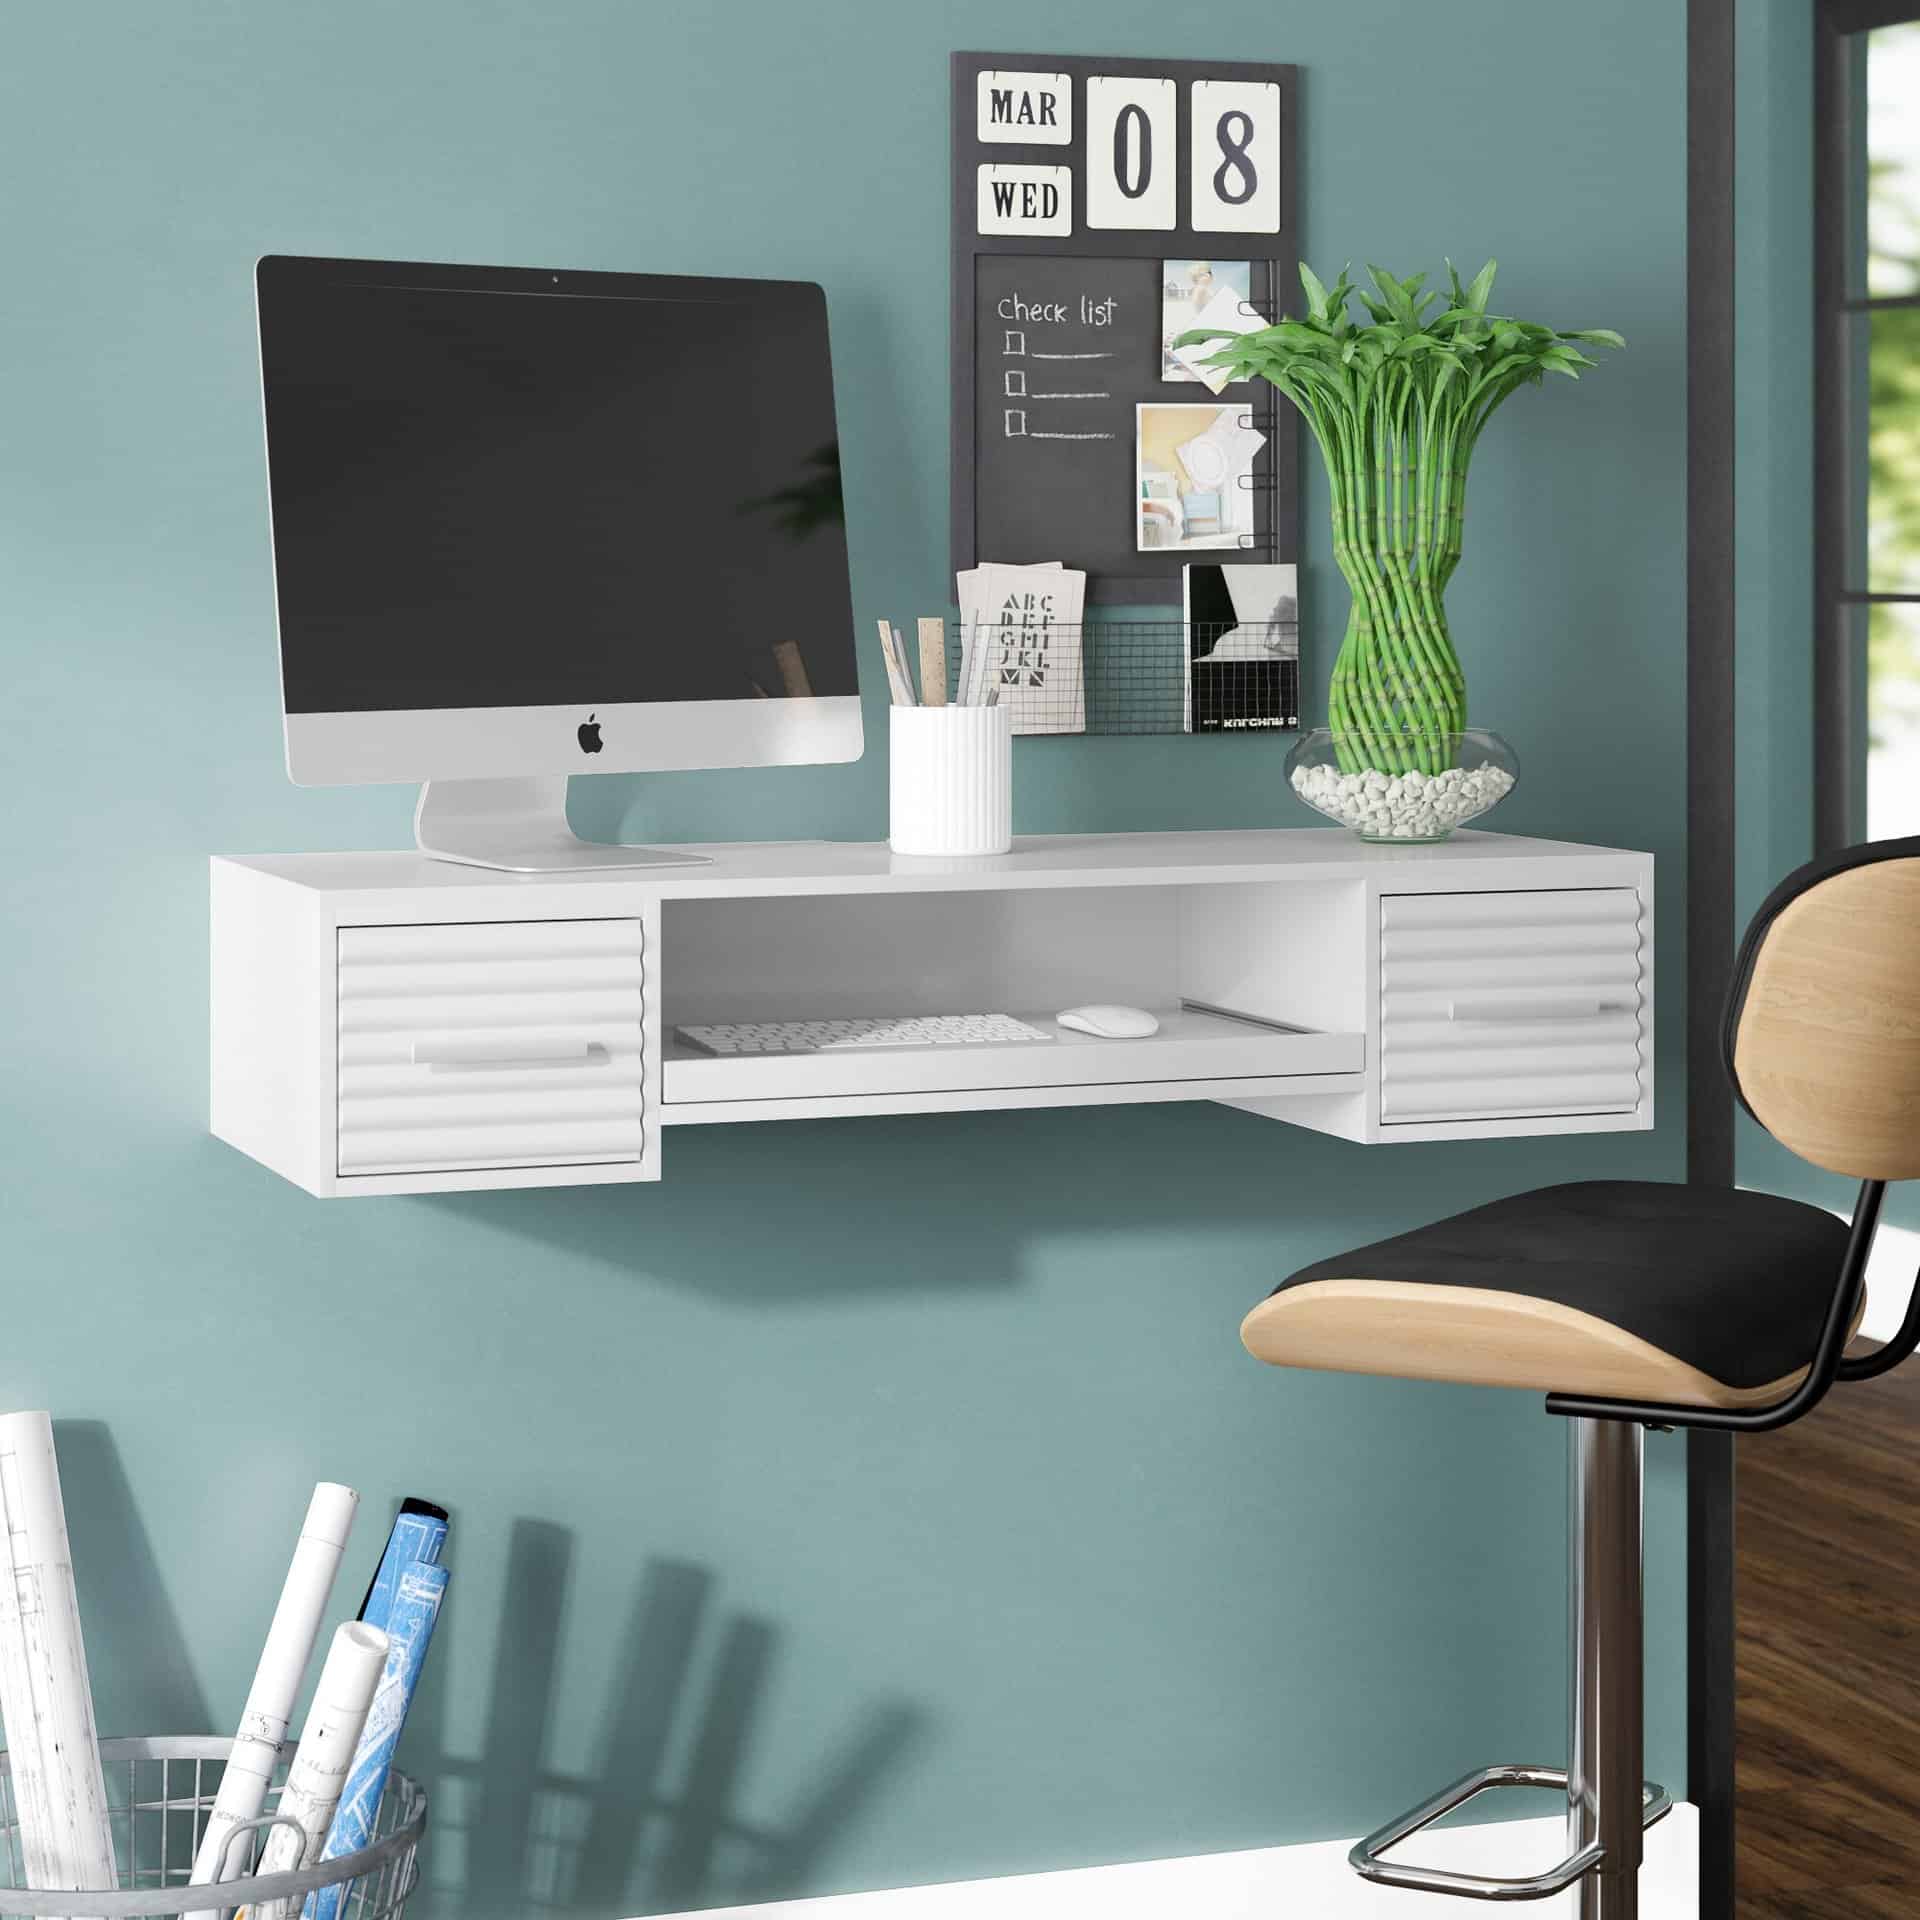
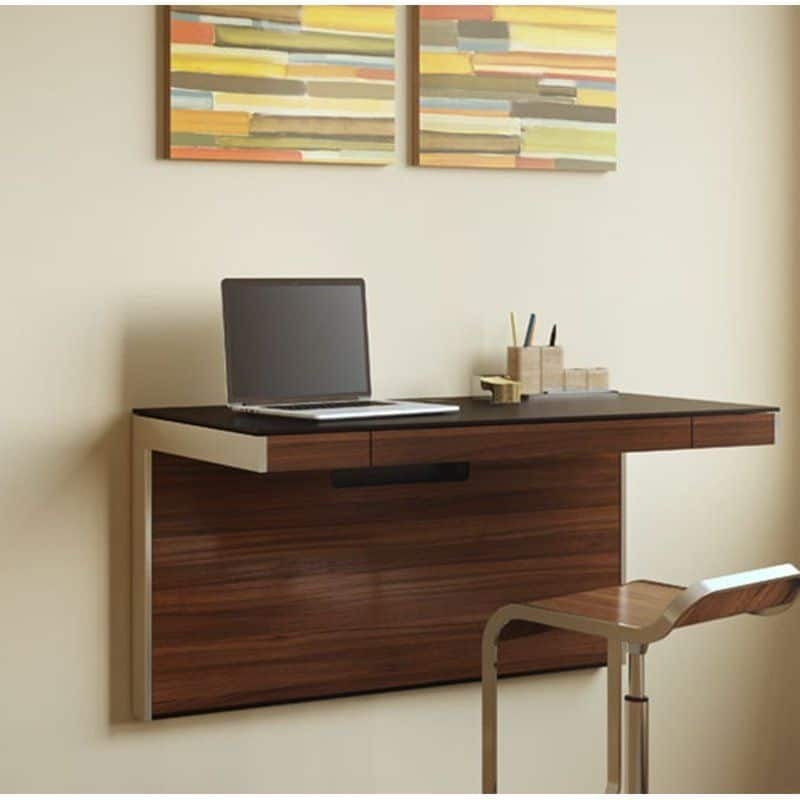
20. The Unique Look Of The Curvy Shape
This eye-catching desk offers a unique look that can be a versatile focal point in your living space. The desk is made from sturdy MDF and is finished with a high-gloss white lacquer. It features two shelves for storage and display, and the bottom shelf is curved to give the desk an interesting silhouette.
It is also is easy to assemble and comes with all the necessary hardware. It can be used for studying, working on your laptop, or as a catch-all for bills and mail. And if you build it with drawers, you’ll have even more storage for office supplies or other items.
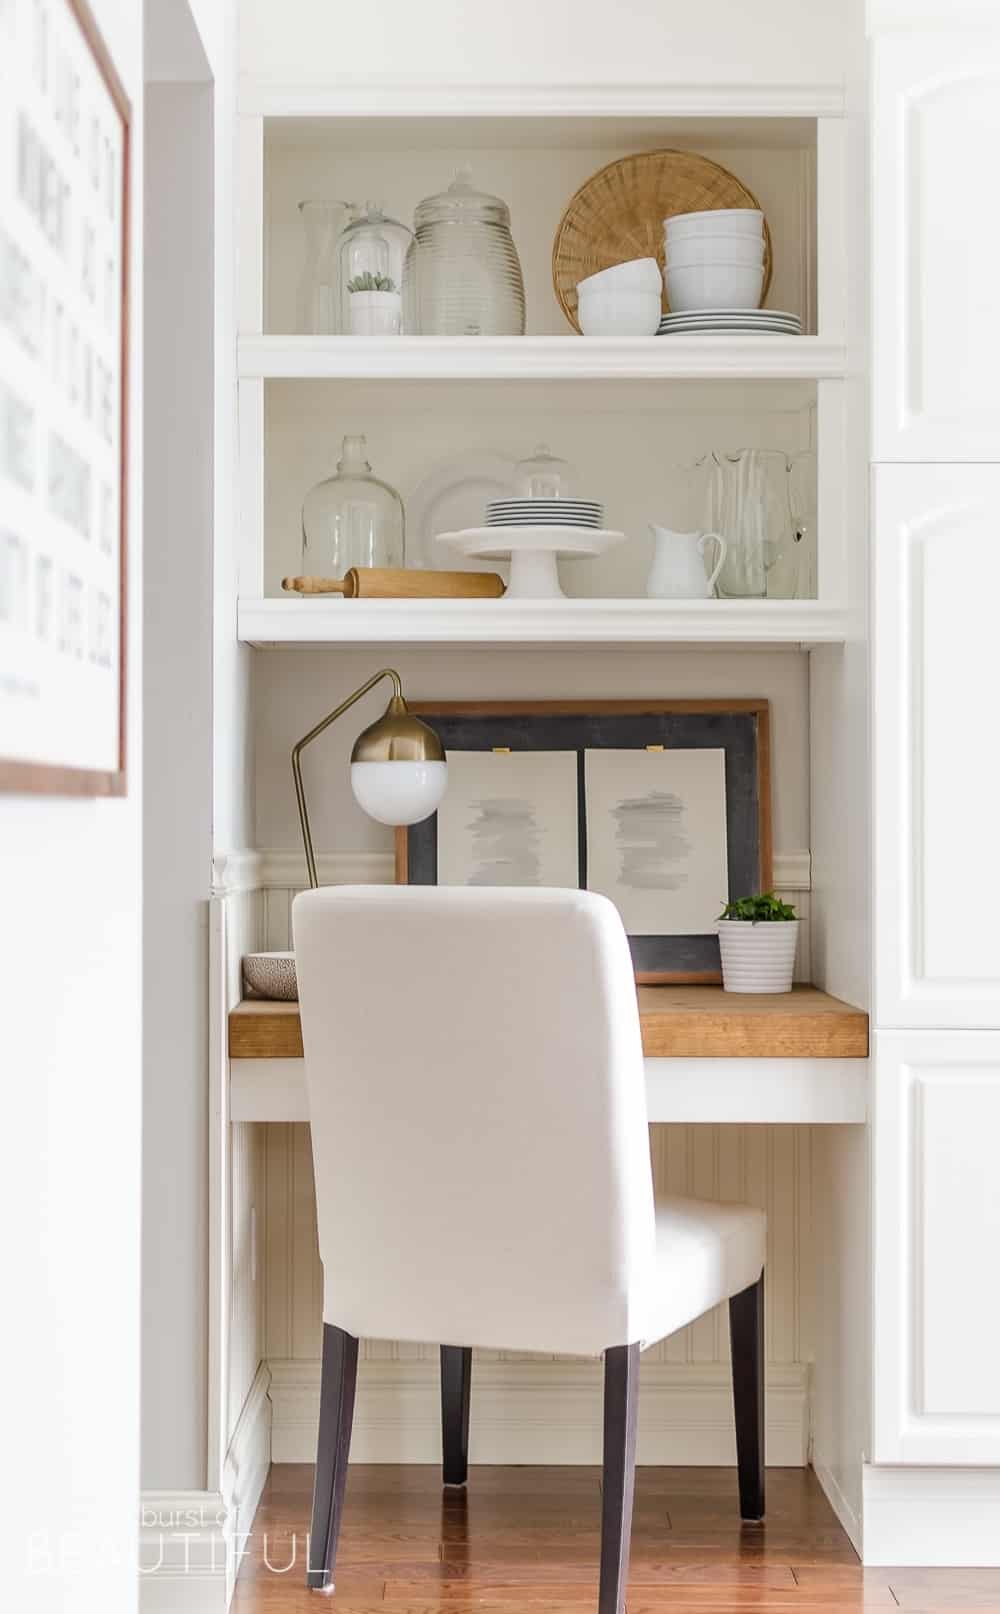
21. Accommodate Your Home Office
It is a great way to add a working surface to any room without taking up valuable floor space. And the best part is that you can easily DIY one using some basic supplies.
To build your own project, you’ll need a piece of wood (I used a 1×12), some brackets, and some screws. Start by cutting your piece of wood to size. Then, attach the brackets to the wall using screws. Next, attach the piece of wood to the brackets using more screws. That’s it!
If you want, you can add a few finishing touches to your desk. First, sand down the edges of the wood so they’re nice and smooth. Wipe the dust with the clean cloth to ensure the shelf surface is clean before you paint it. Then, stain or paint the wood to match your décor. Finally, add some drawer pulls or knobs so you can easily access whatever you need while you’re working.
22. Upcycle The Wood
Highlight the wood accent to your living space through the wooden desk you can create yourself. Start by measuring the area where you want to install the desk. Then, cut two pieces of wood to the desired size. Next, use a drill to create four holes in each piece of wood. These holes will be used to attach it to the wall. Once the holes are drilled, sand the edges of the wood so that they are smooth. Polish the surface to highlight the natural color of the wood.
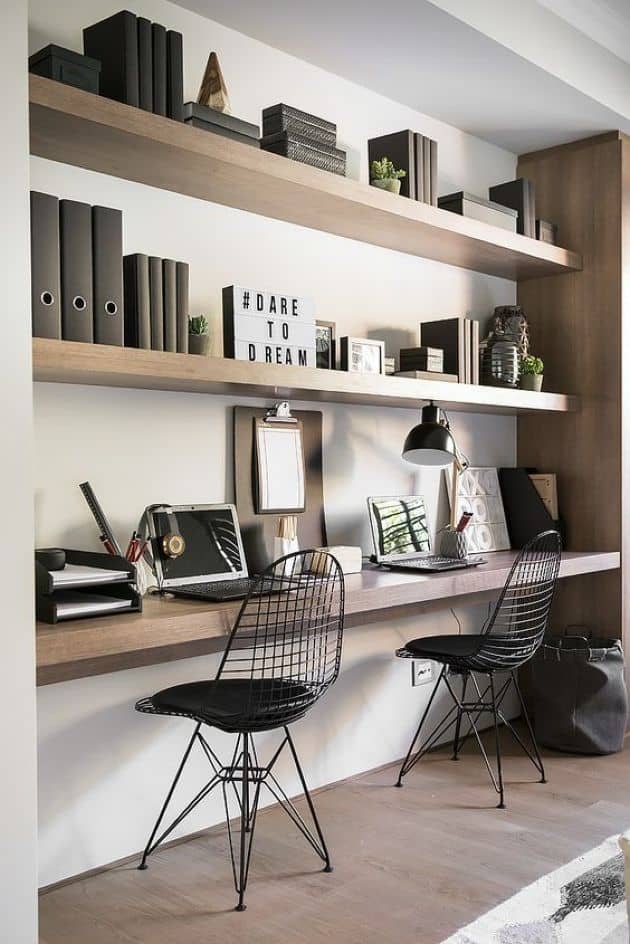
23. The Twin Desk
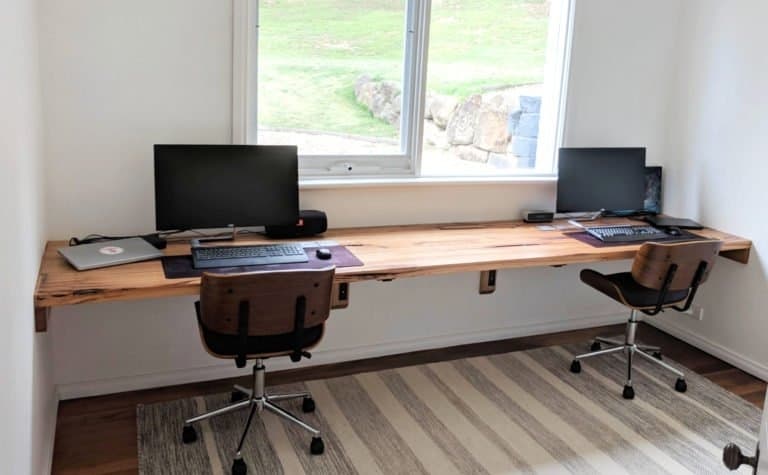
It’s made from two simple shelves, which are mounted to the wall using hidden brackets. The top is made from a piece of reclaimed wood, which gives it a rustic look. The finish can be customized to match your existing decor, and the desk can be easily assembled in under an hour. Best of all, it is versatile enough to be used as a workspace, a dressing table, or even a nightstand.
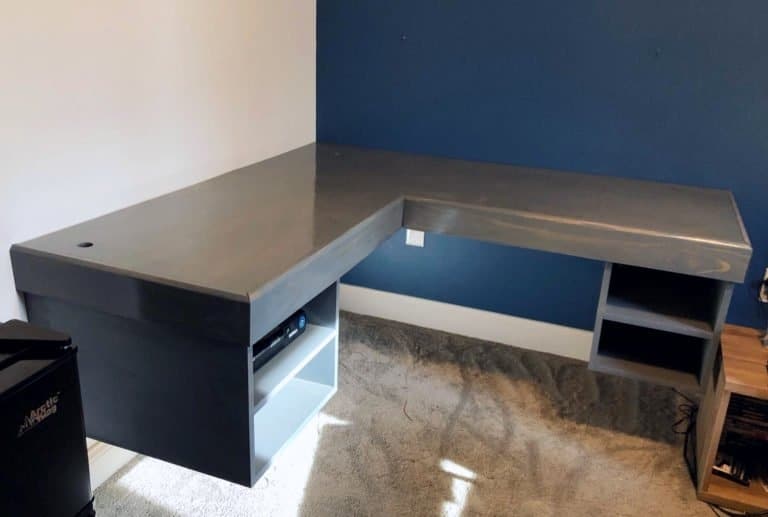
24. The Rectangular Shape
To build a rectangular floating desk, you’ll need four boards that are the same length, two shorter boards for the sides, and one longer board for the top. You’ll also need some L-brackets and screws.
First, attach the two side boards to the top board using the L-brackets. Then, screw the fourth board onto the underside of the top board. This will serve as a shelf for your computer keyboard. Finally, paint or stain it and let it dry. Then you can place your computer on top and start working.
25. Smart Feature At Its Best
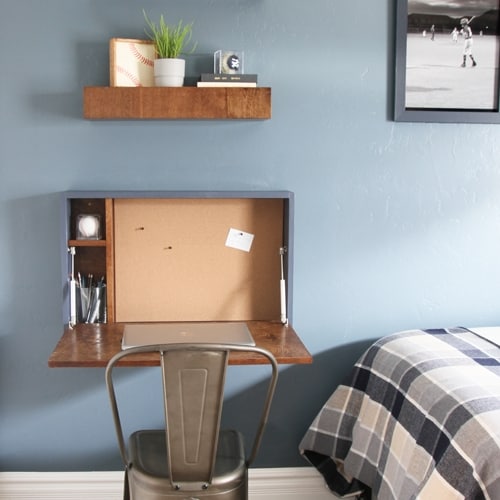
This type of desk is a cool solution if you are tight on space. Since it can be easily folded up and stored away when not in use. It’s also great for people who want to be able to move their desks around, since it’s lightweight and easy to carry. Plus, the sleek, minimalist design will give your home office a modern look.
26. Follow The Latest Trend
With just a few supplies and some basic woodworking skills, you can easily create a modern floating desk that will upgrade the look of your space. It is perfect for small spaces, as it doesn’t take up any floor space and can be easily mounted to the wall.
Here’s what you need to do:
- Start by measuring the area where you want to place your desk. Then, cut two pieces of plywood to size using a jigsaw.
- Next, sand the edges of the plywood pieces smooth with sandpaper. This will ensure that there are no sharp edges on your finished desk.
- Once the plywood is cut and sanded, it’s time to assemble. First, attach two L-brackets to each side piece of plywood. Then, use screws to attach the brackets to the wall. Make sure that the screws are long enough to go through the thickness of the plywood and into the wall studs for added stability.
- Now it’s time to add the desktop. Simply place the remaining piece of plywood on top of the two side pieces and screwed it in place.
- To finish off the desk, add a coat of paint or stain.
27. DIY Compactly Floating Desk
With just a few supplies and some basic woodworking skills, you can build your own floating desk in no time. Here’s how:
Start by cutting two pieces of plywood to the same size. Then, use a drill to create four pilot holes in each piece of plywood. Next, attach the two pieces of plywood together using screws. Once the plywood is assembled, sand it down so that it’s smooth and even. Then, paint or stain the wood to finish it off. Finally, install some L-brackets on the underside of the desk so that it can be attached to the wall.
28. Stylish DIY Floating Desk
This stylish and functional desk provides a place to set up your computer, work on projects, and store important documents. However, desks can often be bulky and take up a lot of space. A floating desk is a great solution for small spaces because it takes up less room and can be easily customized to your needs.
You can create a stylish DIY floating desk with just a few tools and materials. Start by measuring the area where you want to place it. Then, cut a piece of plywood to size and attach it to the wall using screws or brackets. Next, add a layer of paint or finish of your choice.
Finally, install some shelves or cabinets above the desk for extra storage.
29. Be Out Of The Box
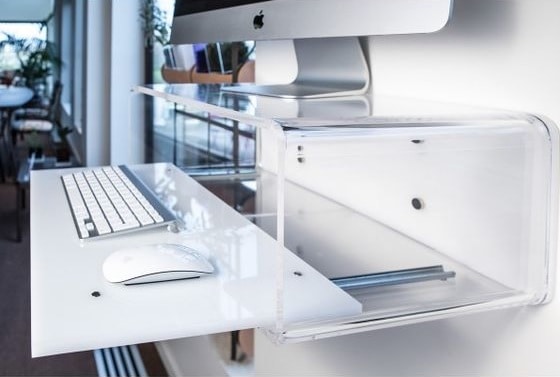
You can make a floating desk out of almost any material, but acrylic can be the brilliant ideas because it’s lightweight and durable. Plus, it’s easy to find acrylic sheets in a variety of colors and thicknesses. To make it, start by measuring the area where you want to put it. Then, cut your acrylic sheet to size and attach it to the wall using screws or adhesive mounts. Finally, add shelves or cubbies for storage.
30. Make It More Functional
Consider creating your own desk that will be a versatile and aesthetically pleasing feature in your living space, which also strengthening your skills as well. To get started, measure the area where you want to put it. Then, cut a piece of plywood to size and attach it to the wall using screws or brackets. Next, add a layer of paint or finish of your choice. Finally, install some shelves or cabinets above the desk for extra storage.
They’re not just for looks anymore! These stylish pieces can provide a working environment that is both comfortable and productive.
If searching online has led nowhere so far, then don’t worry because we’ve got some DIY designs for beginners who want their space without breaking a bank account or sacrificing quality materials. Get inspired today by checking out our selection of 30 ideas.