Having a rabbit as a pet is a great experience, but you need to provide them with a place to live. The are the perfect solution and can be made out of a variety of materials.
The most important part is to make sure the hutch is big enough for your rabbit to move around in and has a place to hide.
The following is a list of DIY rabbit hutches with easy instructions. We will also provide a simple description of each plan, along with the materials needed and the steps required to build it.
So, whether you are a beginner or an experienced DIYer, there is something for everyone here.
Table of Contents
The Simple Rabbit Hutch Plan
This project is for a simple A-frame hutch. It is easy to build and doesn’t require many materials.
You will need:
- Plywood
- Wooden boards
- Nails or screws
- Chicken wire
- Sandpaper
To build this hutch, start by cutting the plywood into two pieces that are the same size. Cut the wooden boards to the desired height for the sides of the hutch. Assemble the wooden frame of the hutch using nails or screws.
Attach wire mesh to the frame using staples or wire ties. Cover the roof with plywood or more wire mesh. Sand down any rough edges and paint or stain the hutch as desired.
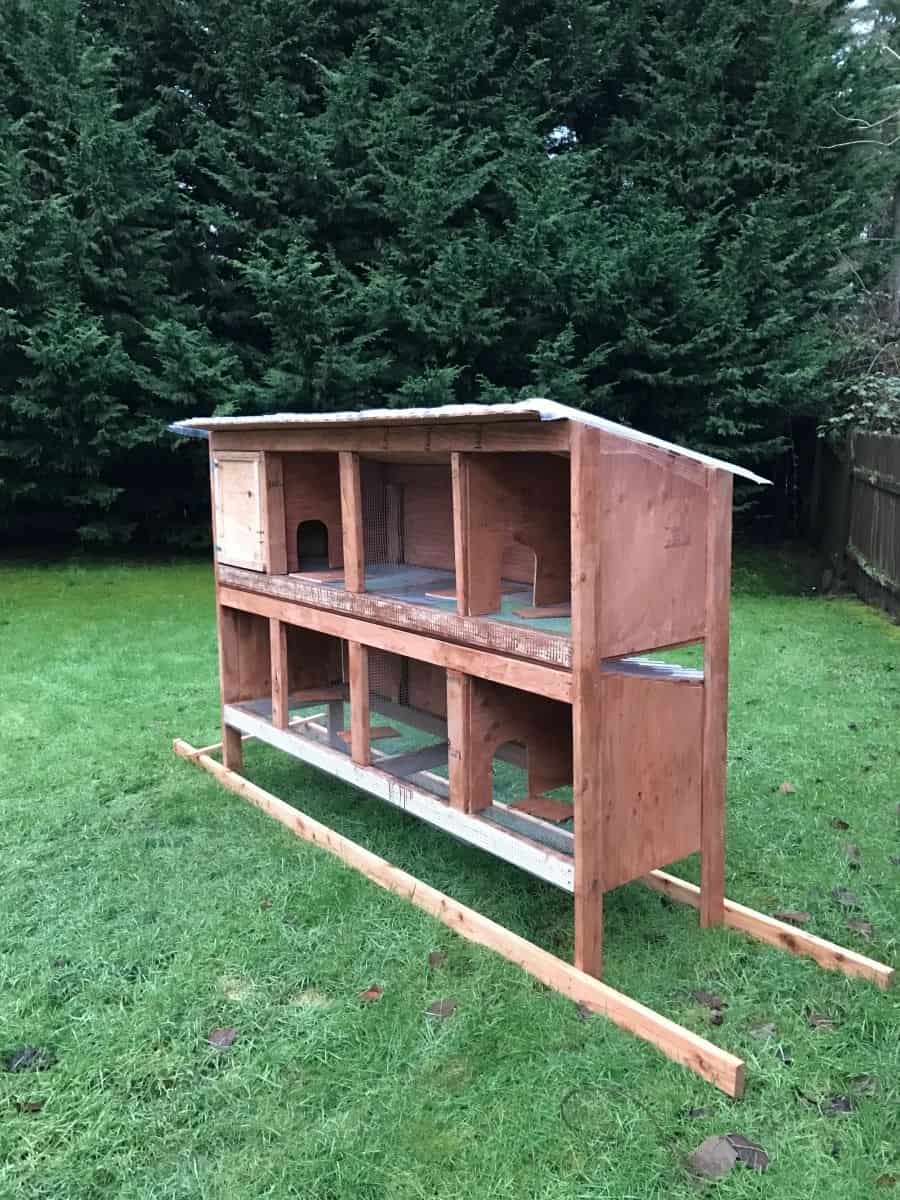
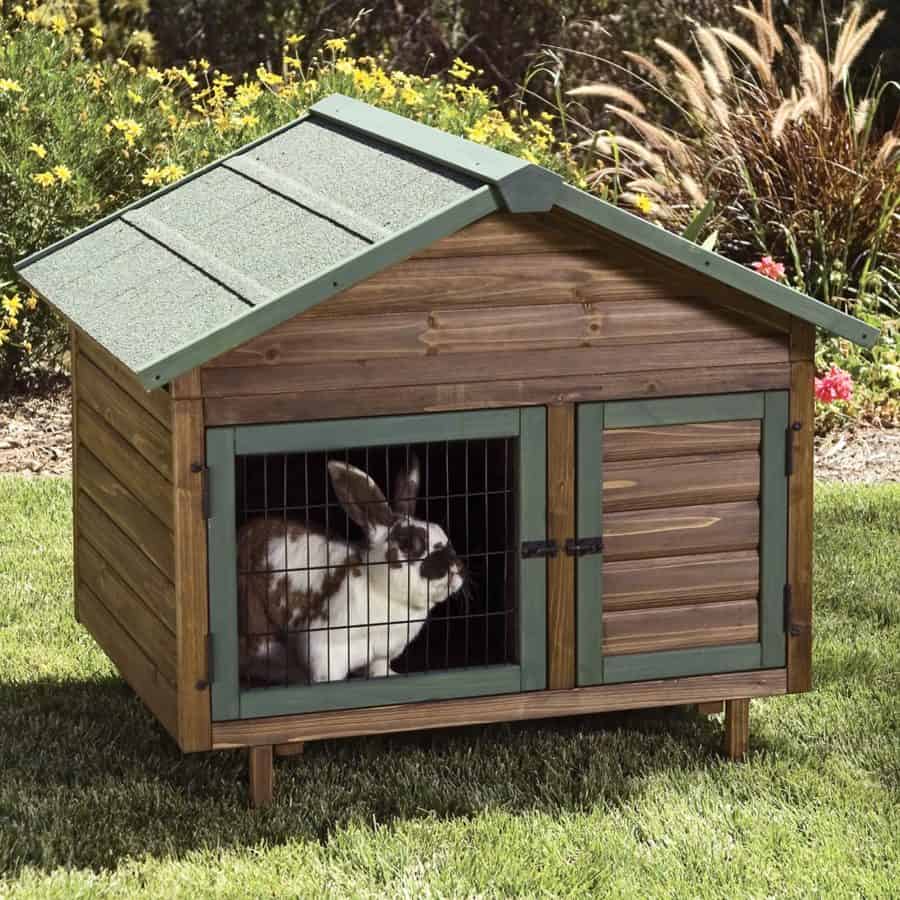
Sloped Roof Rabbit Hutch Design
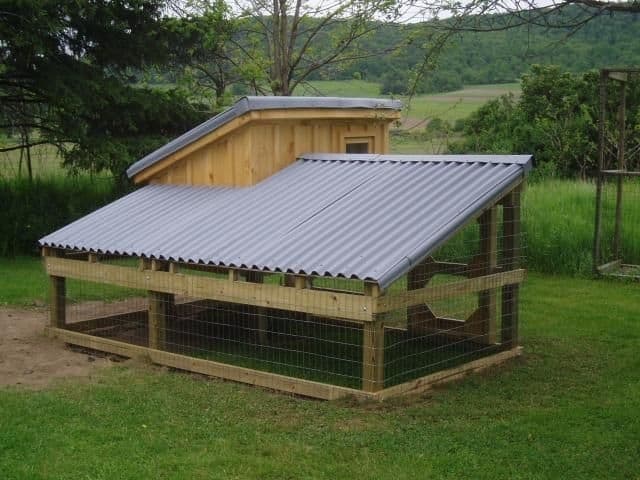
If you are raising rabbits and want to provide your rabbits with a comfortable and stylish home, then these sloped roof rabbit hutch plans are perfect for you.
This design features a spacious hutch with plenty of room for your rabbits to play and explore. The sloped roof provides protection from the weather and also gives the hutch a unique look.
Materials:
- Plywood
- Cedar boards
- Galvanized wire
- Wire cutters
- Metal sheet
Pallet Rabbit Hutch Plans
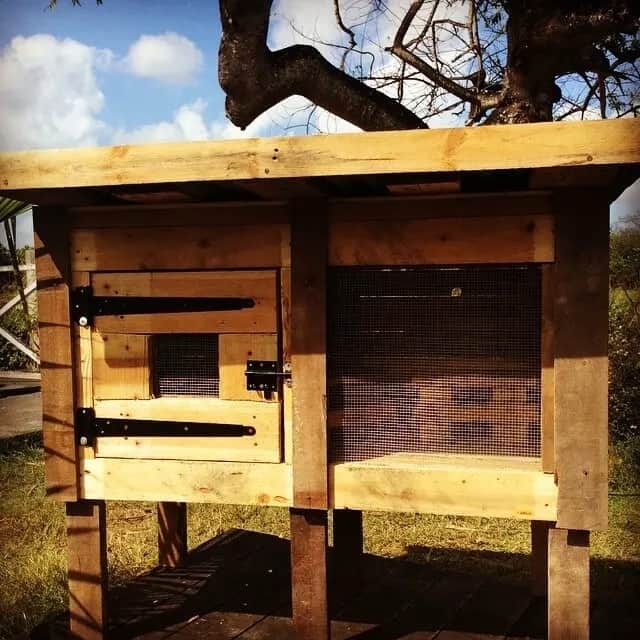
Building a rabbit house out of a pallet is a great way to recycle materials, and it’s easy to do. This hutch is perfect for keeping your rabbit warm and safe, and it’s a great way to save money on your pet supplies. You don’t need any expensive tools or materials, just a few basic supplies and some wood pieces. This project is also easy to make, which would be the best option if you want to make your leisure time more productive.
If you have some woodworking experience, then this project should be a breeze. However, even if you don’t have any experience, it’s still possible to build a rabbit house out of a pallet. The key is to take your time and measure twice before cutting anything. With that said, let’s get started.
Materials:
- Pallet
- Hinges
- Wood pieces
- Screws
- Saw
Wire Mesh Rabbit Hutch Plans
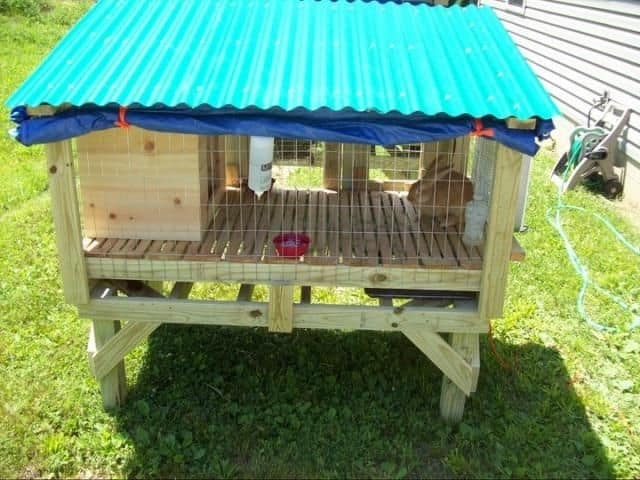
This rabbit hutch is made out of wire mesh and is great for those who want to build a simple yet functional hutch.
The floor frame made out of wooden slats will keep the rabbits warm while also getting a good air circulation. The wire mesh will keep your rabbits safe while still allowing them plenty of ventilation. Also, it is protected by the folded plastic all around the hutch, where you can open it when the weather is cooling down to keep the rabbit warm.
Materials:
- Wire mesh
- Wooden frame
- Nails or screws
- Hammer or screw
- Plastic sheet
Plywood Rabbit Hutch Plans
This rabbit hutch is made entirely from plywood, which makes it easy and cheap to build. You will need a circular saw to cut the pieces of wood, as well as a drill with an assortment of bits.
This rabbit hutch is a great option if you’re on a budget, as it only costs around $50 to build.
The basic steps are:
- Cut the pieces of plywood to the correct size using a circular saw.
- Drill holes in the plywood for the door, windows, and ventilation.
- Assemble the hutch using screws or nails.
- Add a roof and any other desired features (e.g., a ramp, water bottle, or food bowl).
- Place the hutch in your rabbit’s enclosure.
Wooden Rabbit Hutch Plans
This is a very simple wooden rabbit hutch plan that can be made with basic carpentry skills. This hutch is designed for two rabbits, but can be easily modified for more. This elevated rabbit house will keep your rabbits safe from predators and the elements.
The materials needed are:
- One 12’ by 16’ piece of ½ inch plywood
- A ¾ inch dowel rod, cut into four 24” pieces
- Sixteen #12 screws
- Eighty one ½ inch wire ties
The steps involved are:
- Cut the plywood to the desired size using a table saw or circular saw. If you do not have either of these tools, you can have the plywood cut at your local home improvement store.
- Drill two holes in each end of the dowel rods. These will be used to attach the hutch to the rabbit cage.
- Assemble the sides of the hutch using the screws. Make sure that the dowel rods are in the correct position before attaching them.
- Cut two pieces of wire mesh to fit the front and back of the hutch. Attach these using the wire ties.
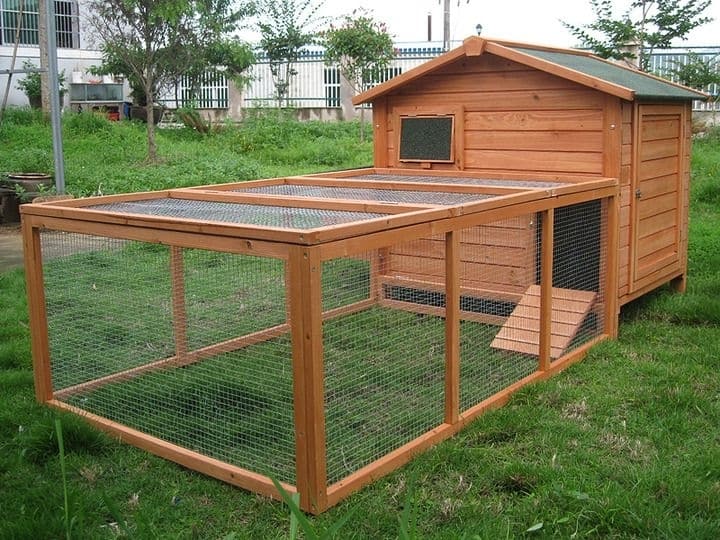
Rabbit Condo Hutch Plans
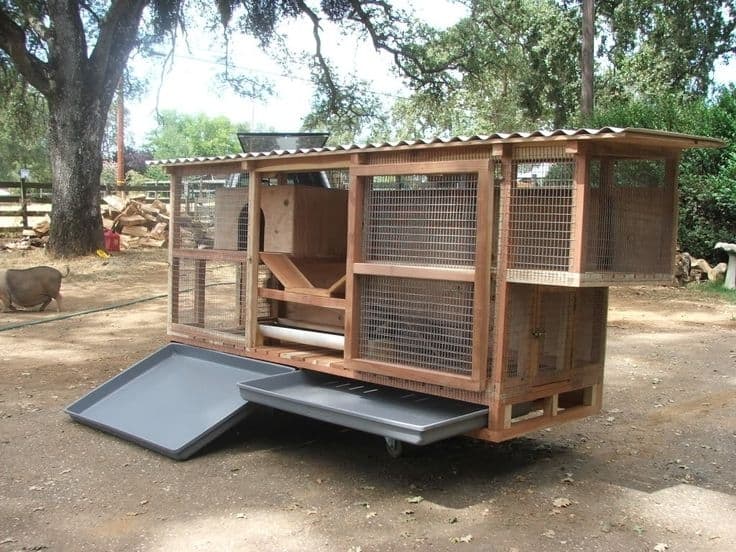
This hutch is a great option for those who want to give their rabbits plenty of space to roam. It’s also a good choice if you have more than one rabbit, as it has enough room for multiple rabbits. The removable litter boxes make cleaning the hutch easier, and the overall design is sure to please both you and your rabbits. The chicken wire allows the rabbit house has a good air circulation, which is good for the rabbit’s health. Building this hutch is definitely a project that you will be proud of.
Materials:
- Plywood
- Chicken wire
- Rabbit food and water dishes
- Litter box
- Hay
PVC Pipe Rabbit Hutch Plans
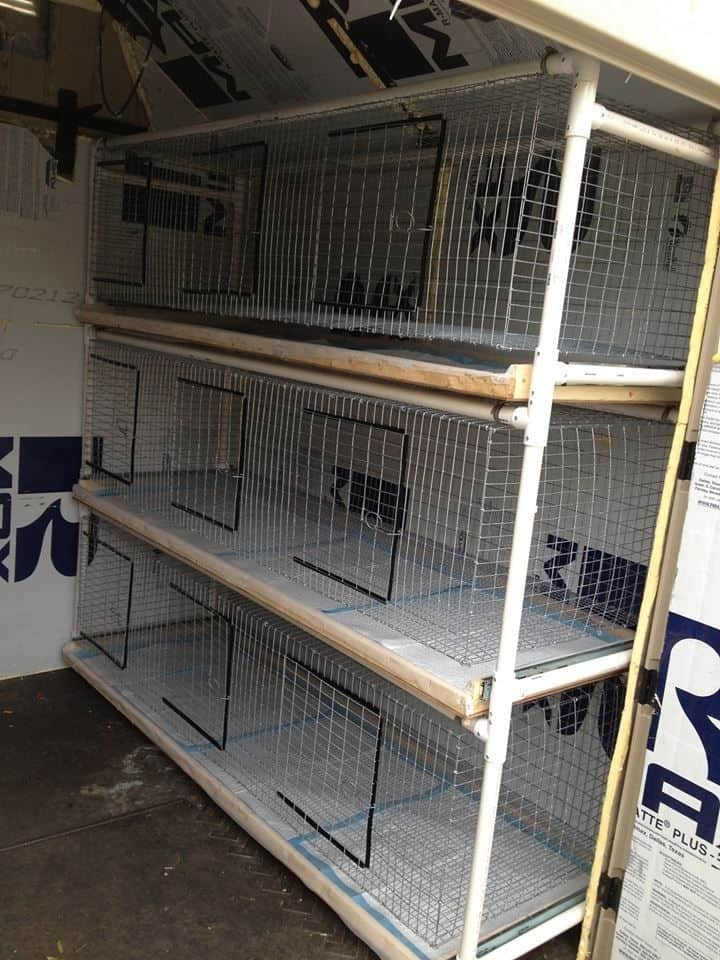
The rabbit hutch plans are made out of PVC pipes and wire mesh. It is a simple design that can be easily put together.
The PVC pipes frame is perfect material. It is light weighted, yet sturdy to keep the house stand properly. The wire mesh is there to keep the rabbit in and other animals out. Also, the wire mesh provides a sufficient amount of natural light and fresh air for the rabbits.
The materials needed for this project are:
- PVC pipes
- Wire mesh
- Plywood
- Screws
- Staples
Two-story Rabbit Hutch Plans
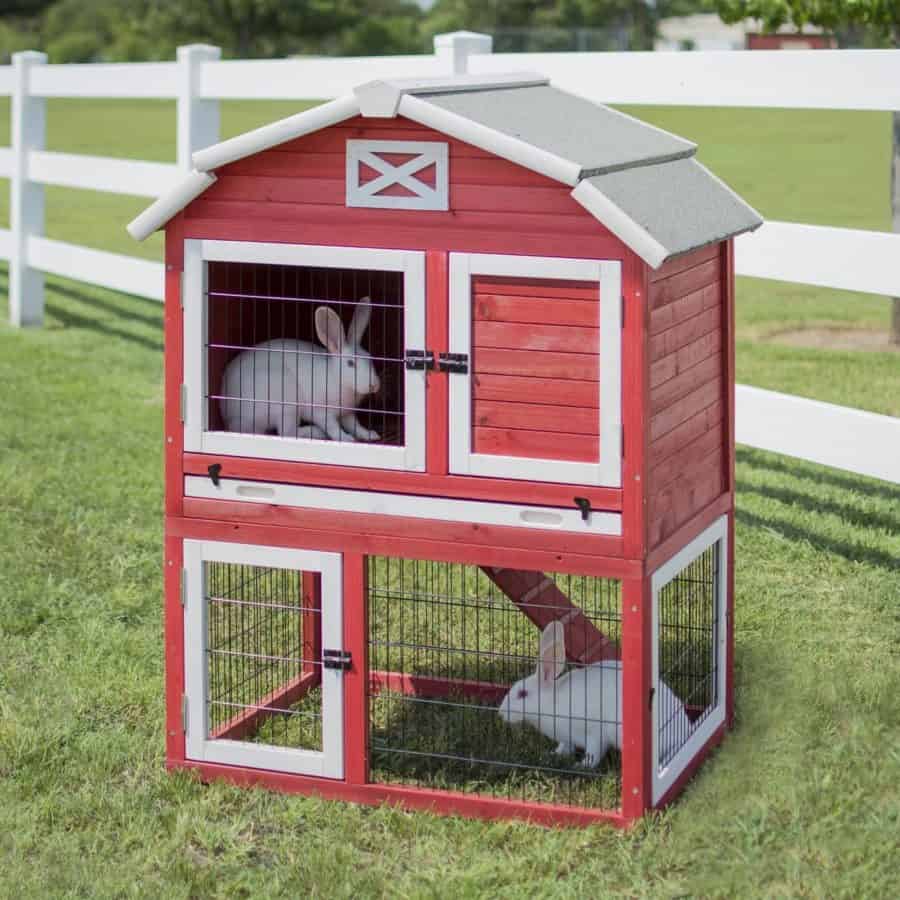
This DIY rabbit hutch plan is perfect for those who want a pretty hutch. The plans are simple to follow, which would be perfect if you are a beginner.
Building a proper rabbit hutch is not about a proper place for raising rabbits. You also need to ensure that it is aesthetically pleasing, which would be perfect as a focal point in your yard.
The hutch should have two levels with a ramp that connects the two.
The most important part of this project is to make sure that the hutch is weatherproof and escape-proof. Make sure that the wire is tightly secured and that there are no gaps that the rabbit could squeeze through.
Materials:
- Wooden slats
- One box of wood screws, size #12
- One tube of construction adhesive
- Four hinges
- Wire mesh, enough to cover the front and sides
- Paint
Simple Outdoor Rabbit Hutch
This DIY rabbit hutch will keep your bunnies safe and cozy outdoor, so if you’re looking for one for your yard, then we’ve got you covered. There will be enough fresh air coming into the enclosure for the bunnies, as well as natural sunlight, which will allow them to grow properly.
You’ll need:
- one sheet of plywood, at least 48″x48″
- one inch of insulation (R-13 or higher)
- furring strips or other thin lumber
- construction adhesive
- staples gun
- saw blade
- drill with bits
DIY Indoor Rabbit Hutch Plans
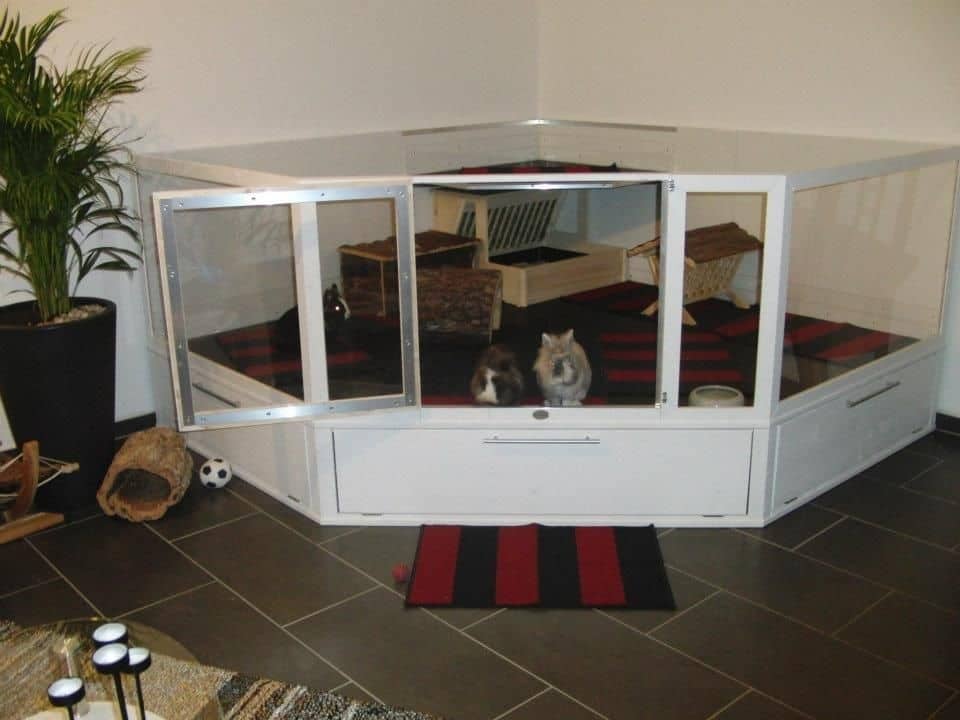
This DIY indoor rabbit hutch will be a great option for you if you are in need of an easy way to house your bunny. The hutch features a bottom shelf that can be used as a litter box, and the top level of the hutch has plenty of room for your furry friend to play.
To build this hutch, you’ll need: one 24″x48″ piece of plywood, one 18″x36″ piece of wire mesh, one box of wire clamps, and two hinges.
Minimalist Rabbit Hutch Plans

This DIY rabbit hutch is perfect for those who want a simple, no-fuss option. The hutch is elevated off the ground and has a slanted roof to keep your bunny dry. The wire mesh walls provide plenty of ventilation and protection from predators.
Materials:
- Plywood
- Wire mesh
- Screws
- Nails
- Hammer
- Drill
- Tape measure
Cheap Rabbit Hutch Plans
An inexpensive project is such one of the most wanted projects. These DIY rabbit hutch plans are not only easy to construct but also cheap. You can use the recycled materials for this project and make it environmentally friendly. This will be a perfect project for the newbies and experienced builders as well. The wooden wall will keep the rabbit warm inside the house, while also providing a place for the rabbit to hide.
The materials you need are:
- a wooden pallet (or any other sturdy wood)
- a jigsaw or hand saw
- measuring tape
- hammer
Large DIY Rabbit Hutch Plans
There is nothing better than keeping multiple rabbits in one hutch, especially when the rabbit hutch is large. You do not need to be an expert in order to complete this project, and all the materials needed can be bought at any hardware store. This project will take some time to complete, but it is worth it when you see your rabbits enjoying their new home.
The first thing you need to do is build the frame of the hutch. This can be done with any type of wood, but it is important that the wood is strong and durable. Once the frame is built, attach the wire mesh to the wooden frame. Make sure that the mesh is tightly attached so that the rabbits cannot escape.
Next, you need to build the roof of the hutch. This can be done with any type of material, but it is important that the roof is strong and durable.
Materials:
- Hammer
- Nail Gun
- Square
- Level
- Tape Measure
- Sandpaper
Triangle DIY Rabbit Hutch Plans
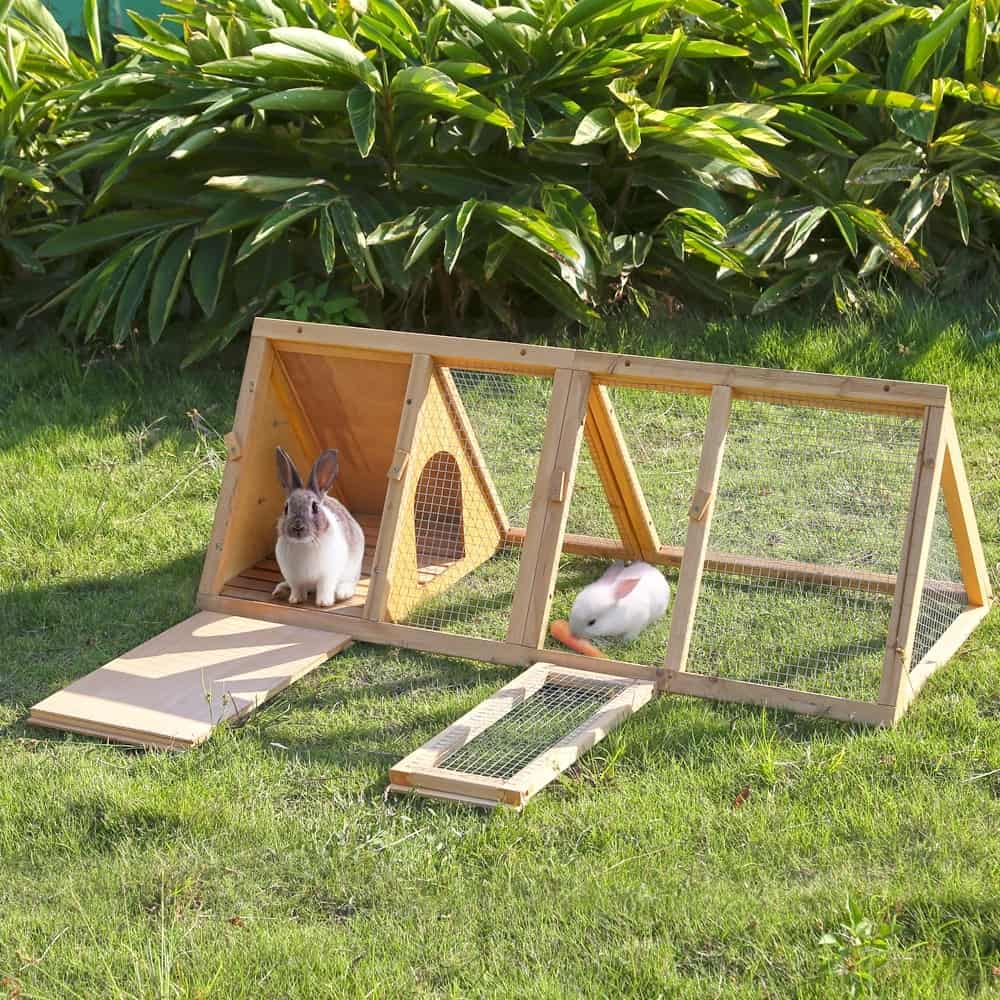
The front of the hutch can be opened up to give you access to the rabbits. There is also a small door on the side so you can easily feed them. The hutch can be easily disassembled for cleaning or moving.
This hutch is perfect if you have limited space, but still want to keep rabbits. It’s also a great project for beginners.
What You’ll Need:
- Plywood
- 1×2 lumber
- Wire
- Nails
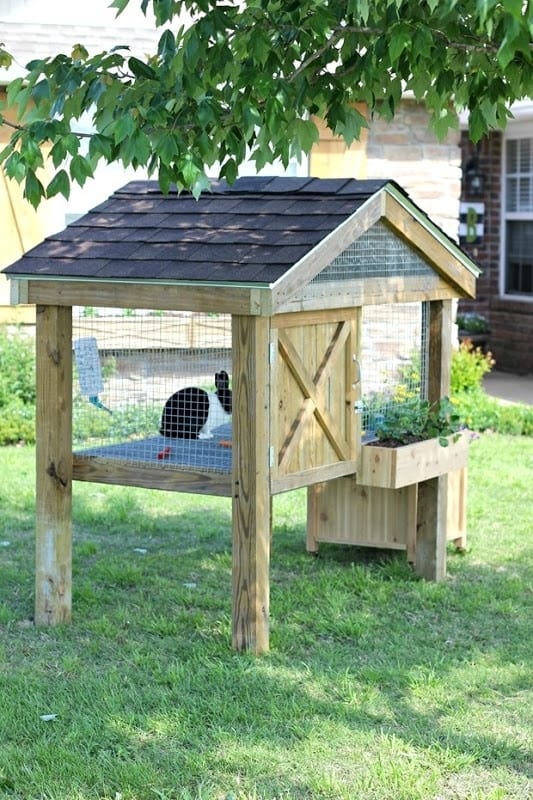
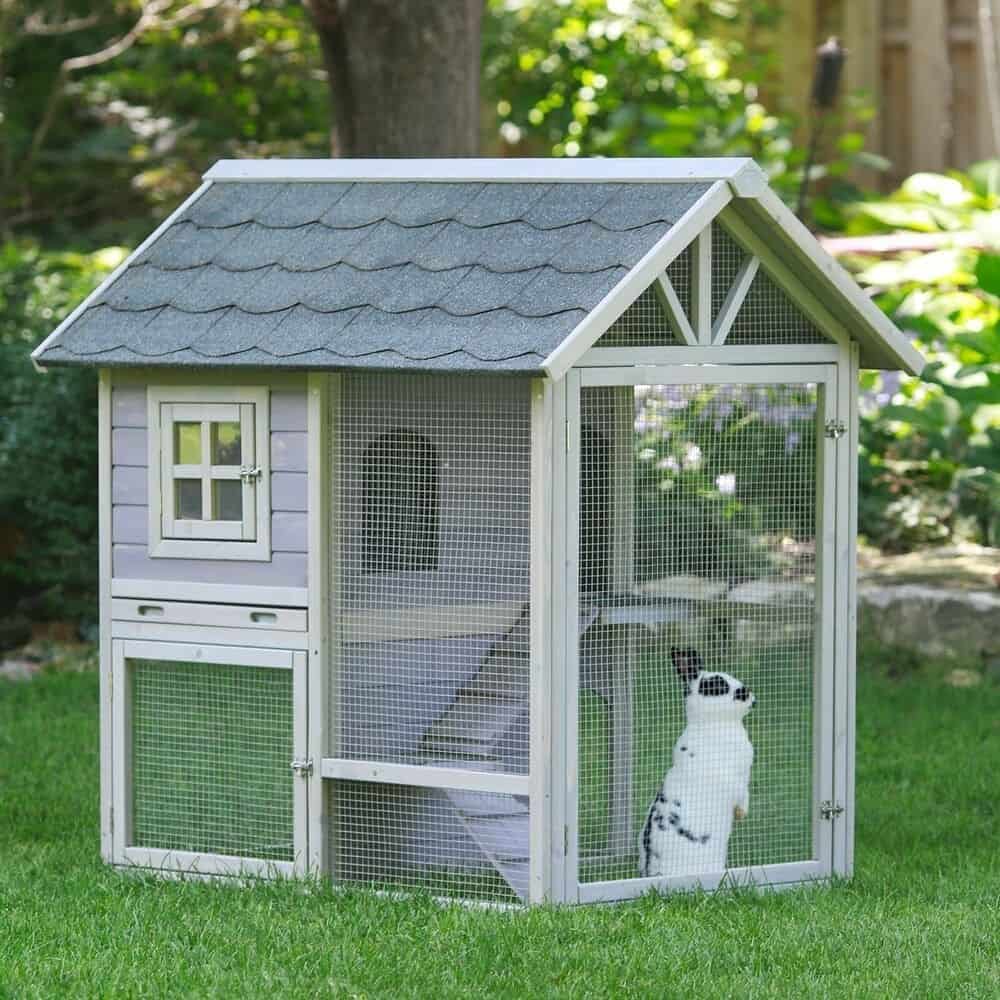
Farmhouse DIY Rabbit Hutch Plans
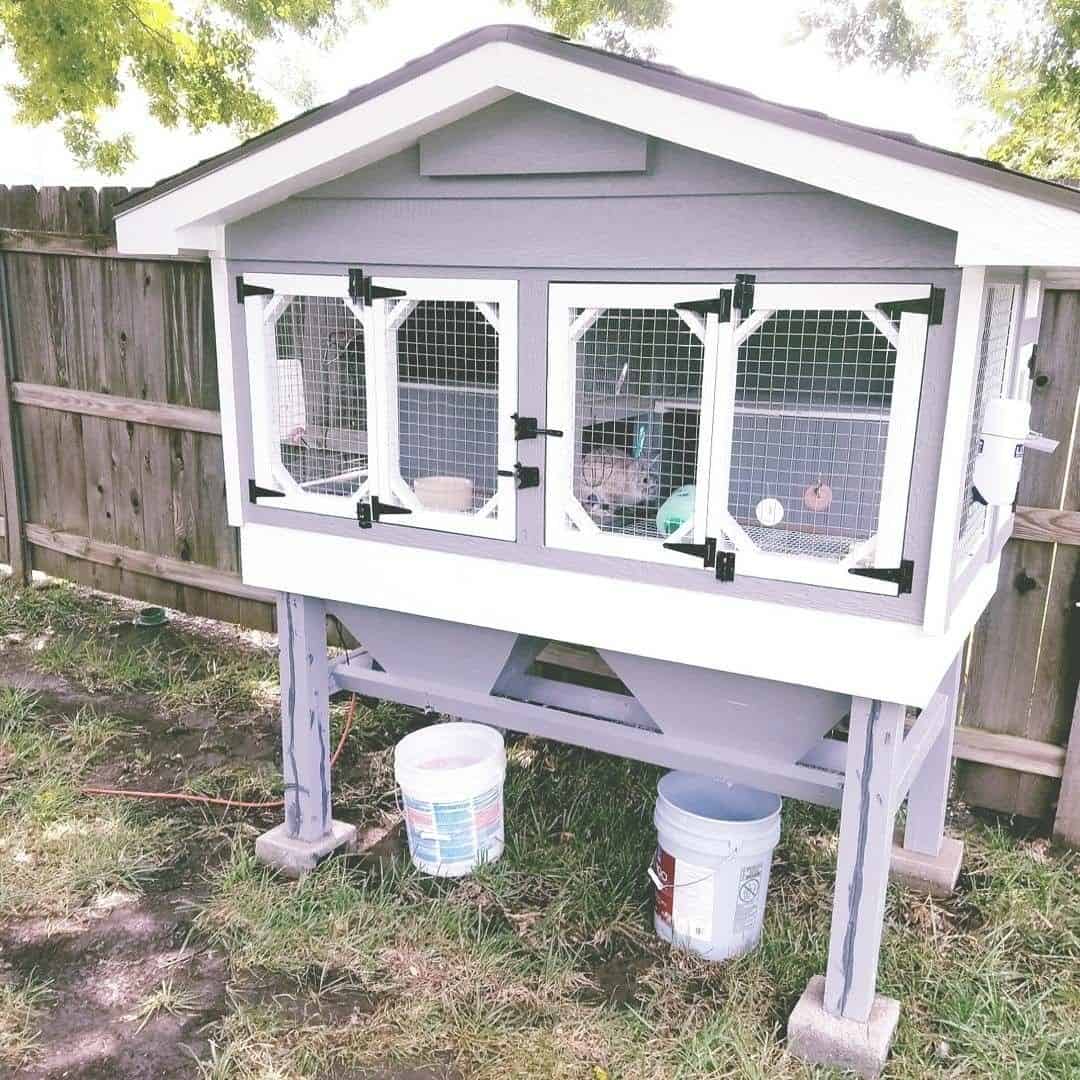
This simple farmhouse rabbit housing can be made with just a few tools and some basic lumber. The finished product is a stylish and functional home for your rabbits that will look great in any backyard.
This elevated farmhouse rabbit hutch keeps the rabbit dry and warm when the rain is pouring.
The combination of the gray and white painting highlight the farmhouse style, which make it more eye-catching on the backyard.
Materials:
- plywood
- pine boards
- wire mesh
- screws
- hinges
- paint or stain
Tools:
- saw
- drill
- screwdriver
- hammer
- wire cutter/stripper
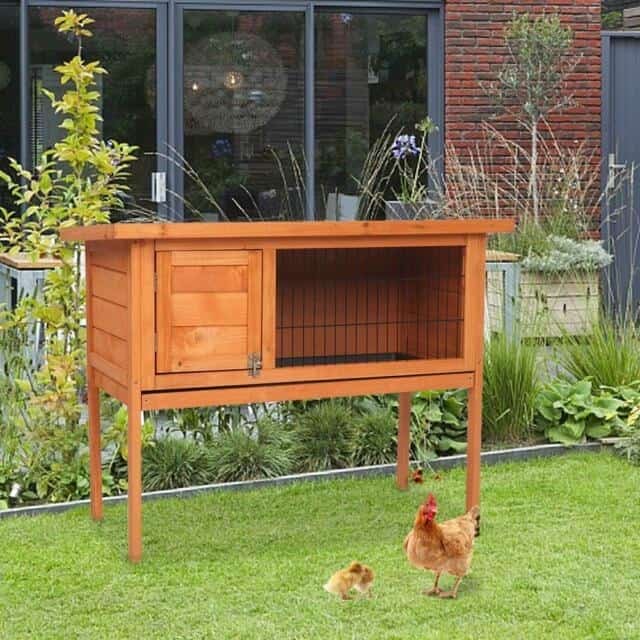
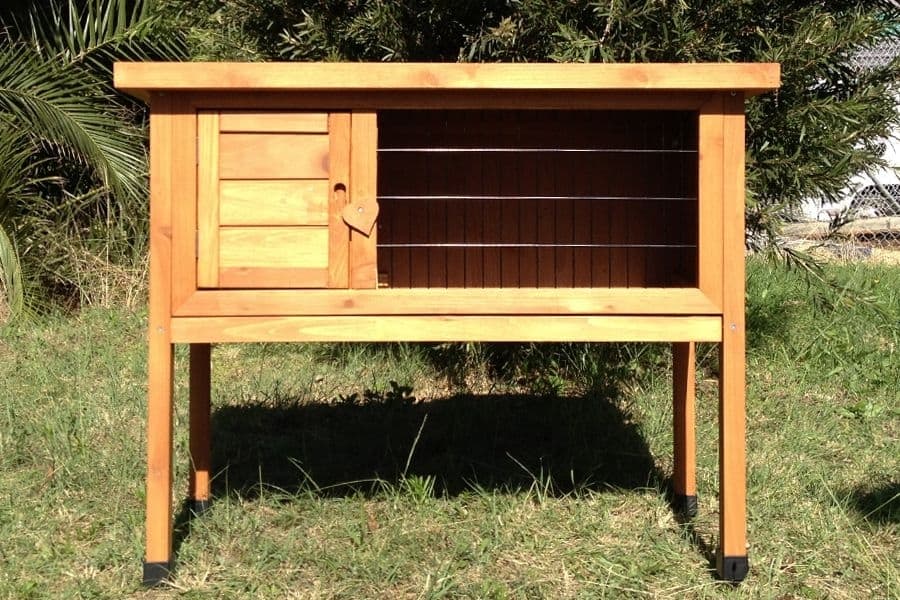
Small Rabbit Hutch Plans
If you are a beginner and want to build your own small rabbit hutch, this is the plan for you. The materials required are minimal, and the construction is basic.
The hutch is small enough to be easily moved, and the wire mesh keeps your rabbit safe from predators.
The wire on the front part of the hutch provides a natural light and fresh air for the rabbit and the wooden walls on the other side keep the house warm during the cold weather.
Final Thought
Building a DIY rabbit hutch is a great way to provide your rabbit with a place to live. The most important part is making sure the hutch is big enough for your rabbit to move around in and has a place to hide.
We’ve provided a variety of plans for you to choose from, each with easy instructions and materials needed listed.