Step into the wonderful world of DIY and discover the ultimate solution to your earring chaos!
Say goodbye to the frustration of losing or mismatching your earrings with our collection of innovative and budget-friendly how to make an earring holder ideas.
Whether you’re a savvy student on a tight budget or a crafty enthusiast seeking a new project, we’ve got you covered.
In this article, we’ll show you how to make an earring holder that is not only practical but also stylish and chic, so you can easily find and admire your earrings.
Table of Contents
DIY Framed Earring Holder
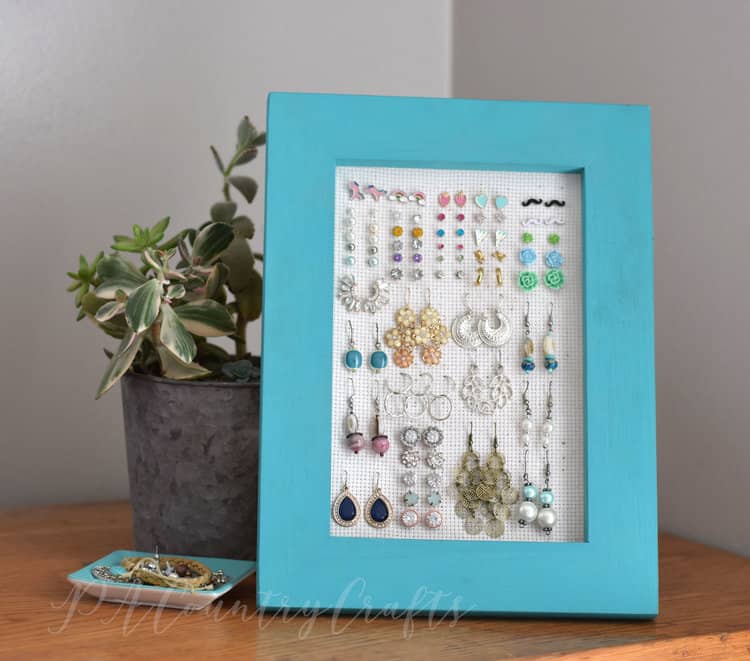
Transform an old picture frame into a beautiful earring holder. Simply remove the glass and backing, attach a piece of wire mesh or lace to the back, and voila! You’ve got a chic and practical earring holder.
You can also repaint the frame for a fresher look.
Simple Ribbon Earring Holder
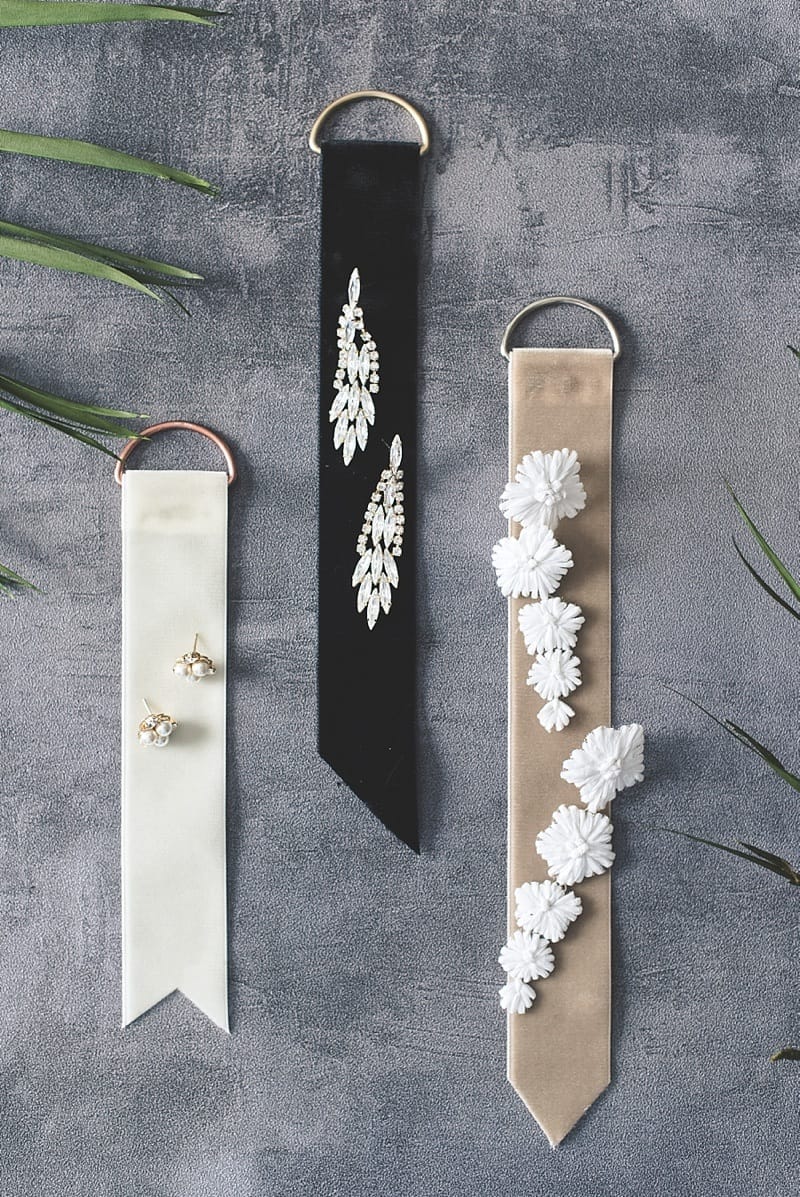
Create a colorful and fun ribbon earring holder by attaching ribbons to a small wooden frame. Simply loop the ribbon onto the D-ring, then glue on the back side of the ribbon. Fold over the straight edge of the D-ring and let it dries perfectly.
The Cute Earing Holder
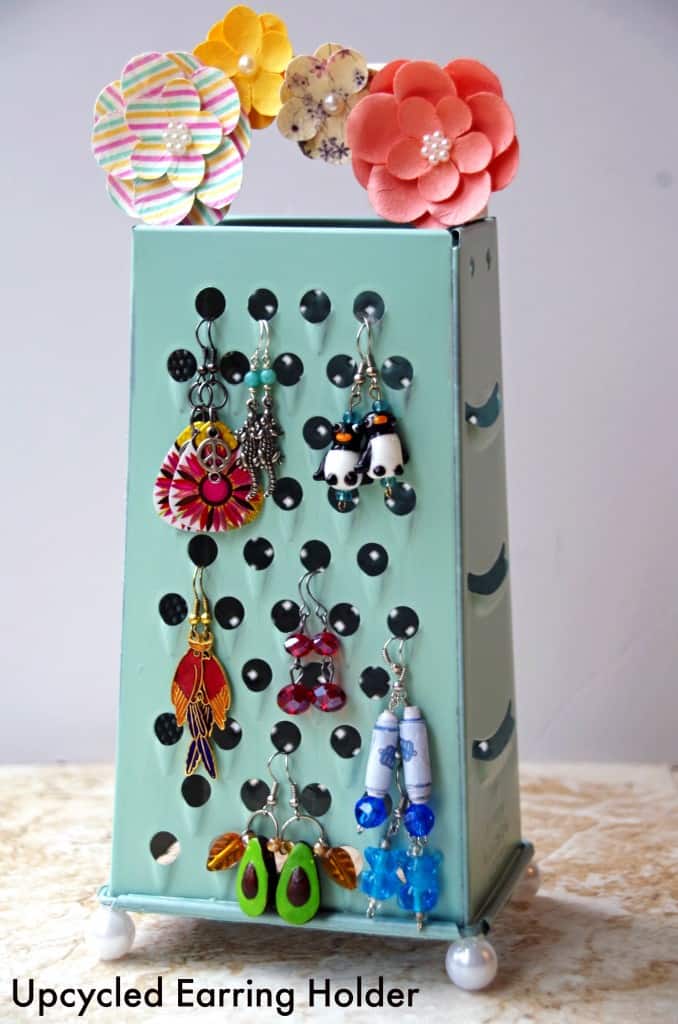
With just a few simple steps, you can transform a rusty old cheese grater into a stunning earring holder that will add a touch of charm to your jewelry collection.
First, give the cheese grater a good scrub and remove any dirt or debris. Next, grab your favorite color of spray paint and give the cheese grater a fresh coat of paint. Once dry, attach the grater to the wall or place it on a table for easy access to your earrings.
Repurposed Pen Cup or Mesh Trash Can
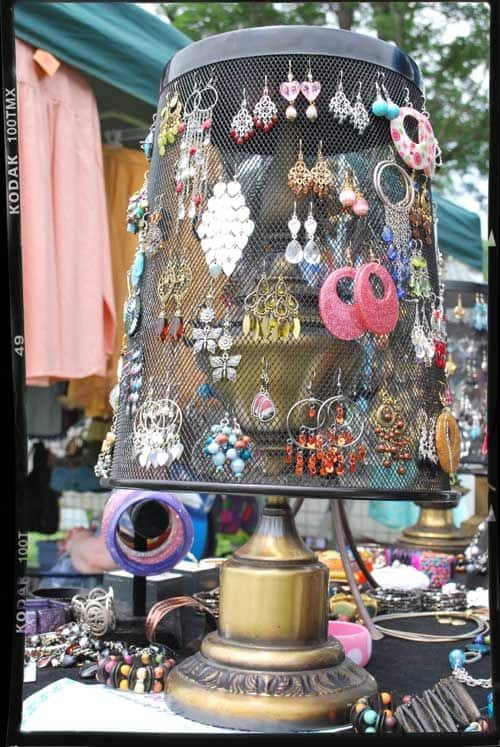
Give your old pen cup or mesh trash can a new lease of life by turning it into a functional earring holder!
All you need is a piece of wire mesh or lace, which can be easily attached to the top of the cup or can. Once completed, you can place it on your dresser or table for easy access to your small earrings, such as studs.
Cork Earring Organizer
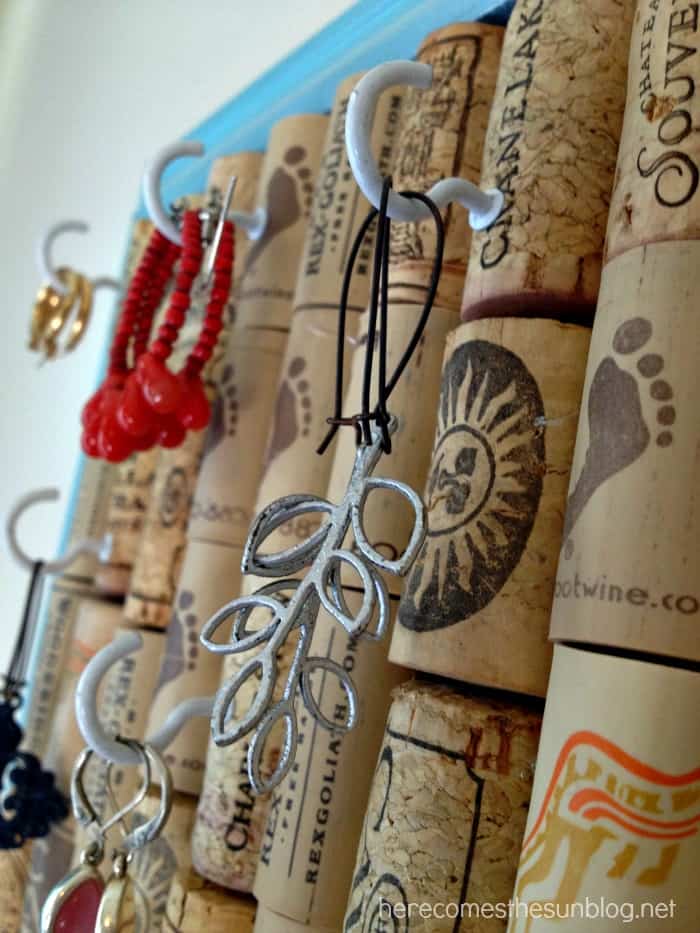
Give your old wine corks a new lease on life by repurposing them as a nifty earring organizer. You’ll be surprised at how easy it is to make!
Just gather your collection of wine corks and attach the hooks to the wine corks. This holder is a clever and functional way to keep your earrings organized and within easy reach.
Fridge Shelf or Oven Rack Earring Organizer
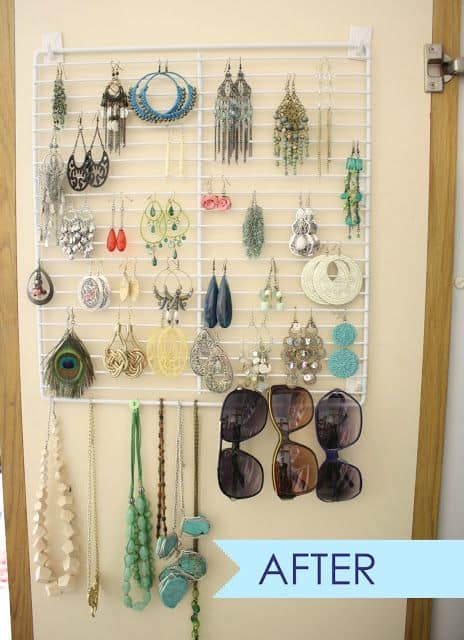
Raid your kitchen for a fridge shelf or an oven rack and turn it into a unique and charming earring holder that will make your friends envious. It’s simple, easy and gives you that rustic look you’ve been after.
To create this DIY holder, first give your fridge shelf or oven rack a good clean and wipe it dry. Then, start by hanging your earrings from the wires. You can organize them by color or style, or go completely wild and create a mishmash of all your favorite pairs.
DIY Stud Earring Box
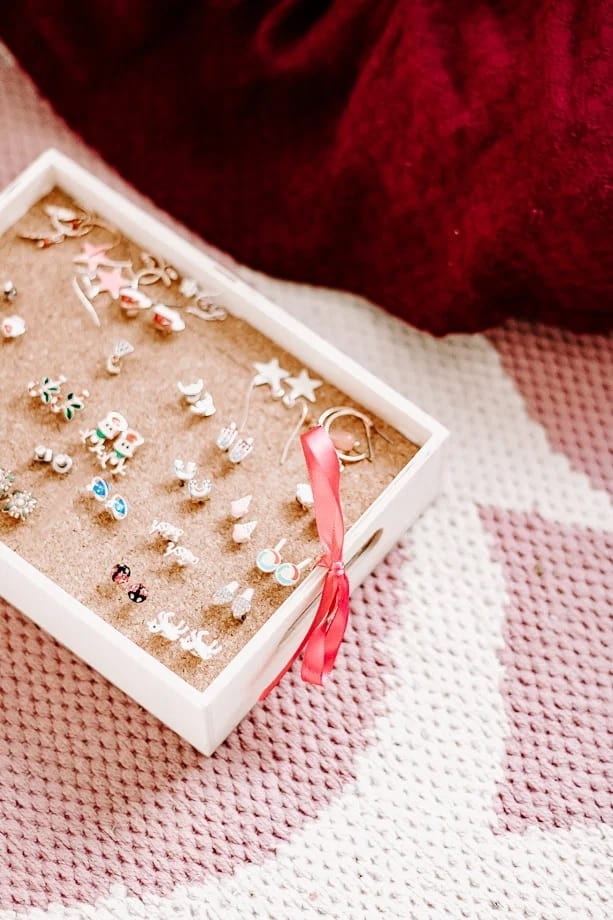
Create a stylish stud earring box by gluing cork square to the bottom of a small wooden box. Simply poke holes in the cork square to insert your stud earrings.
Make it more beautiful with the ribbon on the wooden box.
DIY Earring Holder with Chicken Wire
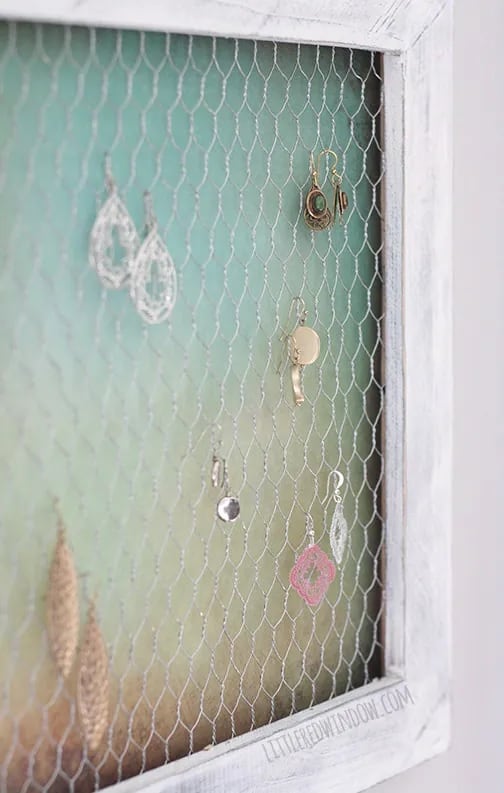
Make a beautiful earring holder using chicken wire. Simply attach the chicken wire to a wooden frame and hang your earrings from the wires. This DIY holder is great for those who want a chic and modern touch to their jewelry display. Also consider painting the wooden frame with the distressed touch that will make it looks more fabulous.
Old Vinyl Records
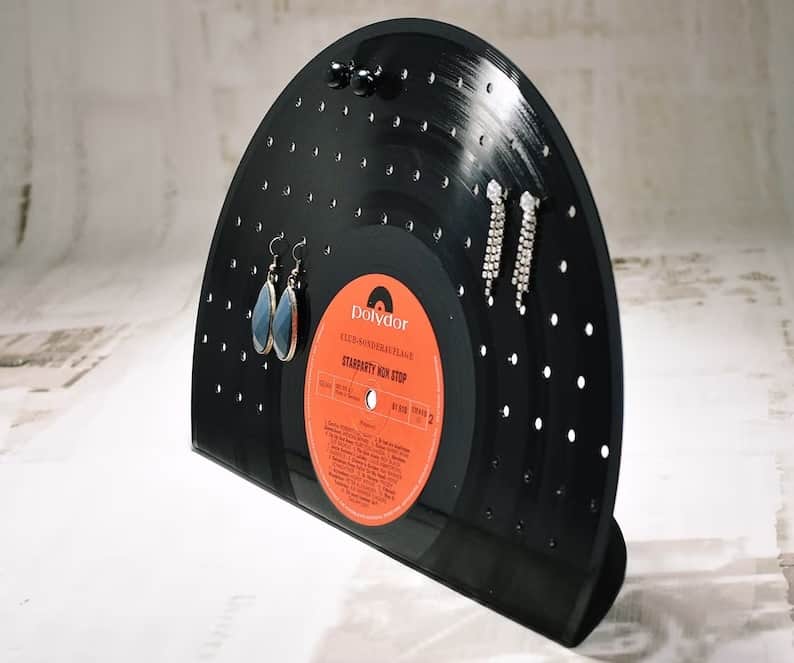
Unlock a new rhythm of creativity and repurpose your old vinyl records into a stunning earring holder that hits all the high notes.
Don’t let your treasured tunes collect dust any longer – give them a fresh spin by placing them on a sleek stand and watching as your earrings find their groove in the record’s iconic grooves.
Make Use of a Splatter Shield
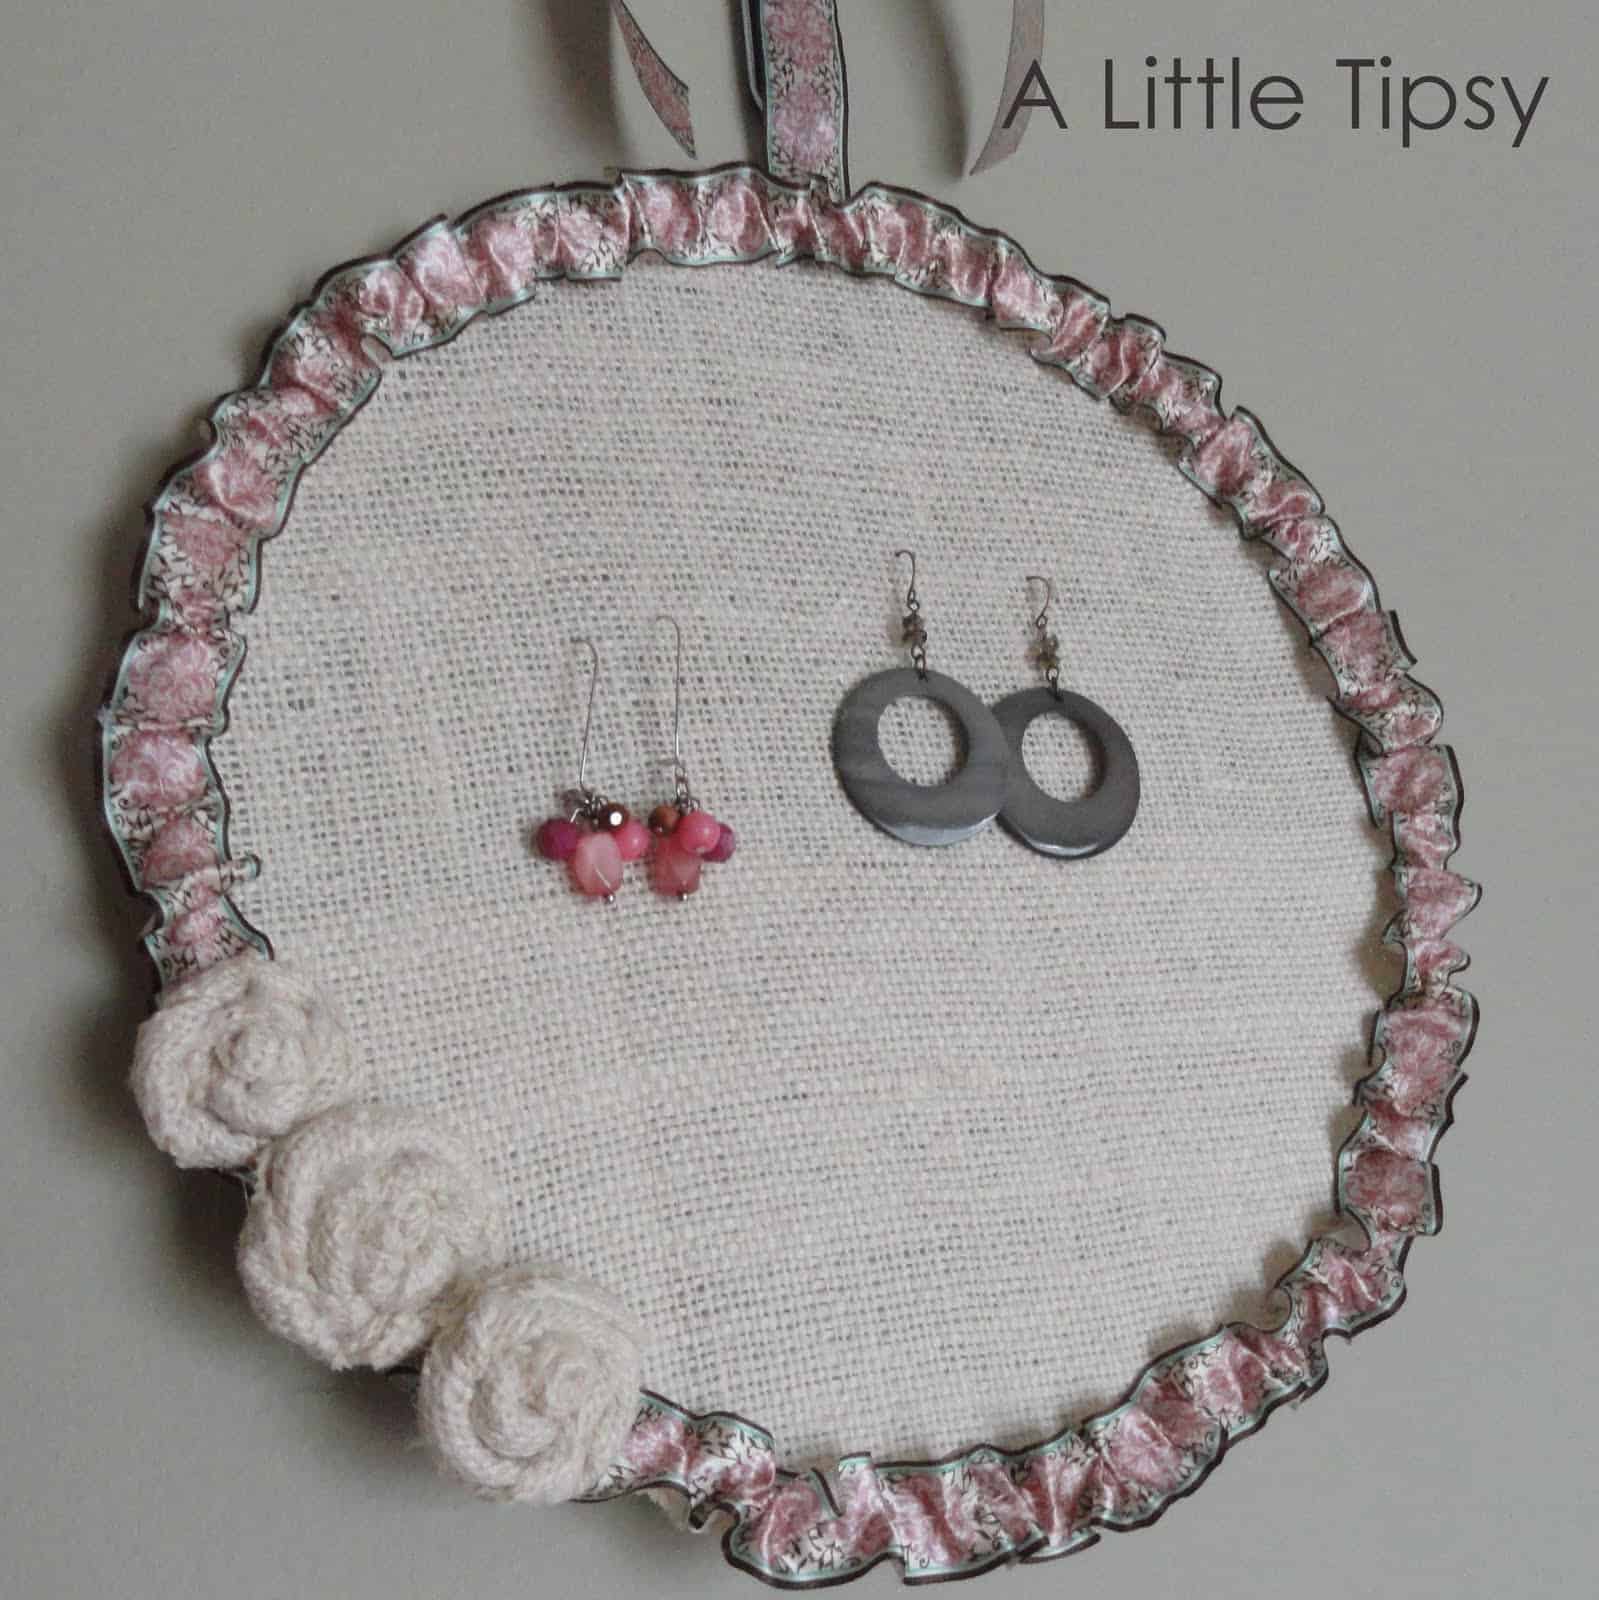
Unleash your inner artist and craft your very own earring holder that’s as stylish as it is functional! With just a few simple materials, including a splatter shield, burlap, hot glue, ribbon, needle, and thread, you can create a stunning holder that showcases your earrings with pride.
No need to spend a fortune on store-bought options when you can whip up a DIY masterpiece that’s uniquely yours.
Display Earrings For a Vintage Feel with Denim
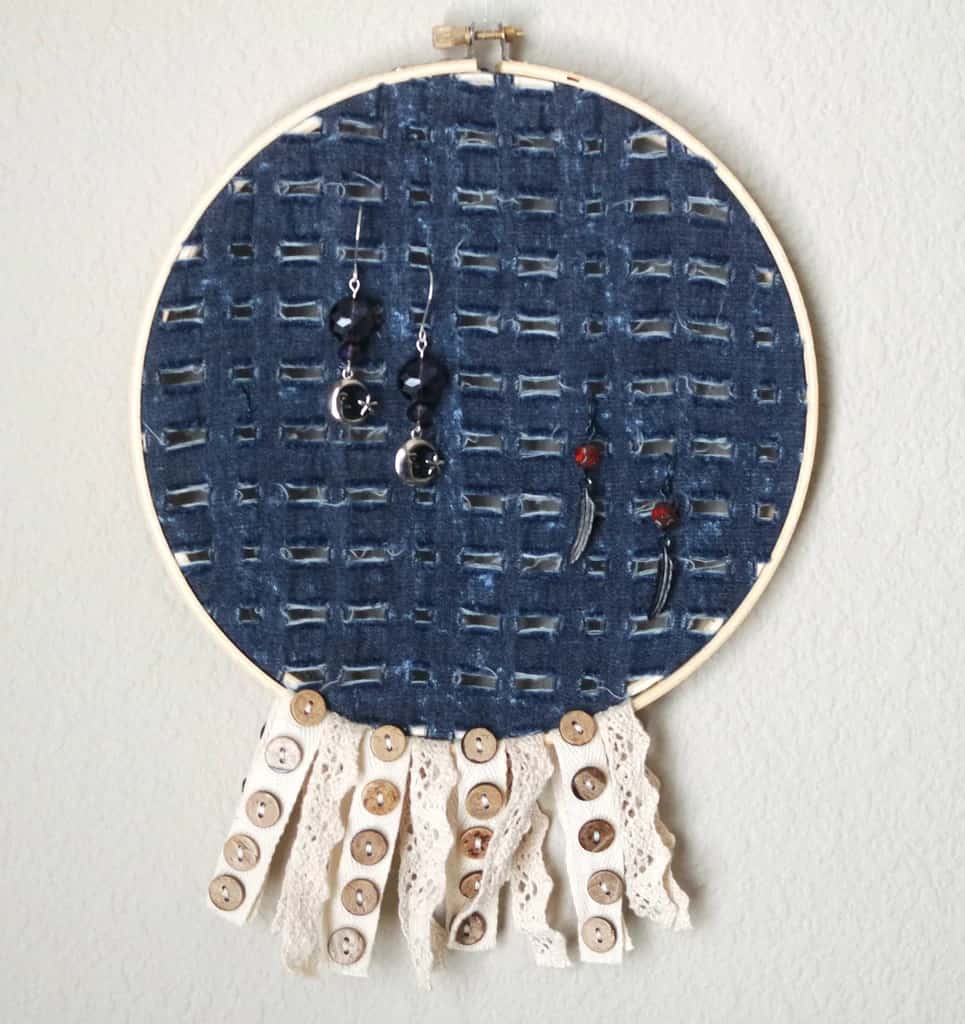
Revamp your old denim and give it new life with this charming earring holder that’s equal parts rustic and chic. Using just an embroidery hoop, denim fabric, delicate lace, and wooden buttons, you can create a unique holder that showcases your earrings in style.
The rustic denim provides the perfect backdrop for the delicate lace and wooden accents, while the embroidery hoop keeps everything securely in place.
Upcycle the Popsicle Stick
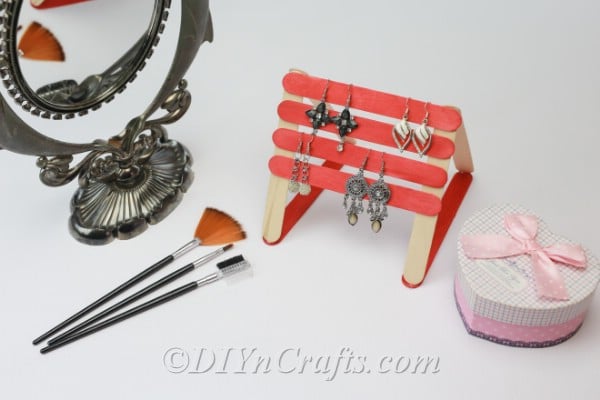
Craft a rustic earring holder using popsicle sticks and twine. Glue together the sticks in a grid pattern and wrap twine around the edges to create a border. Attach small hooks to hold your earrings in place.
Use a rattan as an Earring Holder
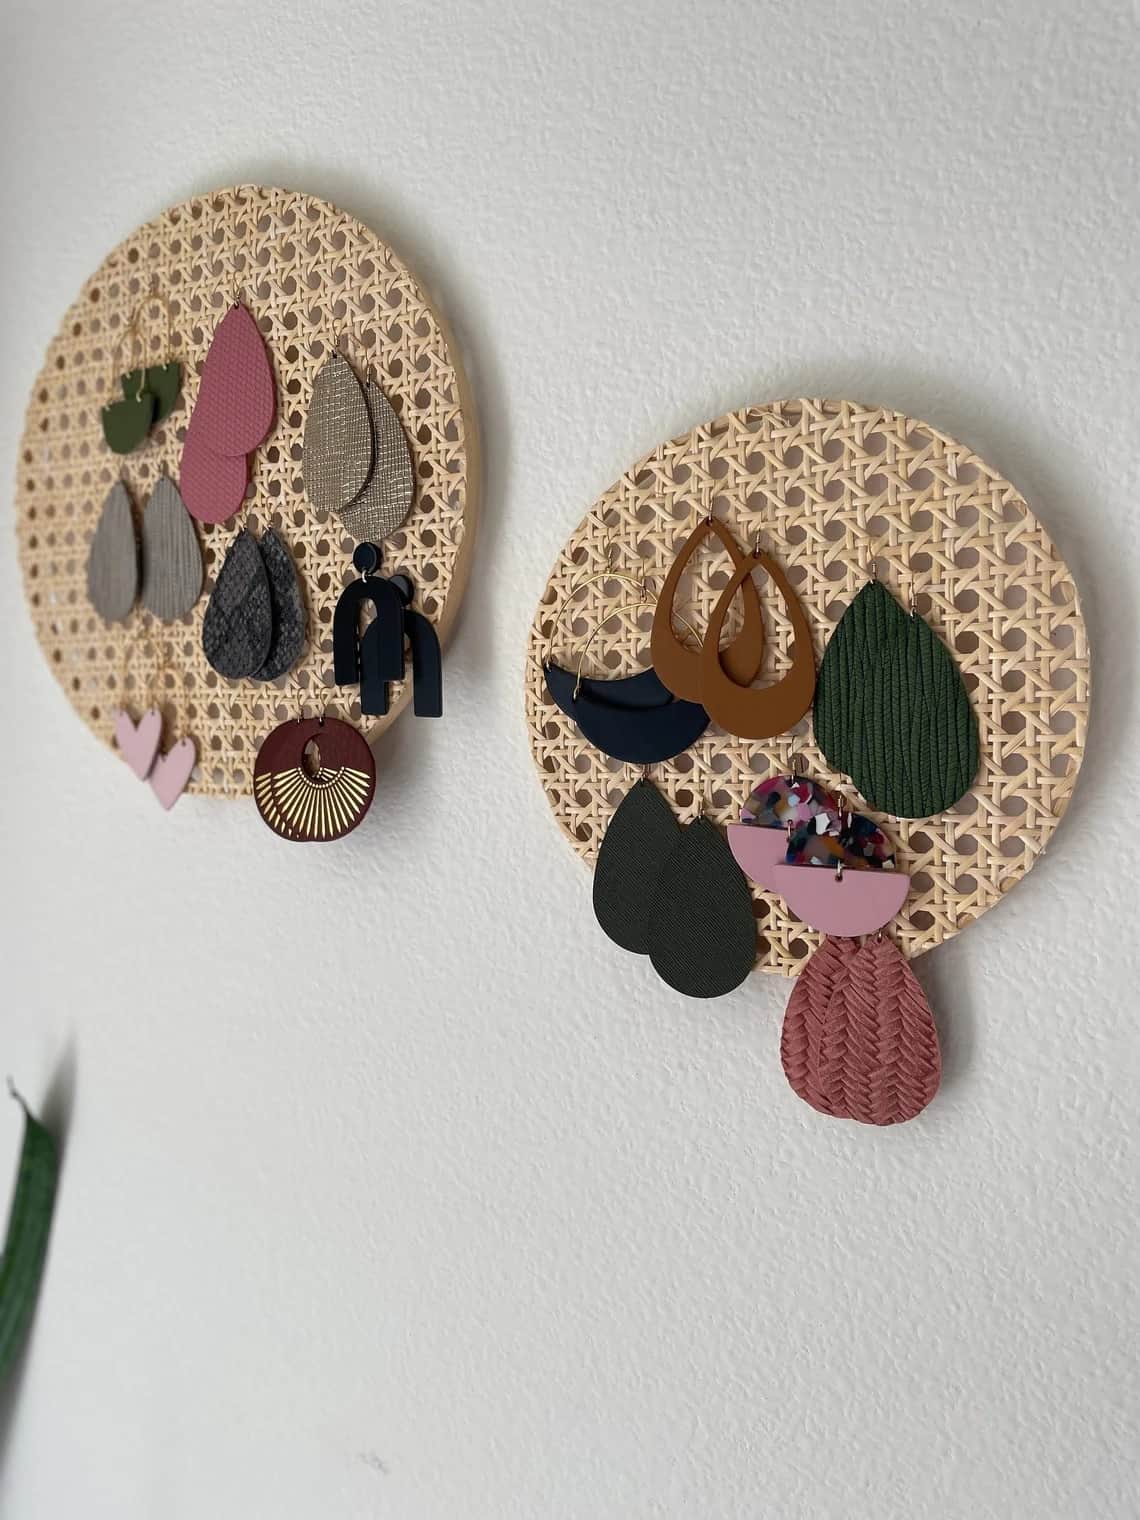
Crafted from woven rattan, this holder is both practical and beautiful, adding a touch of tropical charm to your dressing table or bathroom counter.
Not only does it keep your earrings organized and untangled, but it also makes a statement piece that’s sure to impress. The earthy texture and warm tones of the rattan create a cozy and inviting feel, ideal for those who love a touch of nature in their decor.
Embroidery Hoop Earring Holder
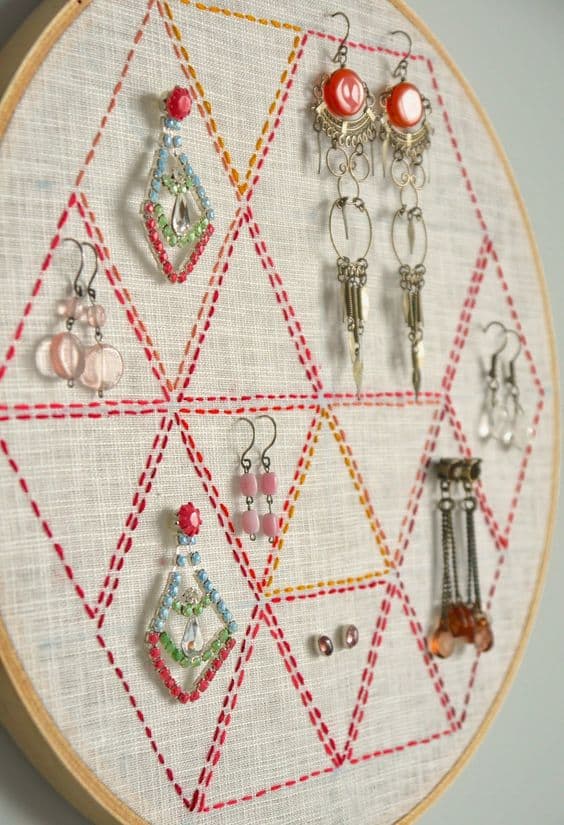
Turn an embroidery hoop into a boho-inspired earring holder by wrapping it in decorative fabric or ribbon. Use small hooks or earring wires to hang your favorite pairs.
Macrame Earring Holder
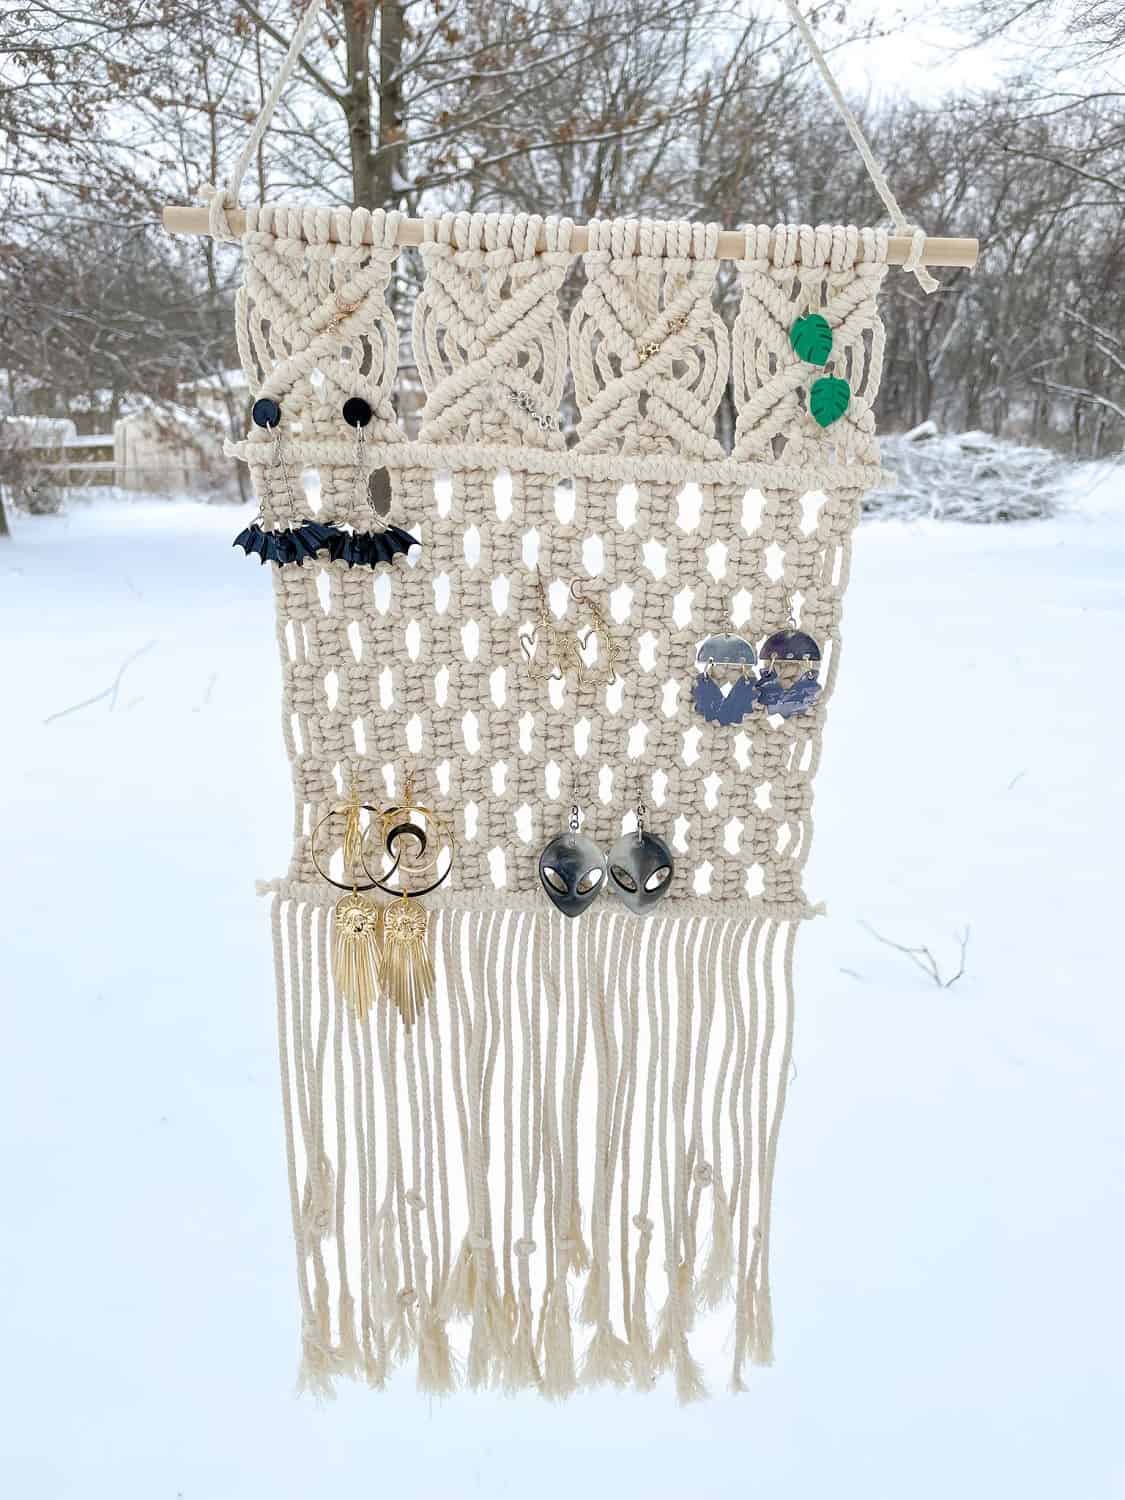
Craft a stylish macrame earring holder using rope and a wooden dowel. Simply tie a series of knots to create a grid pattern and attach small hooks or wires for your earrings.
Elegant Acrylic Earring Holder
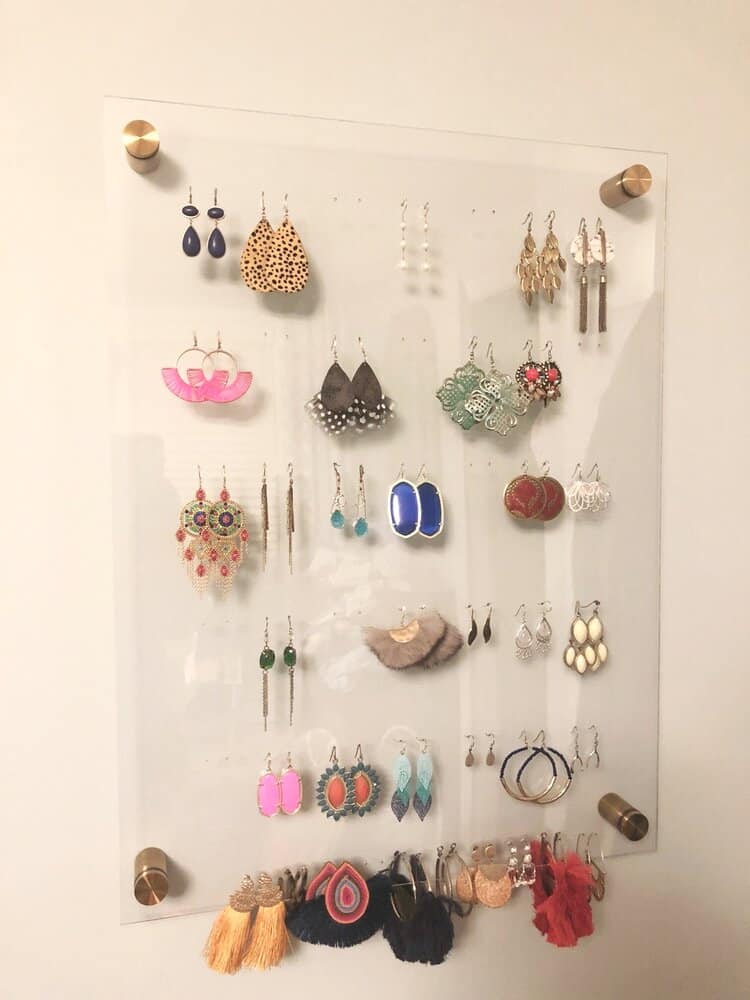
This acrylic earring holder is great for those who have a large earring collection. The clear acrylic allows you to easily see all of your earrings, and the multiple layers provide ample space to display them.
Materials needed:
- Clear acrylic sheet
- wall sign holder
- Hole saw drill bit
- Handheld drill
- Sandpaper
- Earring hooks
Instructions:
- Cut the acrylic sheet into squares or rectangles using the hole saw drill bit.
- Sand the edges of the acrylic to smooth out any rough edges.
- Drill holes into the acrylic squares or rectangles using the handheld drill and hole saw drill bit.
- Screw the back of the wall holder into the wall
- Attach the earring holder to the wall
- Put your earring collections to the holder
Cactus Earring Holder
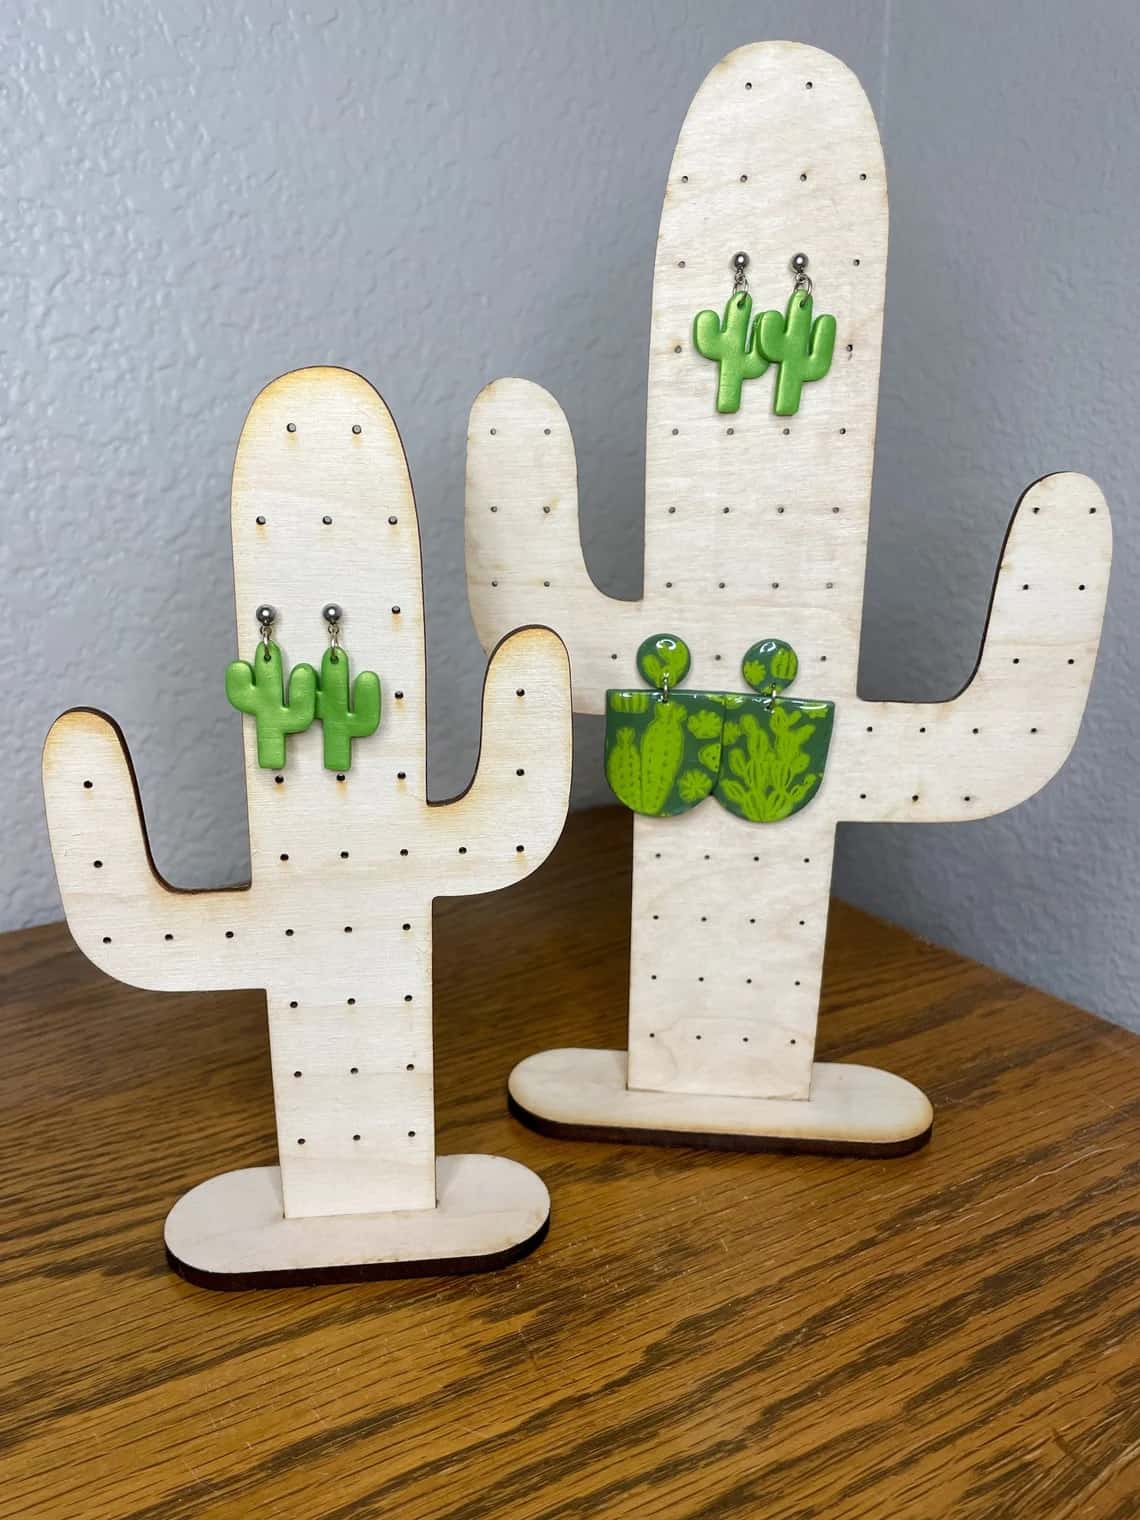
Bring a touch of the desert into your home with a stunning cactus earring holder crafted from wood. This whimsical and functional piece is the perfect way to showcase your favorite earrings while adding a touch of rustic charm to your decor.
The natural wood grain gives it a warm and organic feel, while the cactus shape adds a playful element to your space. With its multiple branches, this earring holder can accommodate a wide range of earring styles and sizes, making it as practical as it is stylish.
DIY Wire Earring Holder
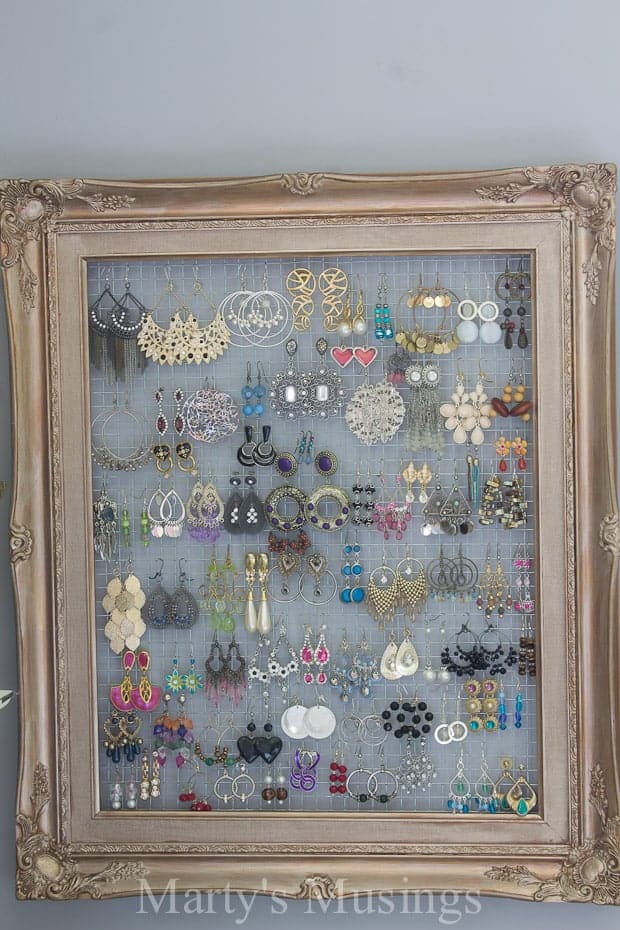
This DIY wire earring holder is a simple and minimalist way to display your earrings. The wire design allows for easy access to your earrings, and you can make it as large or small as you need depending on the size of your collection.
Materials needed:
- Wire mesh
- Wire cutters
- Pliers
- Wooden frame
- Screws
- Screwdriver
Instructions:
- Cut the wire mesh to fit the size of the wooden board.
- Using the pliers, bend the wire mesh into a U-shape.
- Attach the wire mesh to the wooden board using screws and a screwdriver.
- Hang the wire earring holder on the wall and attach your earrings to the wire mesh.
Earring Stand Under One Hour
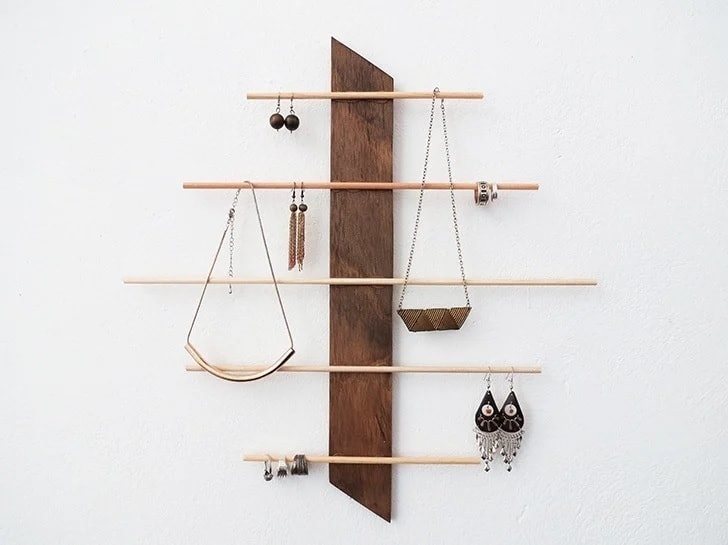
For those who want to create a quick and easy earring stand, this idea is for you. All you need is a small wooden block, a dowel, some glue, and paint. Cut the dowel to the desired length, then glue it onto the wooden block. Once the glue is dry, paint the stand any color you like. It’s that simple!
Earring Holder Using Foam Board
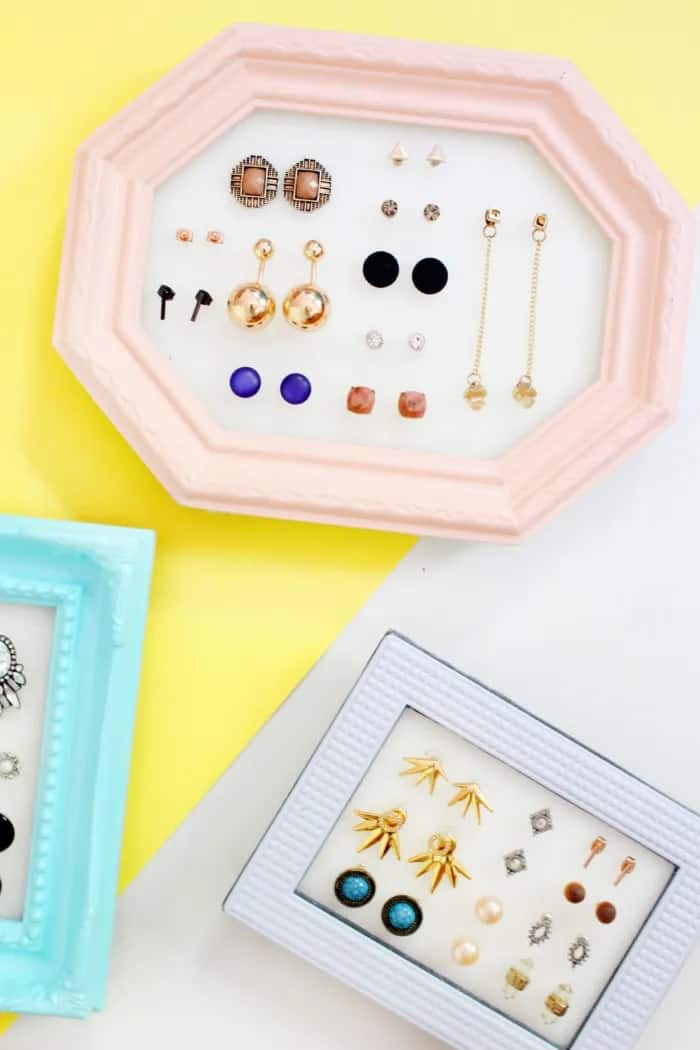
Another easy and inexpensive earring holder idea is using foam board. Cut the foam board into the desired shape and size, then cover it with fabric or paper. Attach small hooks or earring backs to the board and you’re done!
You can even add a small frame or border to make it look more decorative.
Build a Wooden Triangle Earring Holder
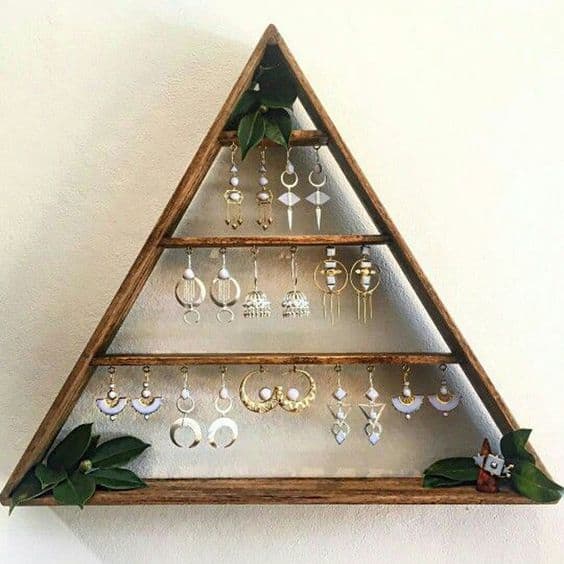
For a unique and modern earring holder, try building a wooden triangle. Cut three pieces of wood to the same size and shape, then glue them together to form a triangle. Drill small holes into the wood for the earring backs and paint the triangle any color you like.
Turn Candle Holder Into Elegant Earring Holder
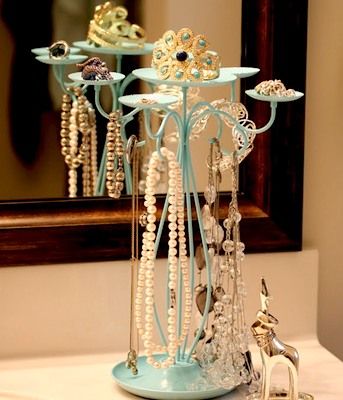
With just a little creativity and some basic materials, you can transform this everyday object into a beautiful earring holder that will elevate the style of any room. Begin by removing any wax residue from the holder, then attach small hooks or earring backs to create space for your favorite pieces.
For an extra touch of flair, consider painting the holder in a vibrant hue and adding a few beads or other embellishments.
Paper Earring Holders
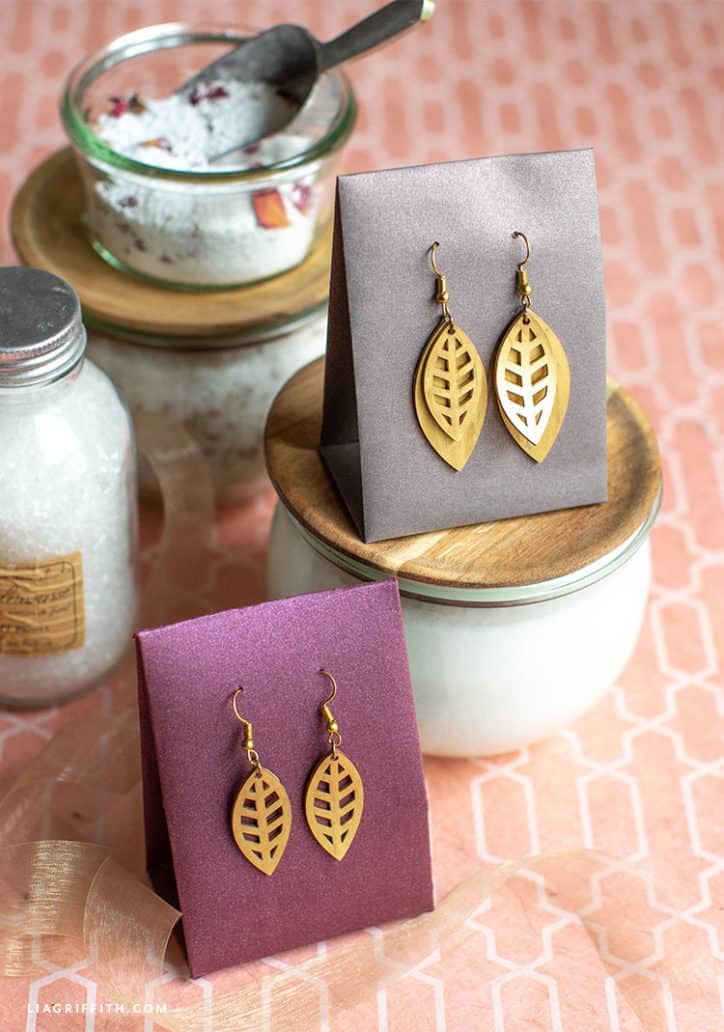
This earring holder idea is perfect for those who want to create their own earrings. Using shrink film, draw and cut out leaf or butterfly shapes.
Bake the shapes according to the instructions and attach the earring backs. Then, attach the earrings to a simple earring holder made from decorative paper.
Colorful Lace Earring Holder
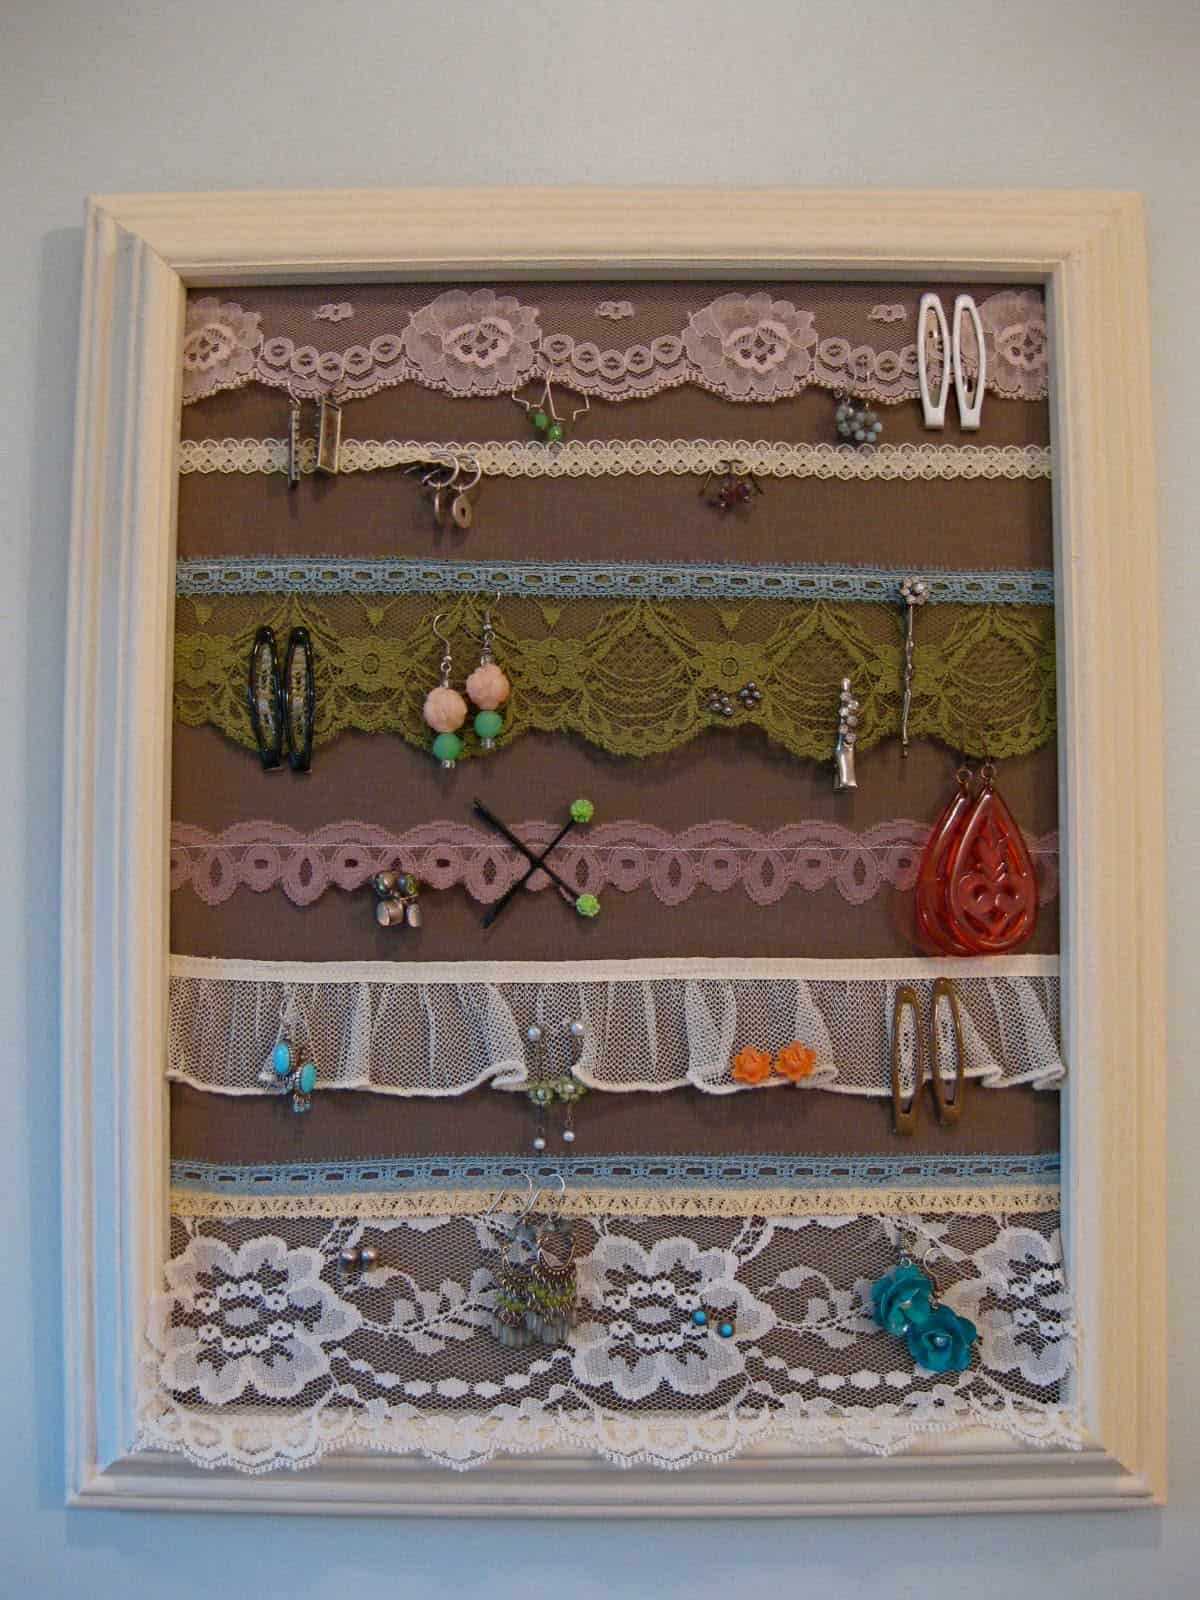
Add some elegance to your earring organization by using lace to decorate a picture frame. This DIY earring holder is super easy and inexpensive to make. Infusing chic style to your house both effortlessly and functionally in one.
The Skinny Wooden Sticks
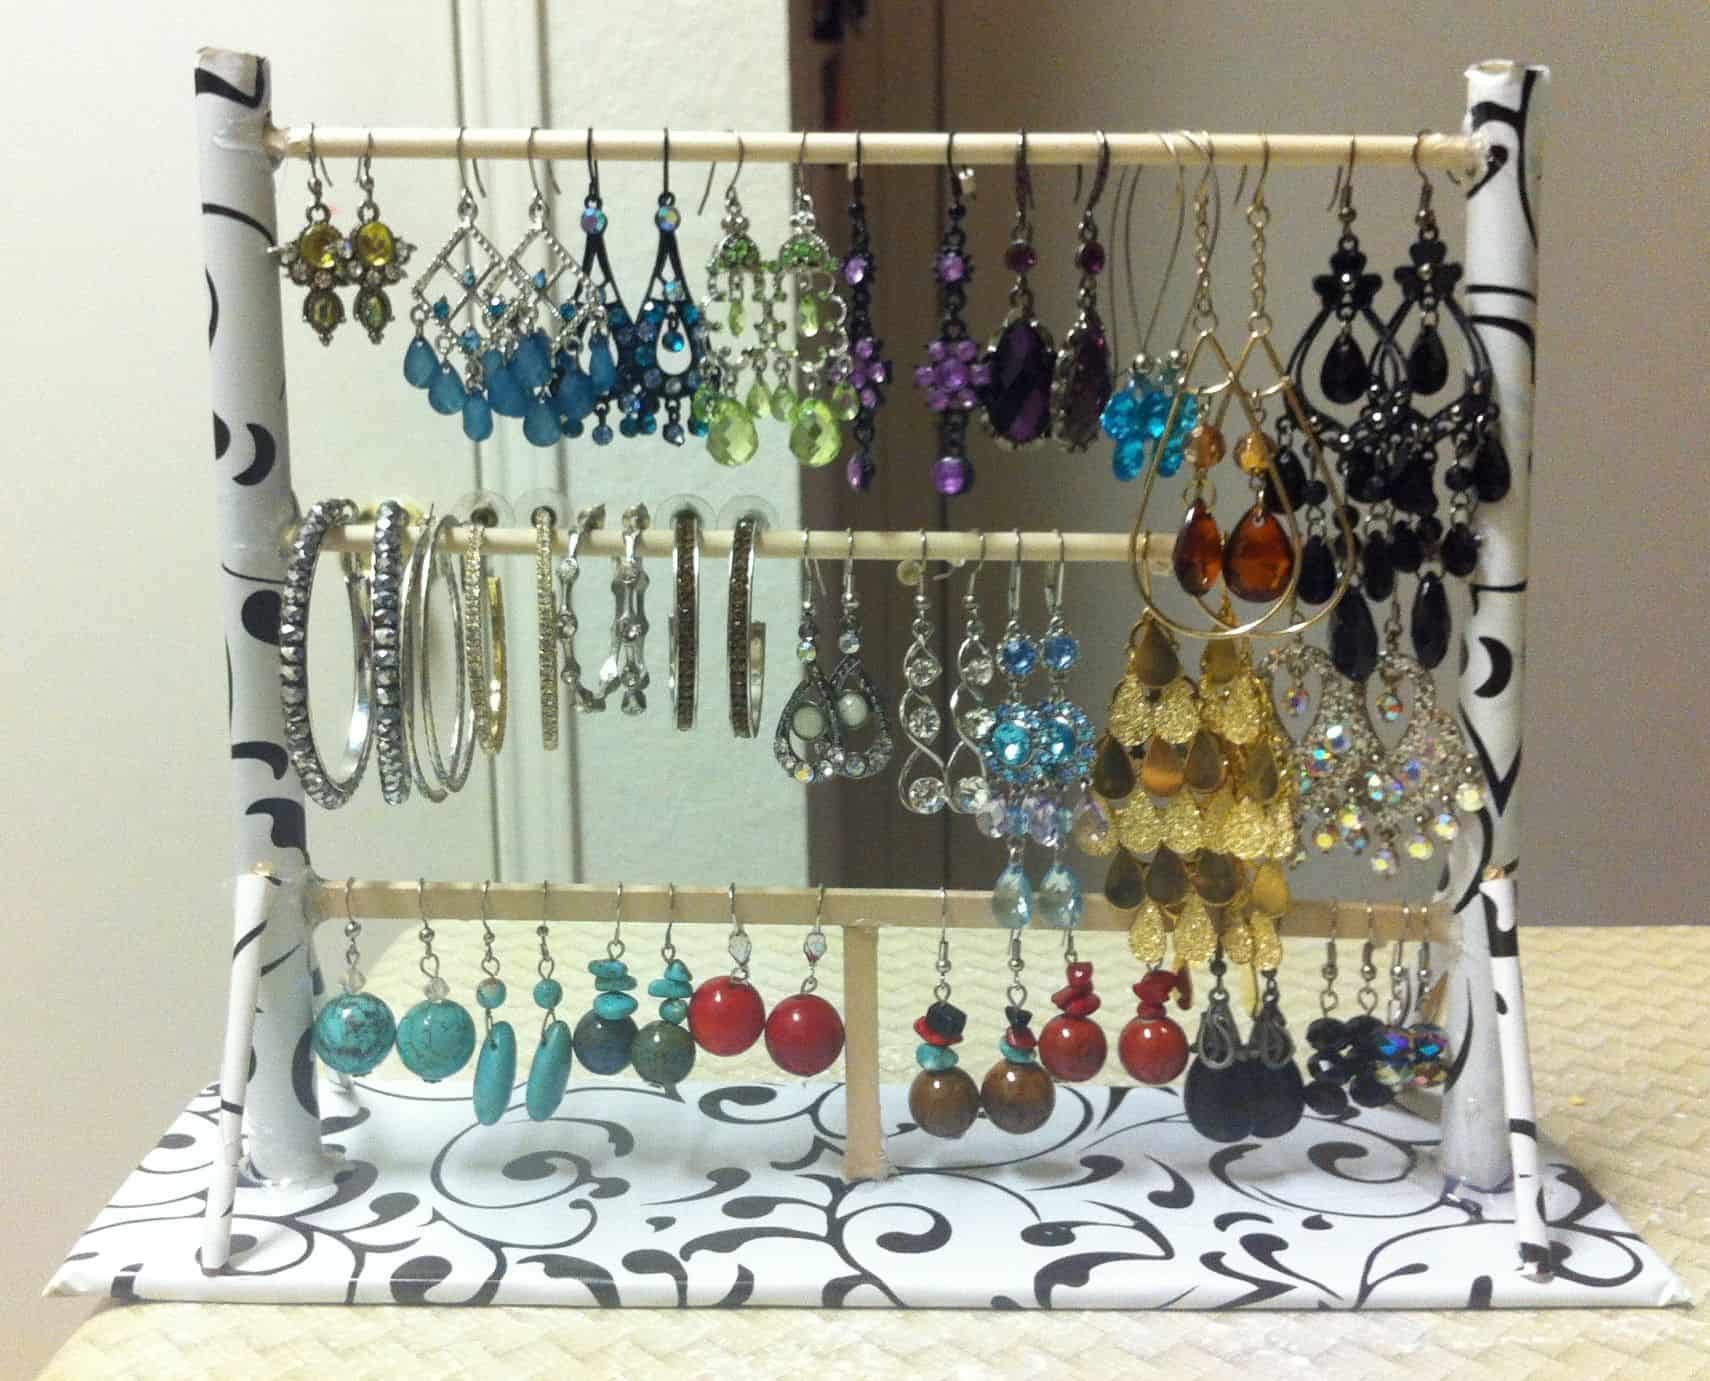
Crafting your own earring holder out of skinny wooden sticks is an excellent way to add a touch of rustic charm to your bedroom decor.
The process is surprisingly easy and requires just a few basic materials. By assembling the sticks into a simple yet elegant design, you can create a unique and functional storage solution for your earrings.
Shabby Chic Dangly Earring Display
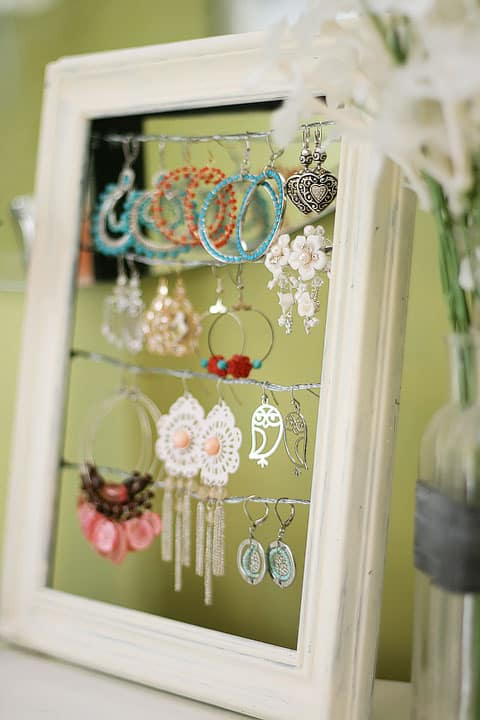
With just a wooden dowel and some fancy paper, you can craft a lovely and eye-catching earring display that is perfect for showcasing your favorite pieces. This shabby chic earring holder is not only functional but also aesthetically pleasing, and it will surely bring a touch of whimsy and charm to your room.
Plus, it’s an easy and fun project that you can do yourself, so why not give it a try and see how it transforms your space?
Cool Brass Pyramid Earring Holder
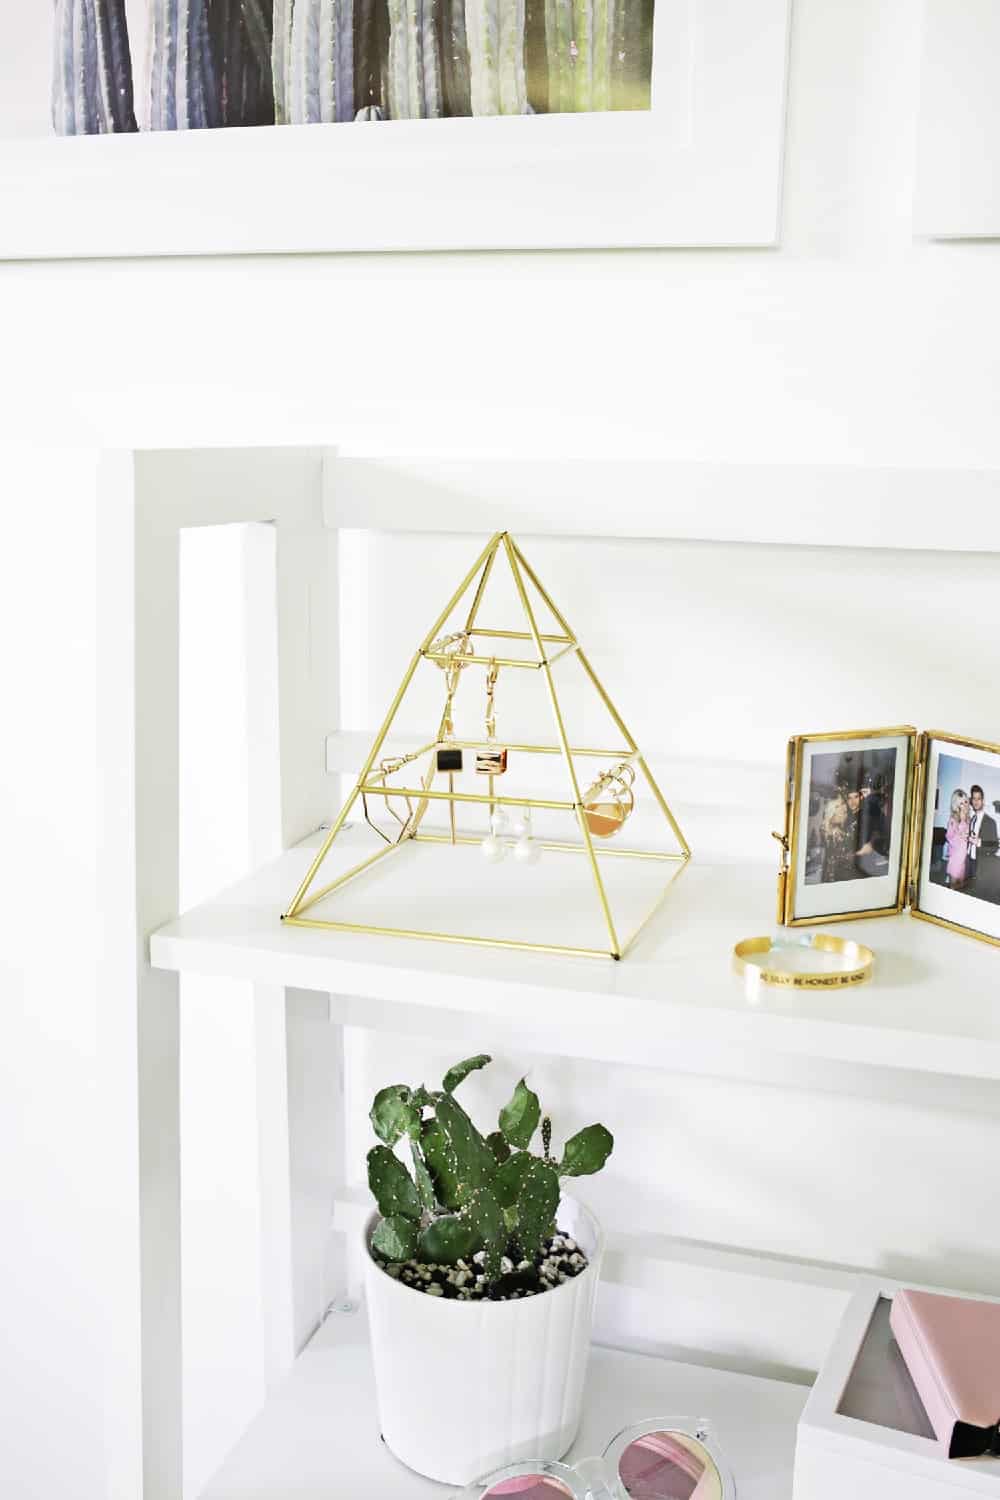
With its sleek and contemporary design, it’s the perfect accessory for any fashion-forward individual. The sturdy construction ensures that your precious earrings stay organized and in pristine condition.
Not only does this DIY holder provide a functional storage solution, but it also adds a touch of glamour to any room. Don’t settle for cluttered and chaotic jewelry storage – elevate your space with this chic and stylish earring holder.
5 Minutes Felt Earring Holder
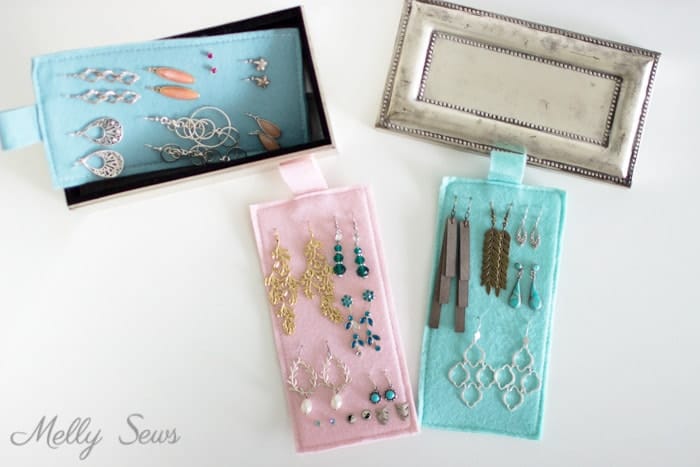
Crafting your own earring holder can be a fun and satisfying way to display your favorite accessories. In just 5 minutes, you can create a personalized earring holder using felt and basic crafting tools.
This project allows you to express your creativity and style while also keeping your earrings organized and easy to find. Other than that, with the satisfaction of creating something unique and useful, you’ll feel accomplished and proud every time you use i
Make Your Own Earring Display Tray
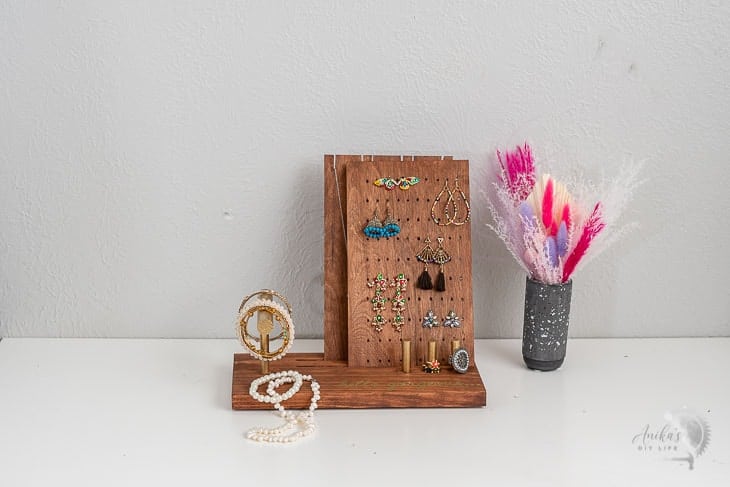
With just a few simple steps, you can take your earring collection to the next level by creating a unique and stylish display tray. All you need is a plain wooden tray and some paint in your favorite colors.
First, start by sanding down the surface of the tray to create a smooth surface for painting. Next, apply a coat of your chosen paint color and let it dry completely. Once dry, you can add additional coats or designs to create a personalized and chic look. Finally, use the tray to showcase your favorite earrings in a way that is both practical and visually appealing.
This DIY project is a fun and easy way to add a touch of creativity to your everyday routine.
How to Make an Earring Holder
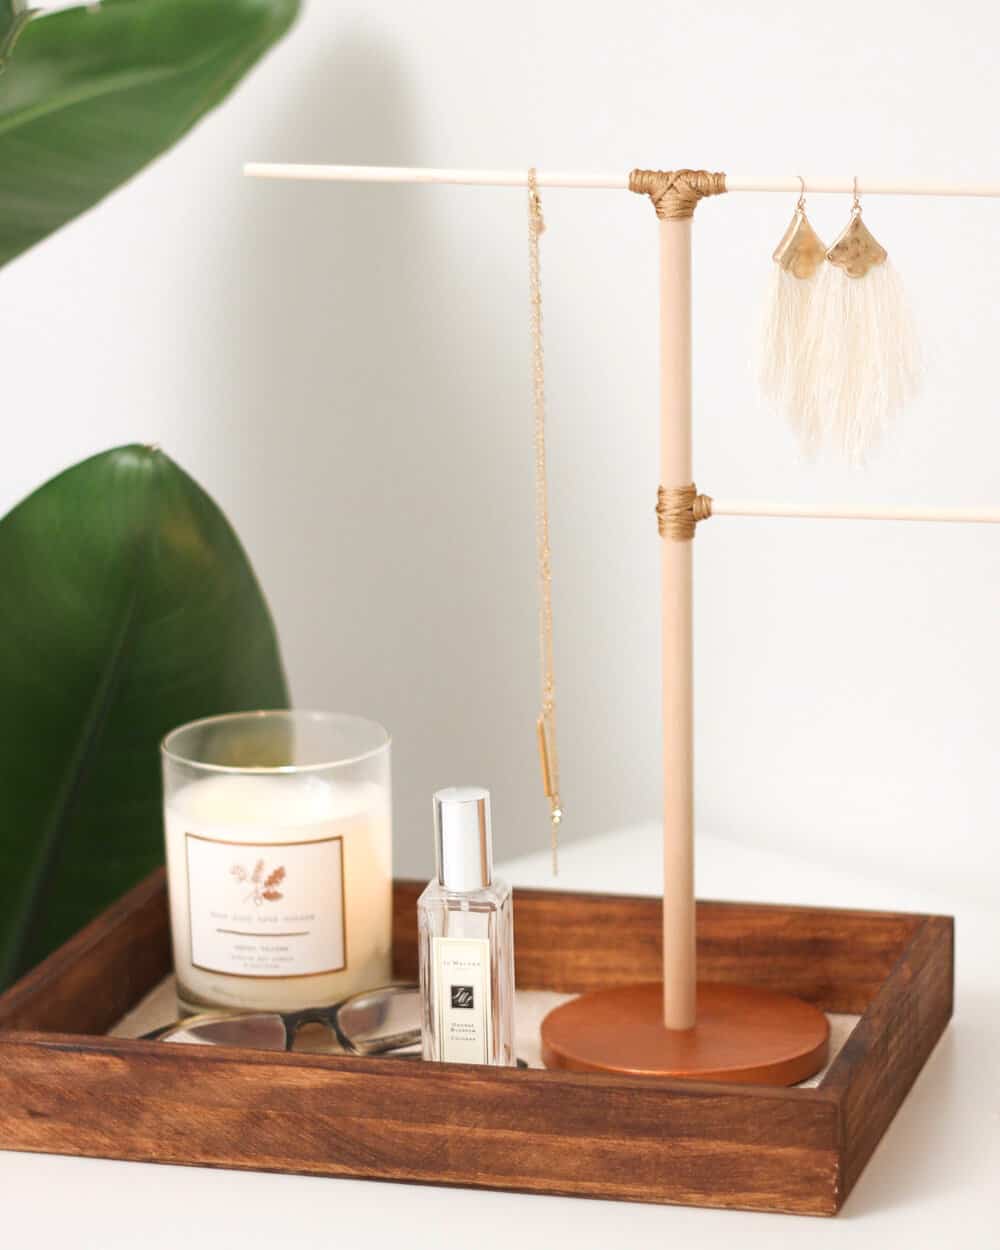
A simple and elegant DIY earring holder that’s perfect for showing off your favorite pairs of earrings. Use some wooden dowels, paper mache circular ornament, embroidery thread, acrylic paint, glue, and a wooden block to create an earring stand that’s both functional and beautiful.
DIY Jewelry Organizer
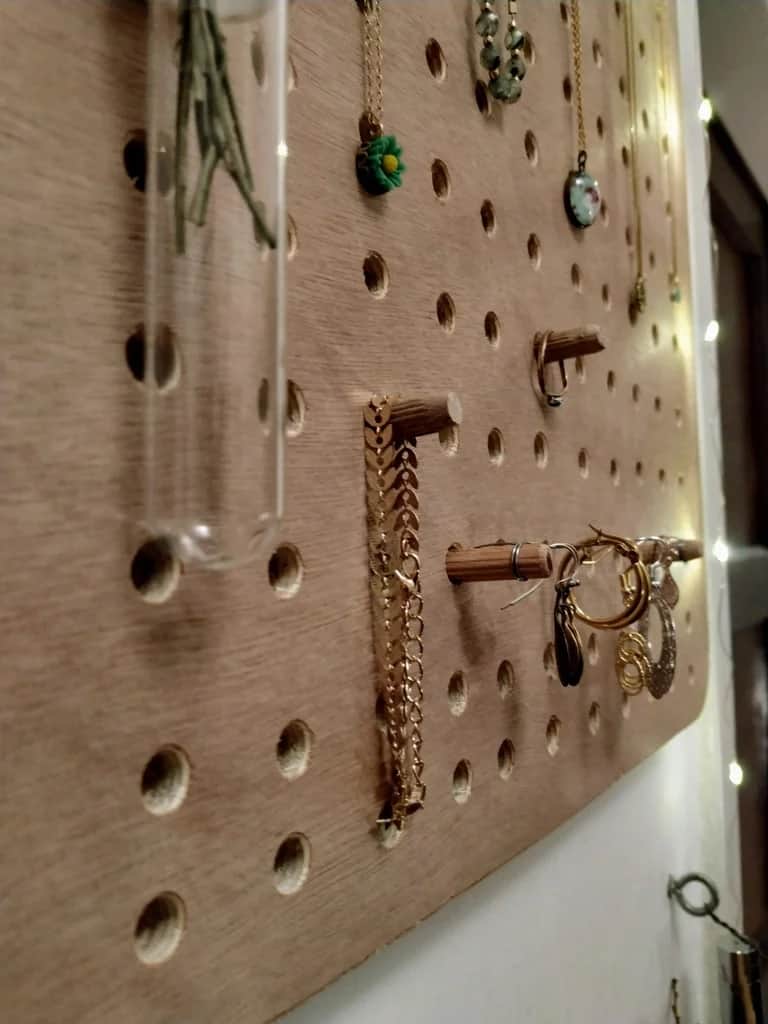
Use a piece of pegboard and some hooks to create a DIY jewelry organizer that’s perfect for earrings, necklaces, and bracelets.
DIY Earring Holder Made From Wood
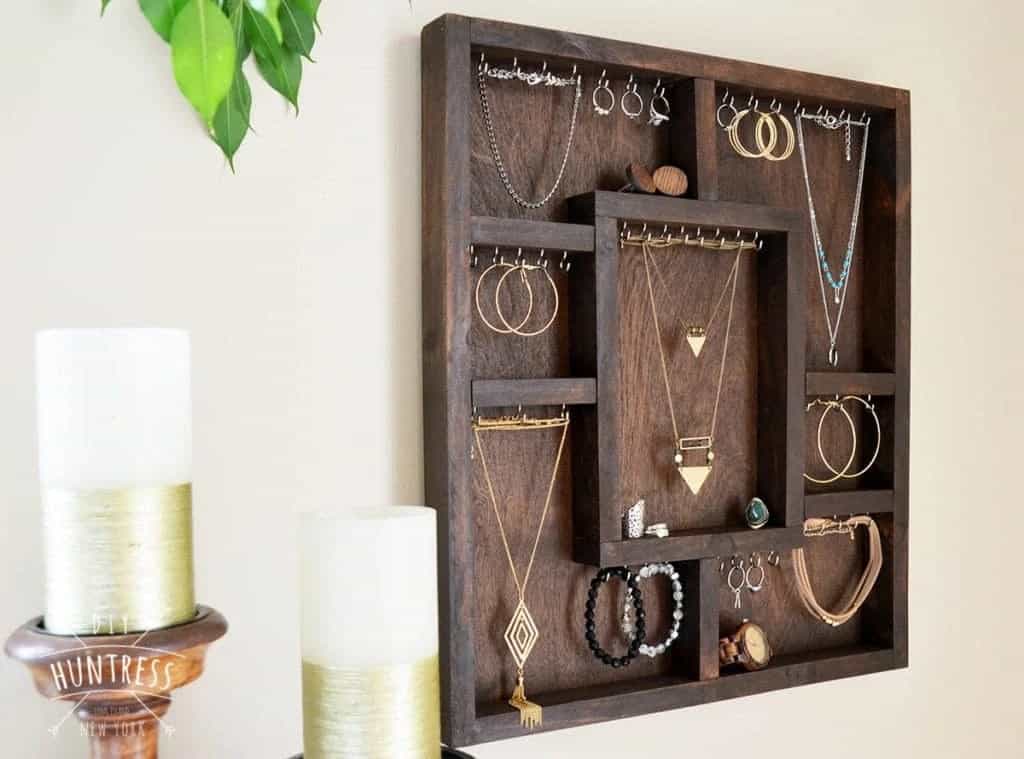
Craft a beautiful earring holder using a small piece of wood and some hooks. This holder can be customized to fit any size or style of earring.
How To Make A Homemade Earring Holder
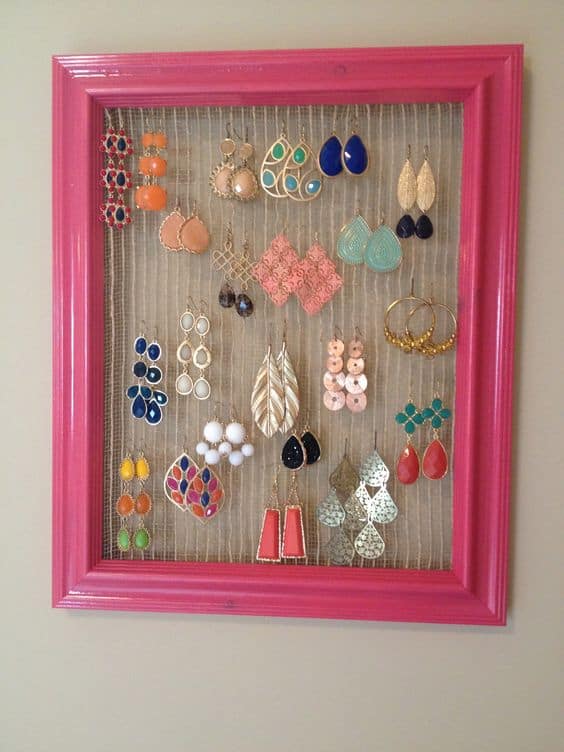
Get creative with household items like old picture frame, mesh strainers, and muffin tins to make unique and functional earring holders.
Wood DIY Earring Holder
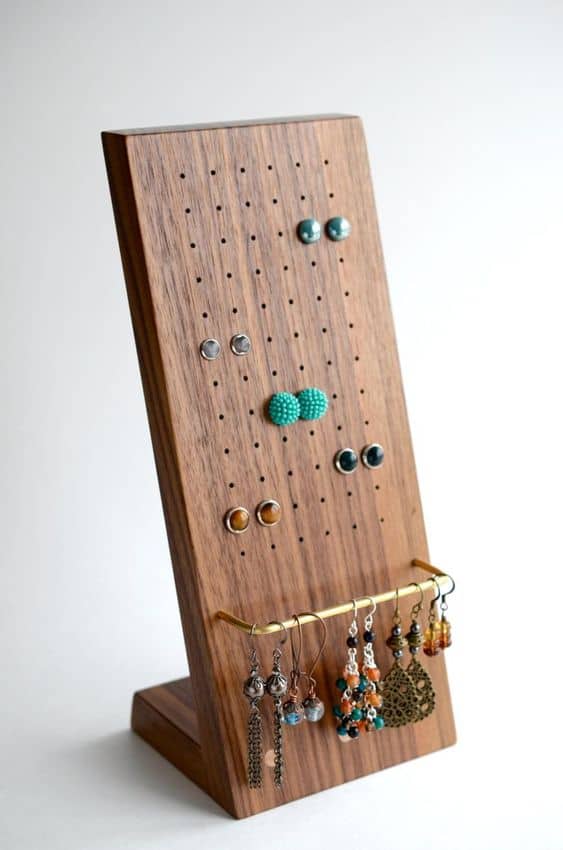
Crafting a chic and trendy earring holder can be a delightful and rewarding DIY project that you can easily accomplish with just a few materials.
With a wooden block, a drill, and your creativity, you can create an eye-catching and functional jewelry display that showcases your favorite earrings.
By strategically drilling holes into the block, you can design a unique and modern holder that perfectly complements your personal style.
DIY Earring Stand
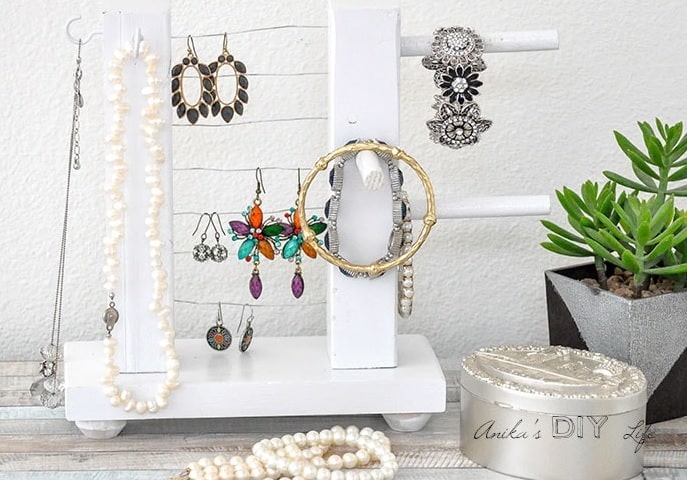
A wooden dowel and a dainty base come together to create a stunning showcase for your beloved earrings, offering a modern touch to any vanity or dressing table.
The sleek appearance of this holder is sure to leave a lasting impression, as it showcases your collection with poise and grace. Give your earrings the display they deserve and add a touch of refinement to your space with this chic earring holder.
Aluminum Sheet Earring Holder DIY
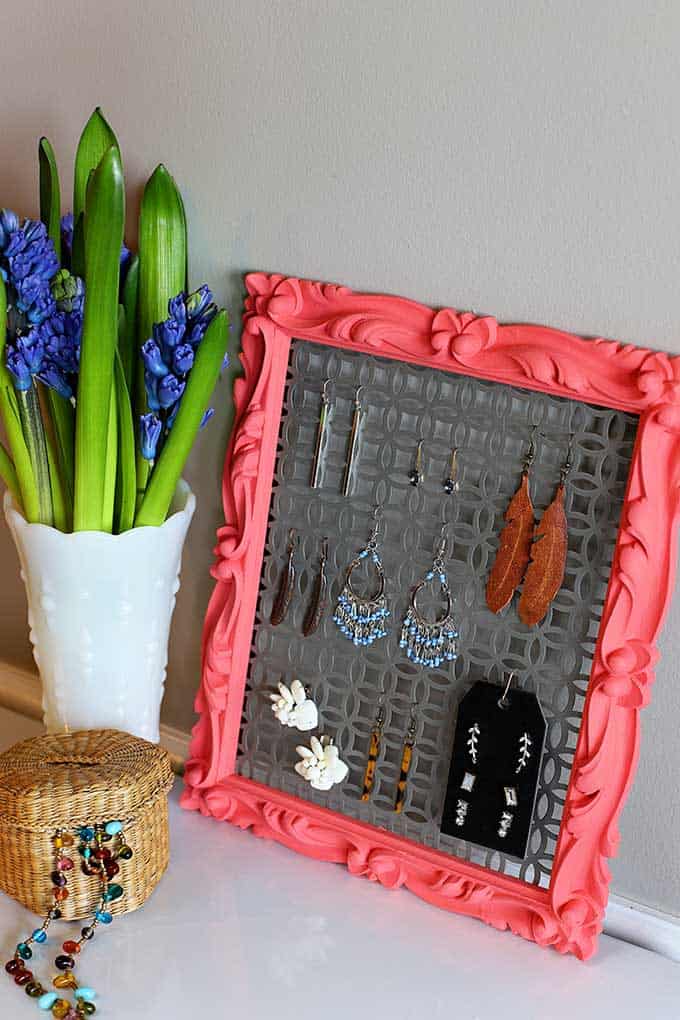
This industrial-style earring holder uses a sheet of aluminum and some metal hooks to create a minimalist and functional display.
Small DIY Earring Holder
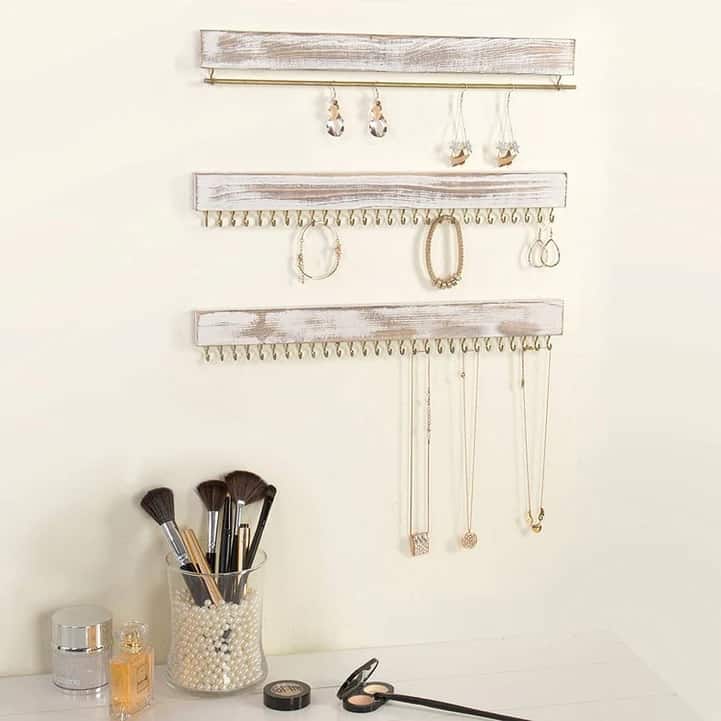
By using a compact wooden block and a few sturdy metal hooks, this earring holder provides a beautiful and organized solution for storing and showcasing your favorite pairs.
Not only does it add a charming touch to your vanity or dresser, but it also keeps your earrings safe and accessible. So, instead of rummaging through a tangled mess of jewelry, why not add some style to your space with this simple and stylish earring holder?
Low Budget Earring Holder DIY For $
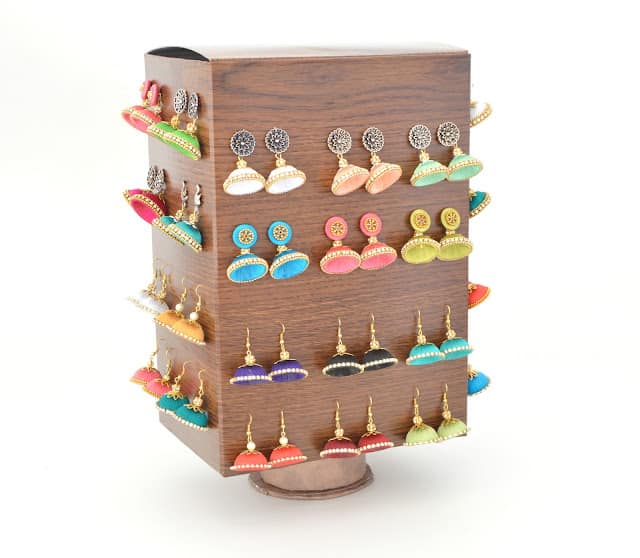
Crafting your own earring holder can be an enjoyable and budget-friendly project, without compromising style and functionality.
Using simple and easily accessible materials such as cardboard, foam board, and paper clips, you can make a unique and practical earring holder that perfectly suits your preferences.
Say goodbye to expensive and impersonal store-bought options and hello to your very own personalized creation.
DIY Velvet Earring Holder
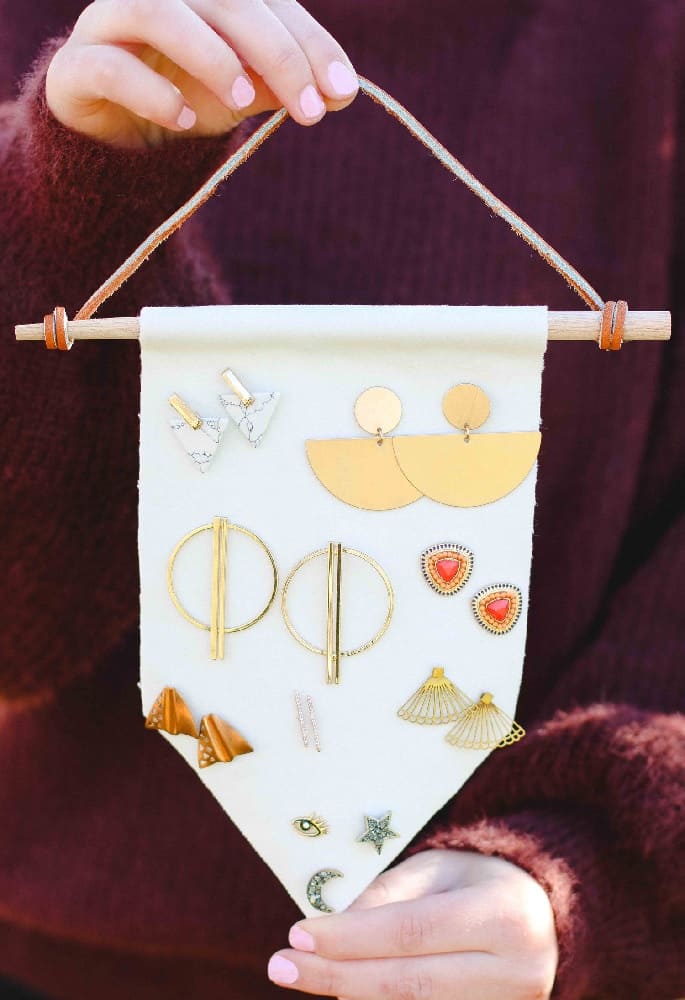
Indulge in the lavishness of this exquisite earring holder that exudes opulence and class with every glance.
Crafted with a plush velvet fabric that embraces your precious gems in a soft and sophisticated manner, this stunning creation is a must-have for every fashionista who desires a chic and stylish display for their earrings.
With just a touch of glue and a keen eye for aesthetics, you can elevate your accessory game to new heights with this luxurious earring holder.
DIY Wall Earring Holder
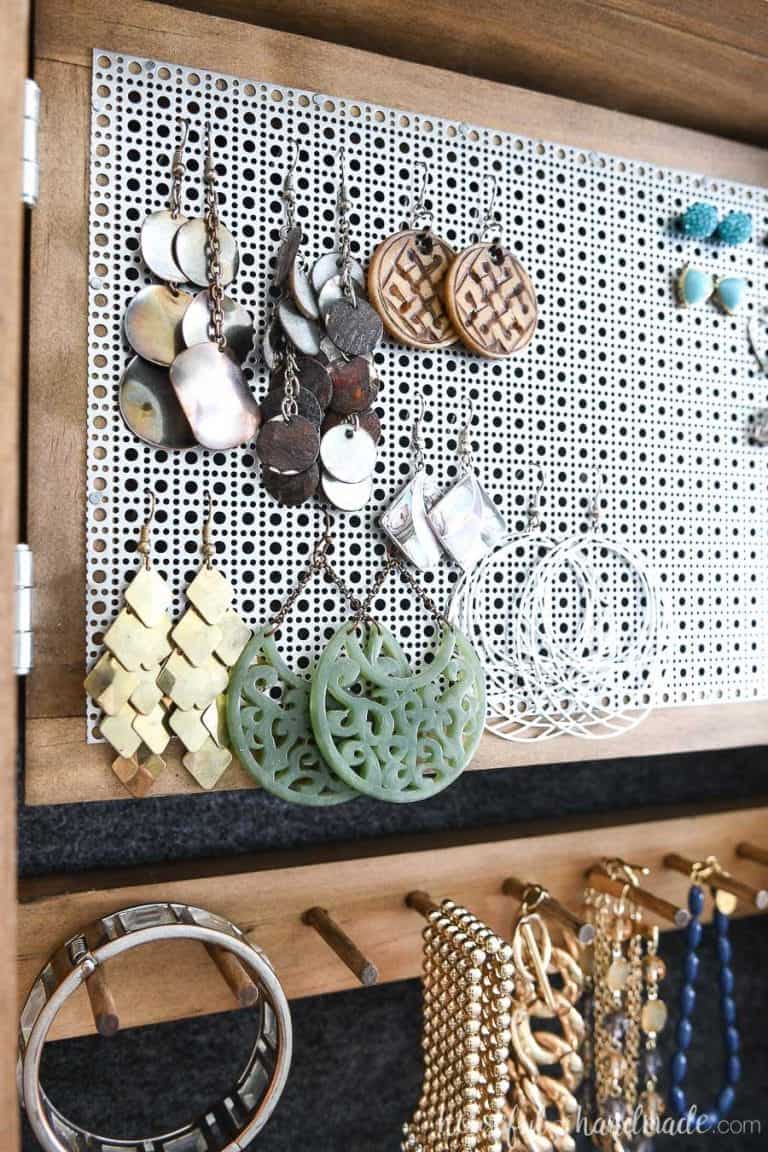
If you’re short on counter space, consider making a wall earring holder. This DIY project requires a wooden board, some dowels, decorative sheet metal, and paint or stain. Not only is it space-saving, but it also doubles as a statement piece on your wall.
DIY Rotating Earring Holder
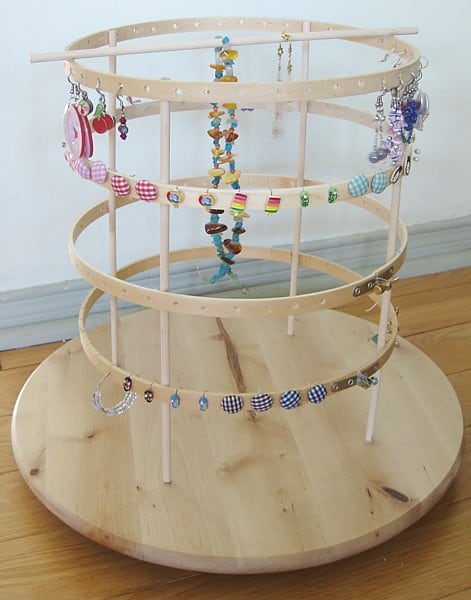
A rotating earring holder might just be the solution to your problem!
These holders are designed to neatly organize and display your earrings, making it easy to find the pair you’re looking for without any hassle. Plus, with the added feature of rotation, you can quickly and effortlessly spin the holder to view all of your earrings at once.
Whether you have a collection of statement pieces or simple studs, a rotating earring holder is the perfect accessory to keep your earrings organized and on display.
DIY earring holders are a great way to organize your earrings while also adding a decorative touch to your room. Whether you’re repurposing household items or using unique materials like macrame and shrink film, there are countless creative and budget-friendly ideas to choose from.
